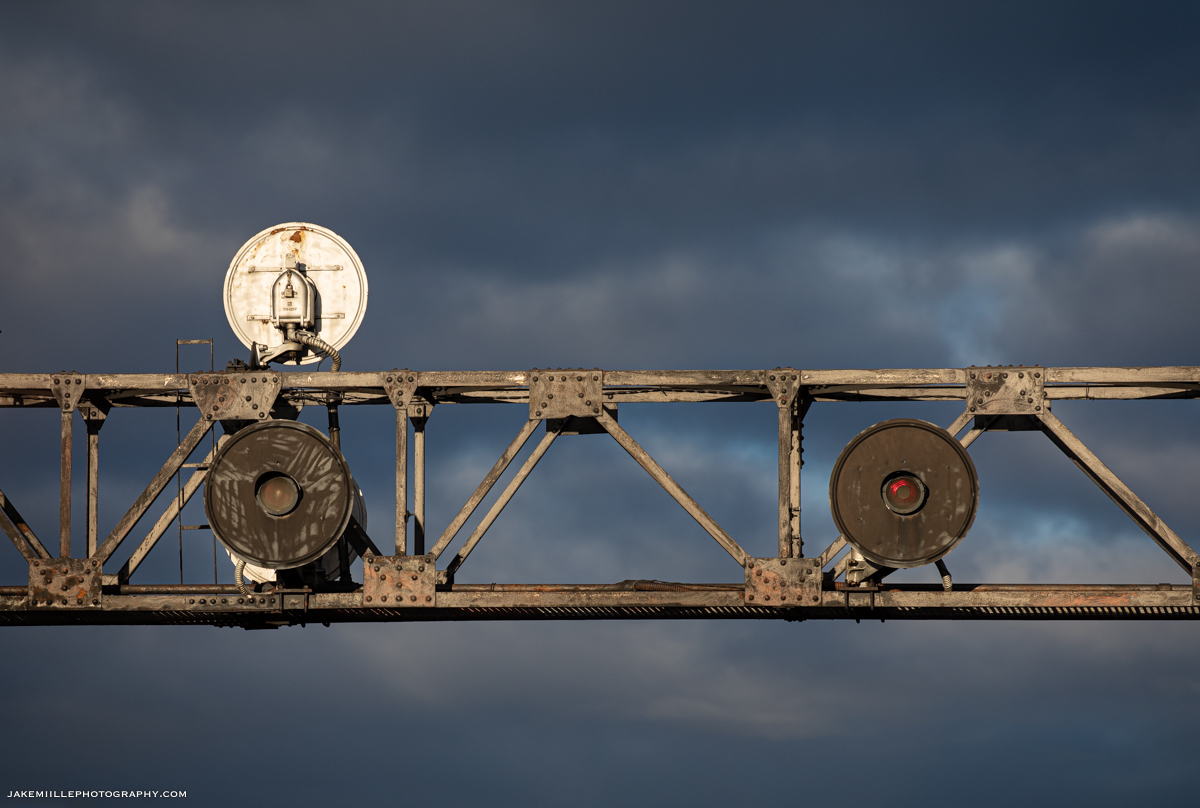
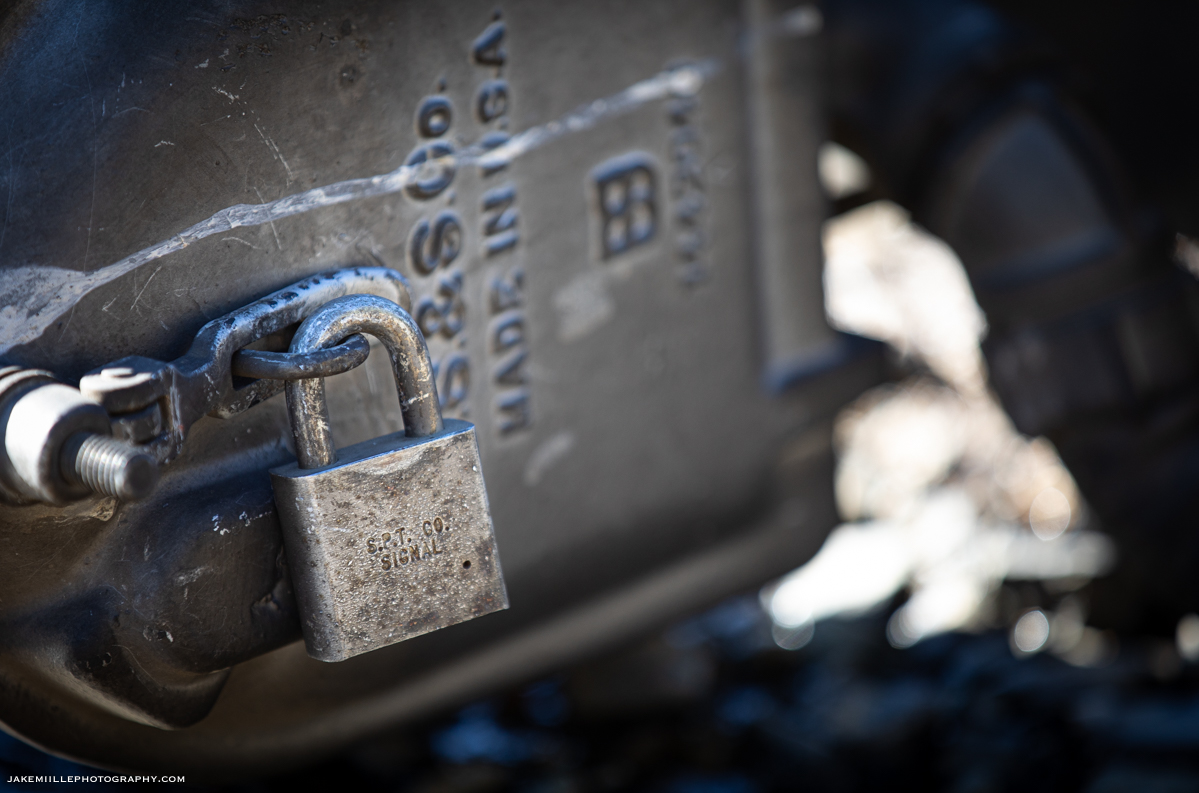
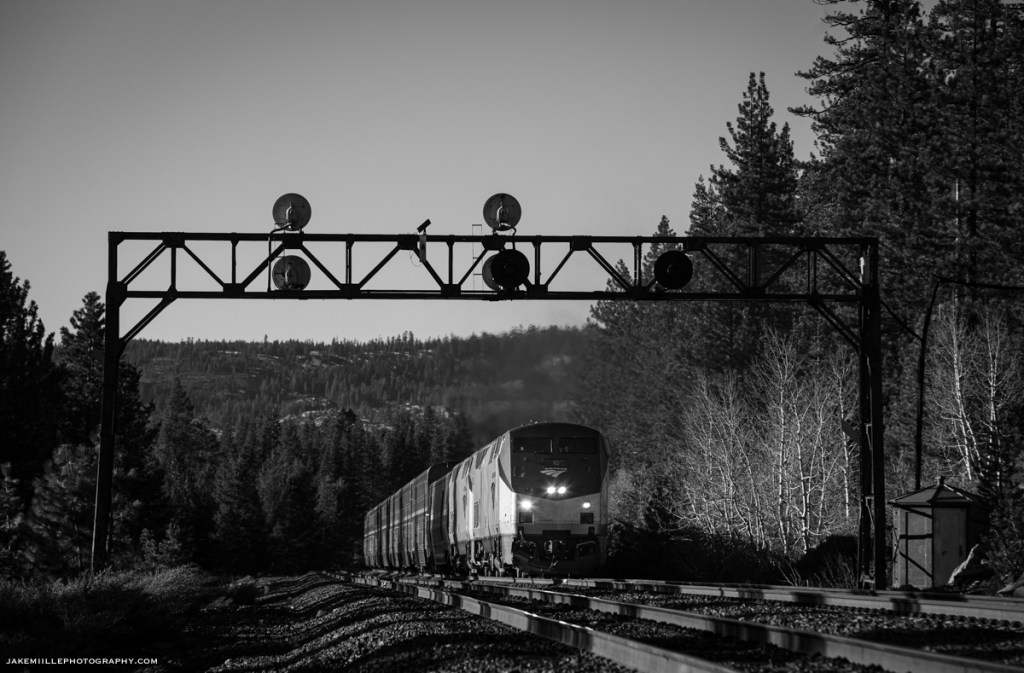
The searchlight signals at Norden were special to many railroaders, railroad photographers and historians. The US&S Searchlight Signals withstood the test of time, enduring decades of brutal winters atop the infamous Donner Pass Route.
While an exact installation date is not known at this time, railroad historians estimate the searchlight signals were installed in the mid-20th century. The bridge support they stood upon is believed to have been installed in the 1920’s with an interlocking machine, followed by semaphores and eventually replaced by searchlights.
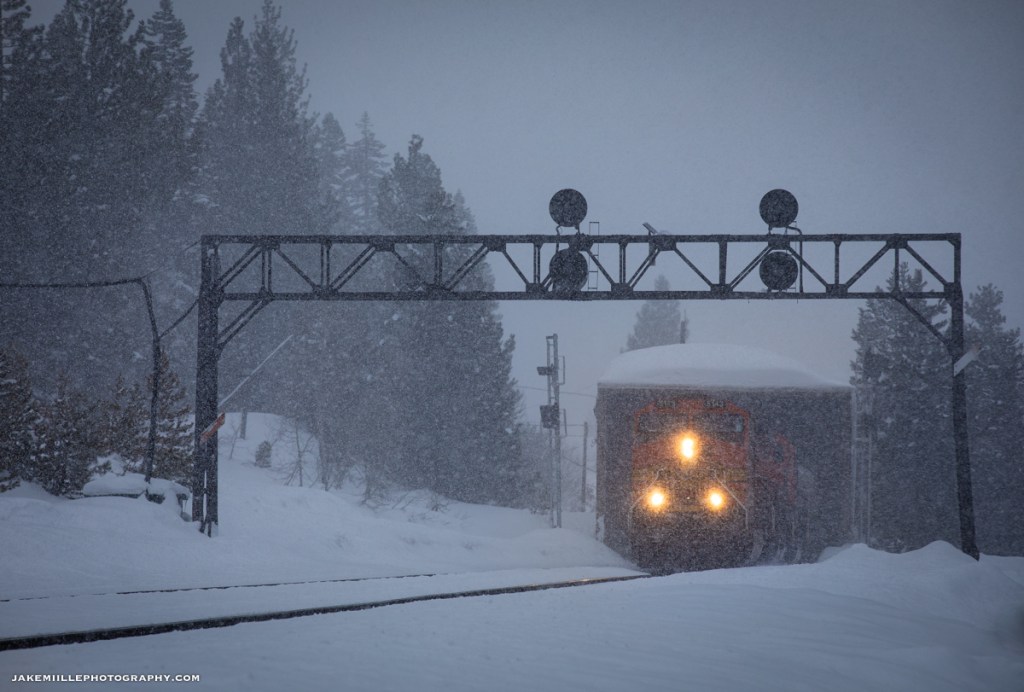
At nearly 7,000′ in elevation, Norden is effectively the “top of the hill” for the railroad. The true summit is located in Tunnel 41 (“The Big Hole”), which passes under Mount Judah (8,243′). Being that Norden is on the western side of the summit, it is subjected to heavy snowfall. With an annual average snowfall of 140″, keeping the railroad open is difficult. The Union Pacific Railroad uses a variety of methods to keep the tracks clear of snow and trains moving.
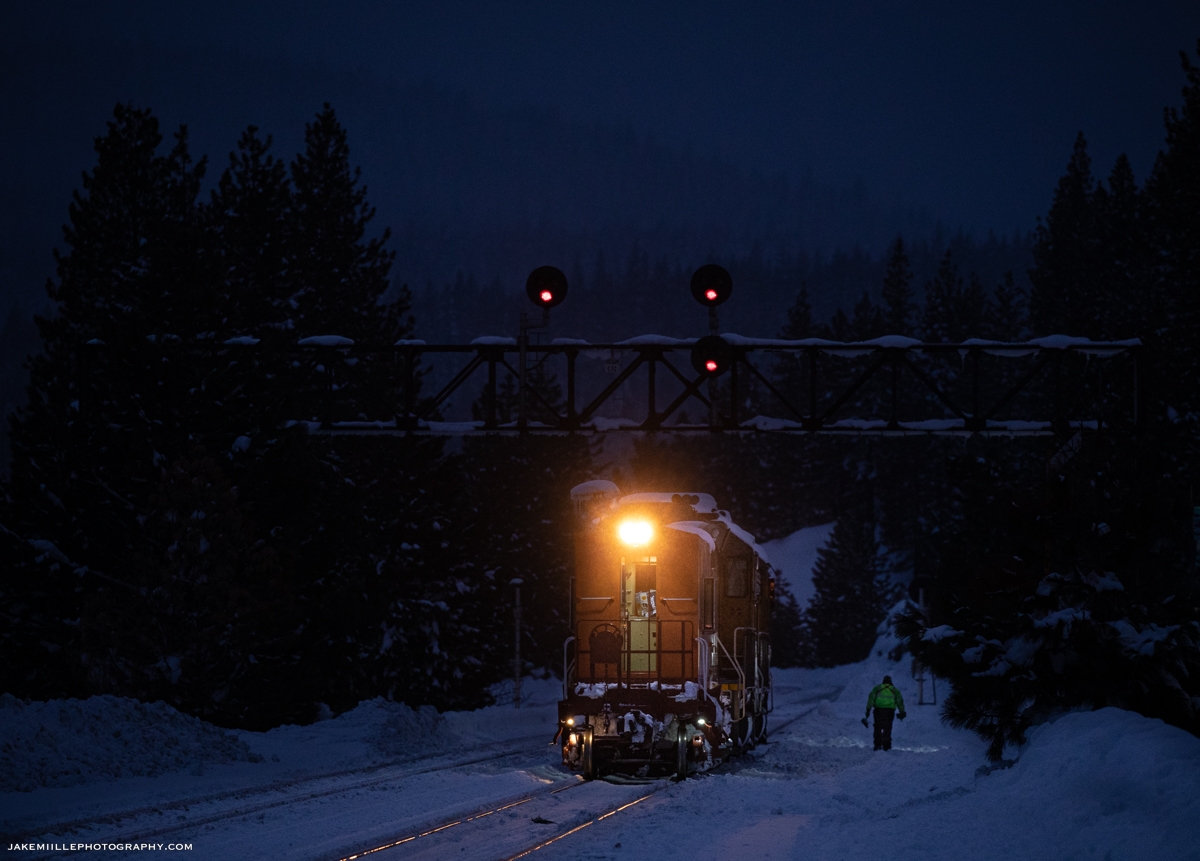
Union Pacific’s “snow fighters” work throughout the winter months, removing snow from the right-of-way. The snow fighters consist of snow cats, flangers, spreaders and the famous rotary snow plows. While these are effective in battling snow, the railroad also uses snow sheds. At Norden, a snow shed protects the crossovers (definition: a crossover is a pair of switches that connects two parallel rail tracks, allowing a train on one track to cross over to the other). Crossovers are especially vulnerable to snow and ice build up since the switches actuate. Any build up of snow between the switch can render it out-of-service. Searchlight signals guarded both ends of the Norden snow shed.
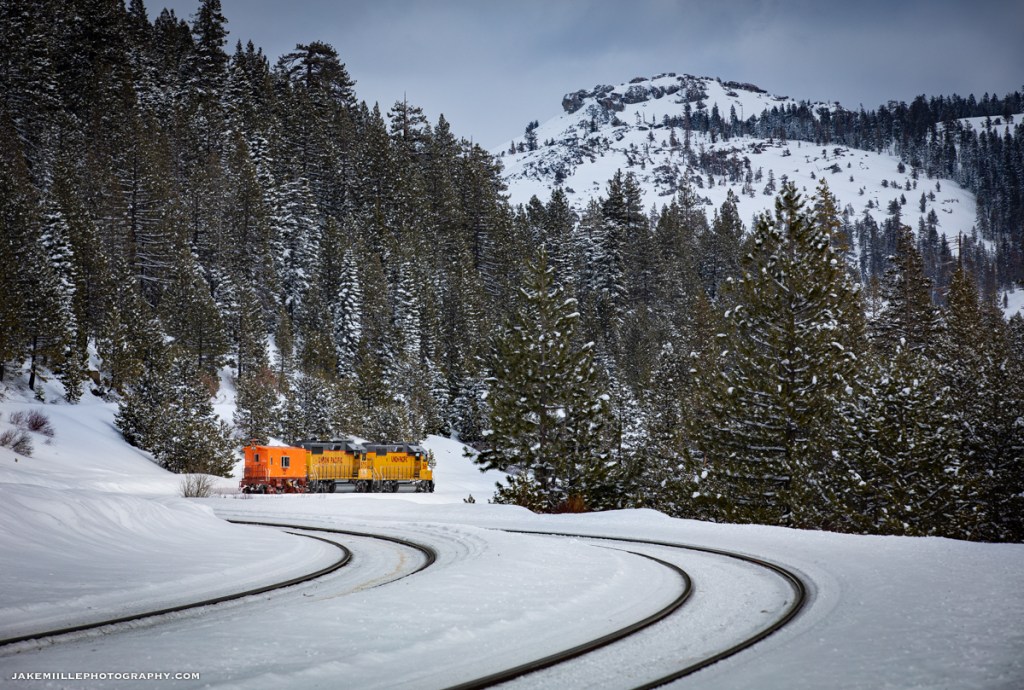
After crossing over from the #1 track, a westbound flanger gets a clear signal down the #2 track at West Norden. The crossover is still lined #1 to #2 and is visible in the foreground.
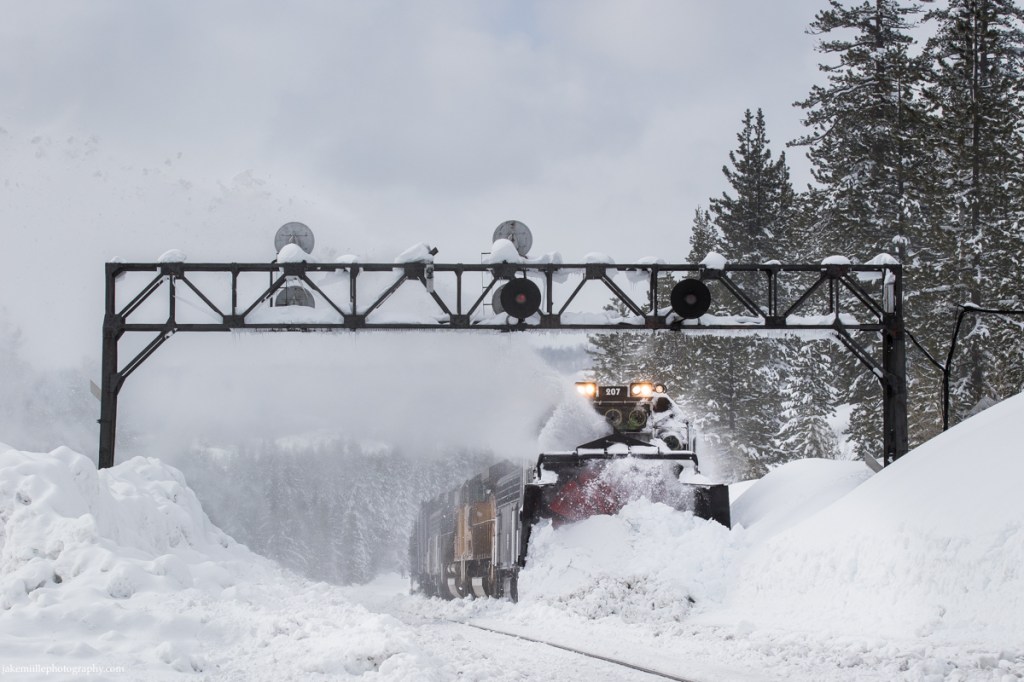
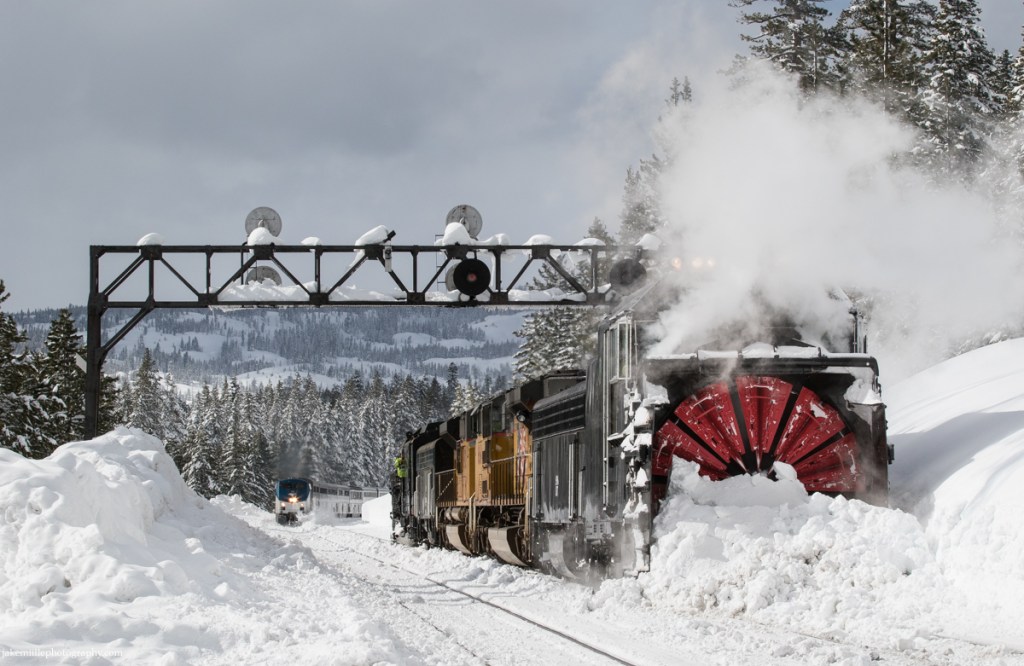
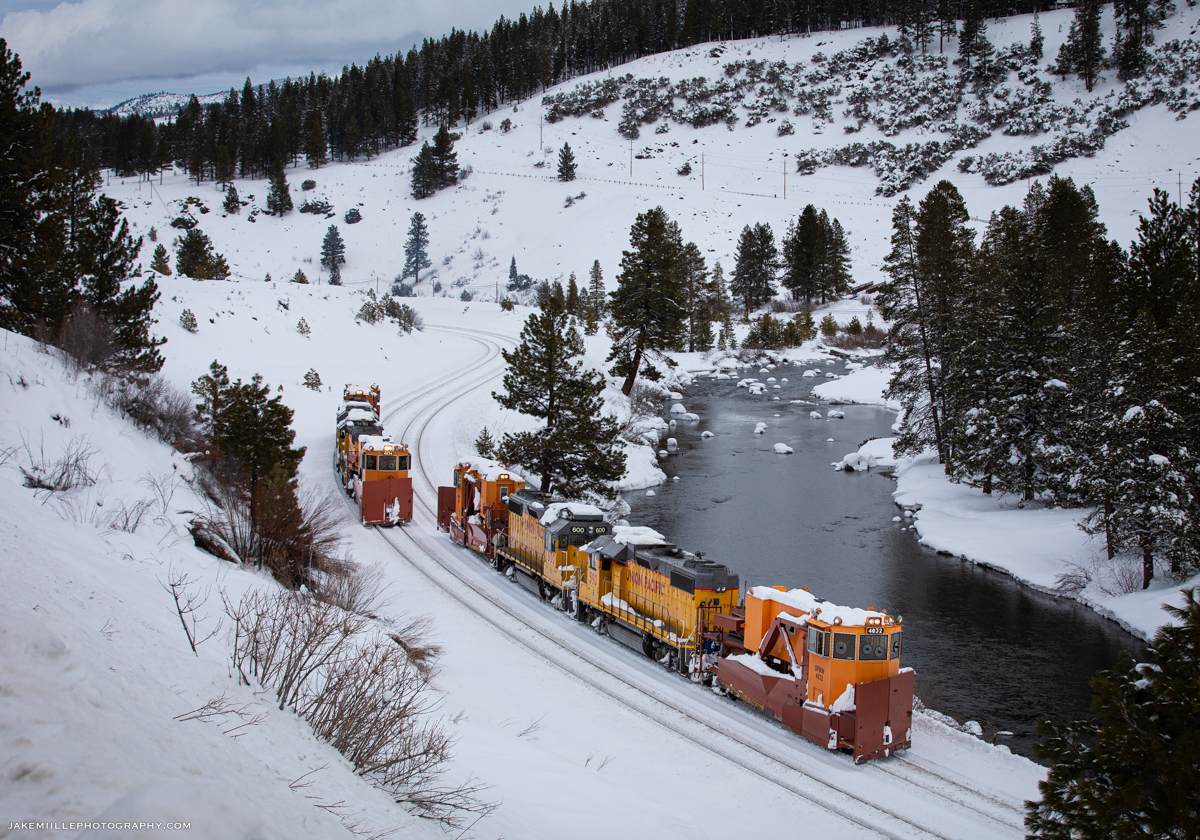
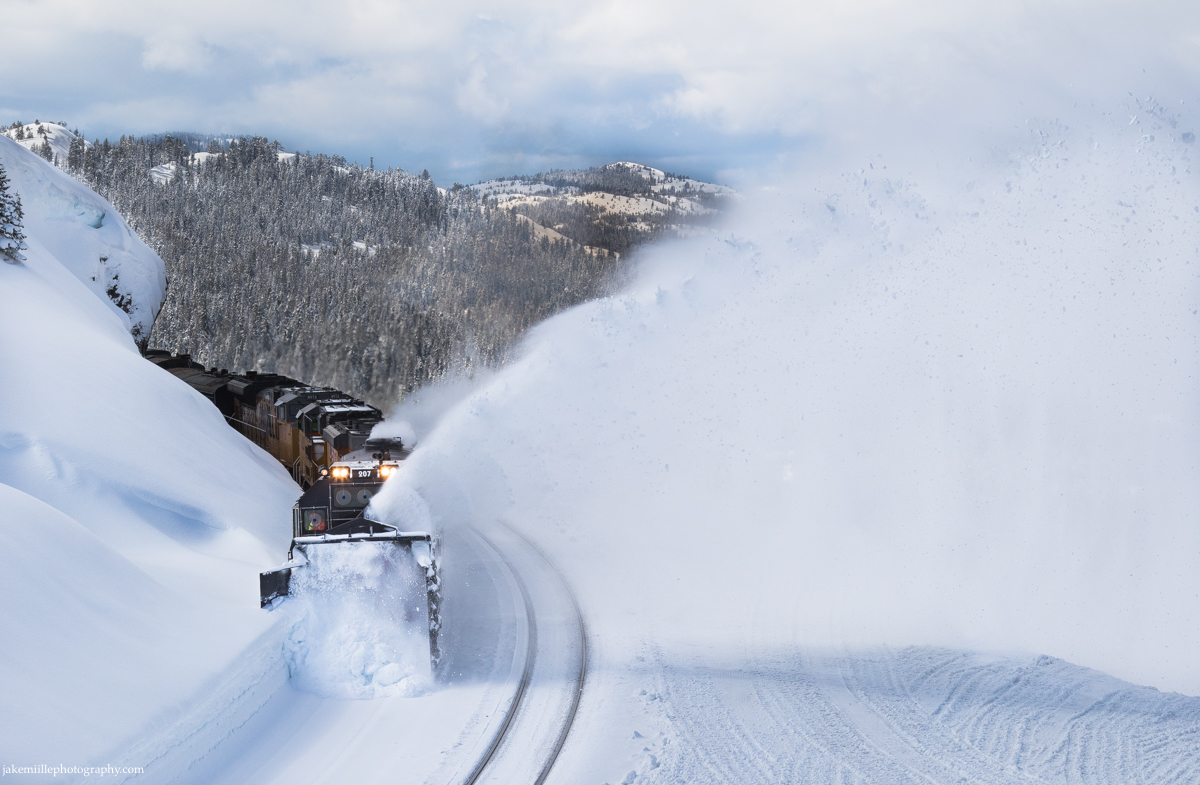
Union Pacific’s rotary snow plows cut through heavy snow at Norden (February 2017).
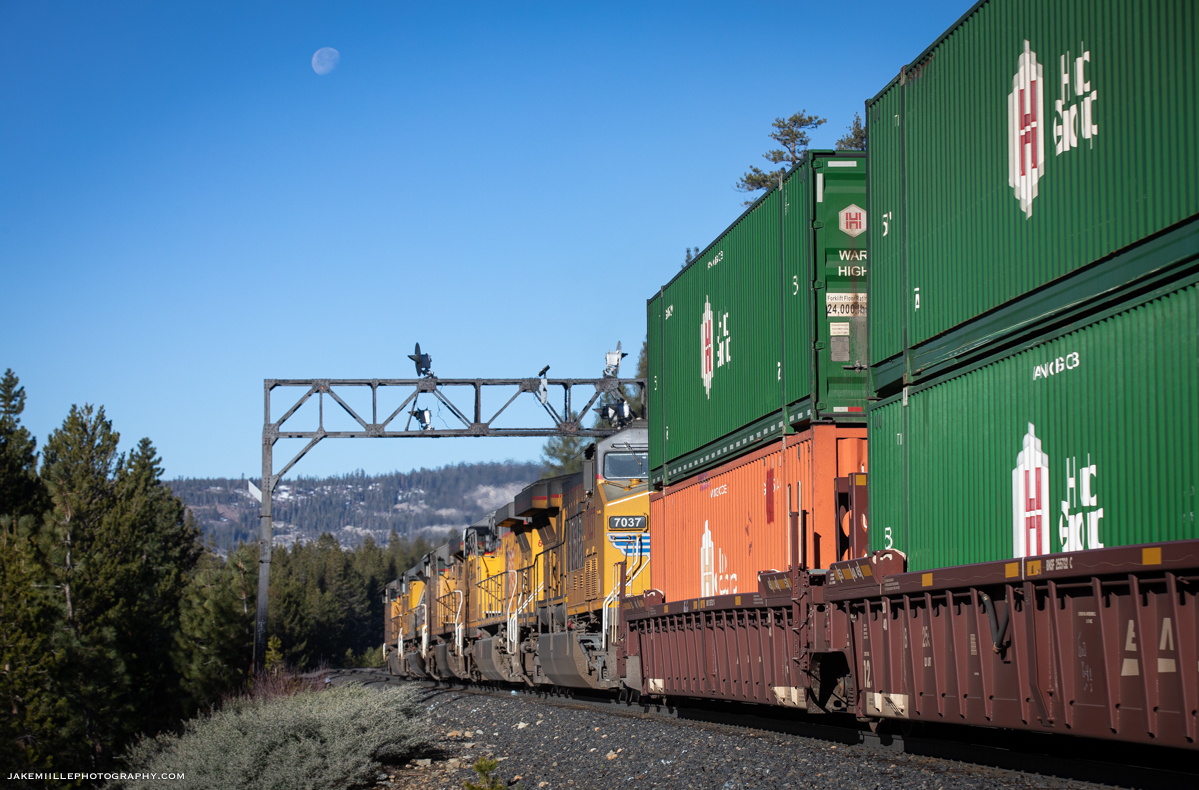
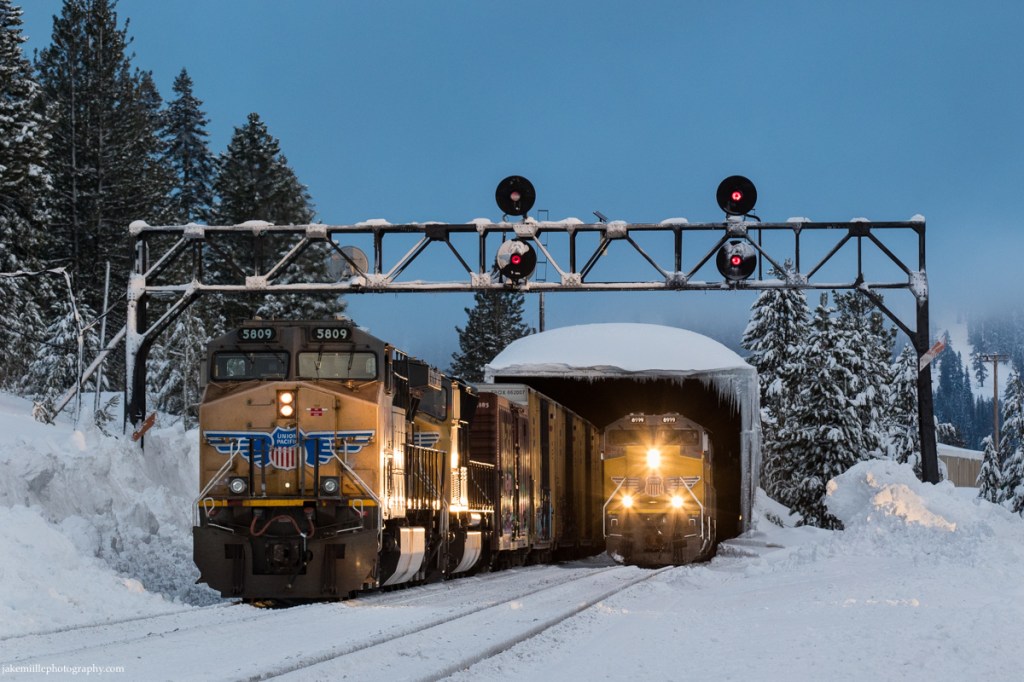
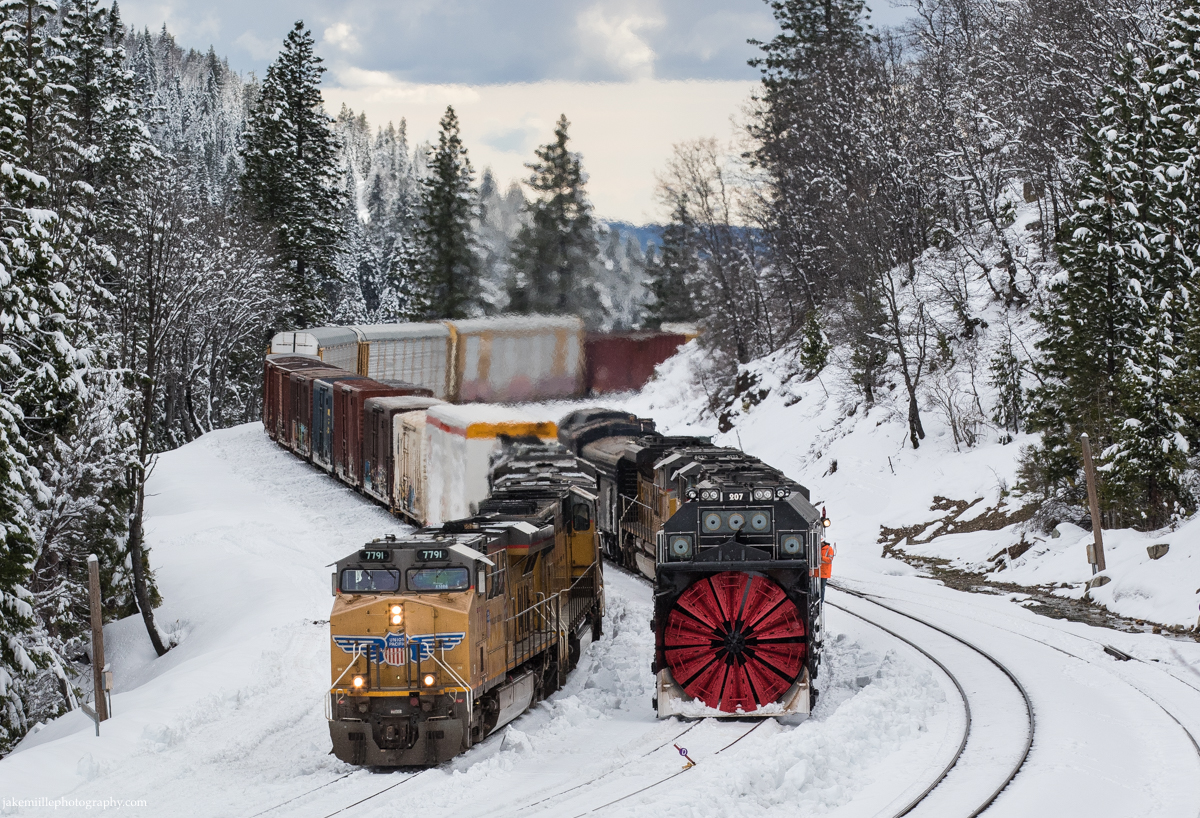
The DPU’s of the MRVNP (left) patiently wait for an opportunity at the Big Hole while the high priority ZG2OA races west down the #2 track at Norden. The single track through the Big Hole makes Norden a common place for train meets.
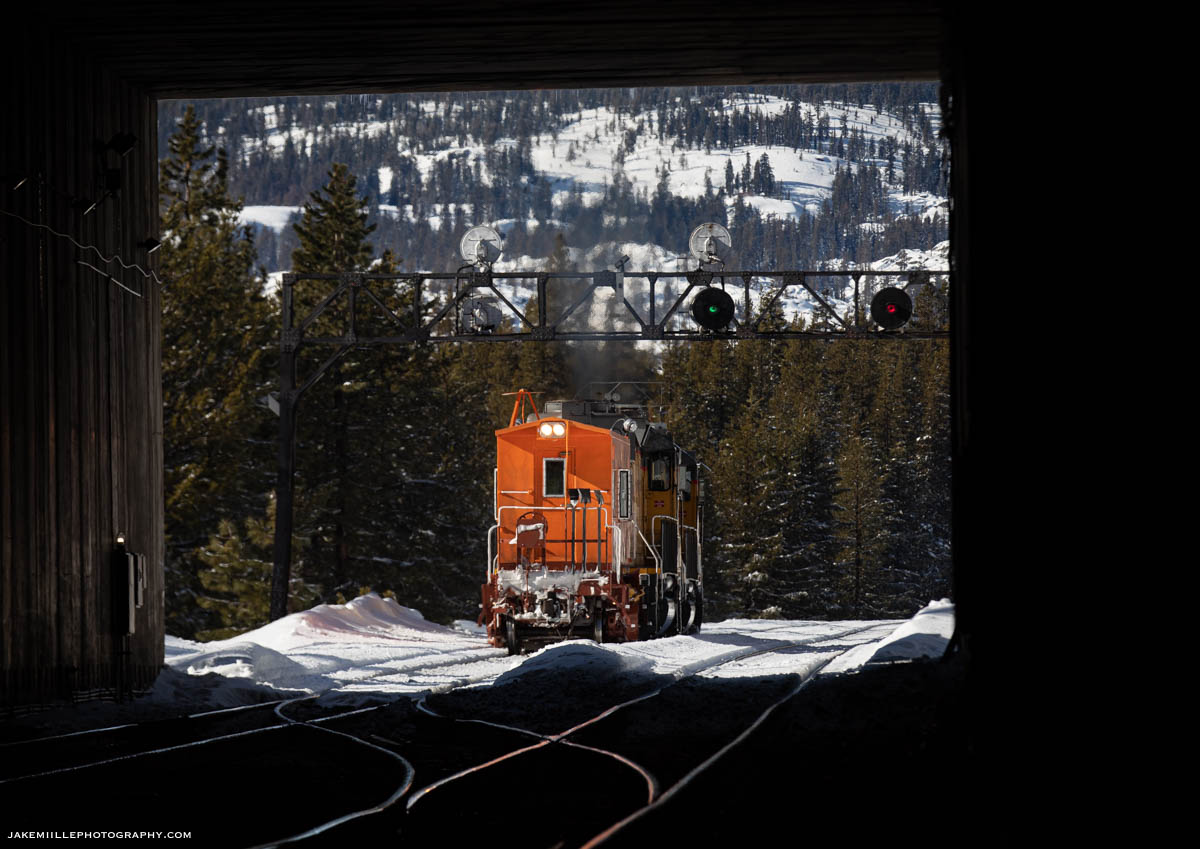
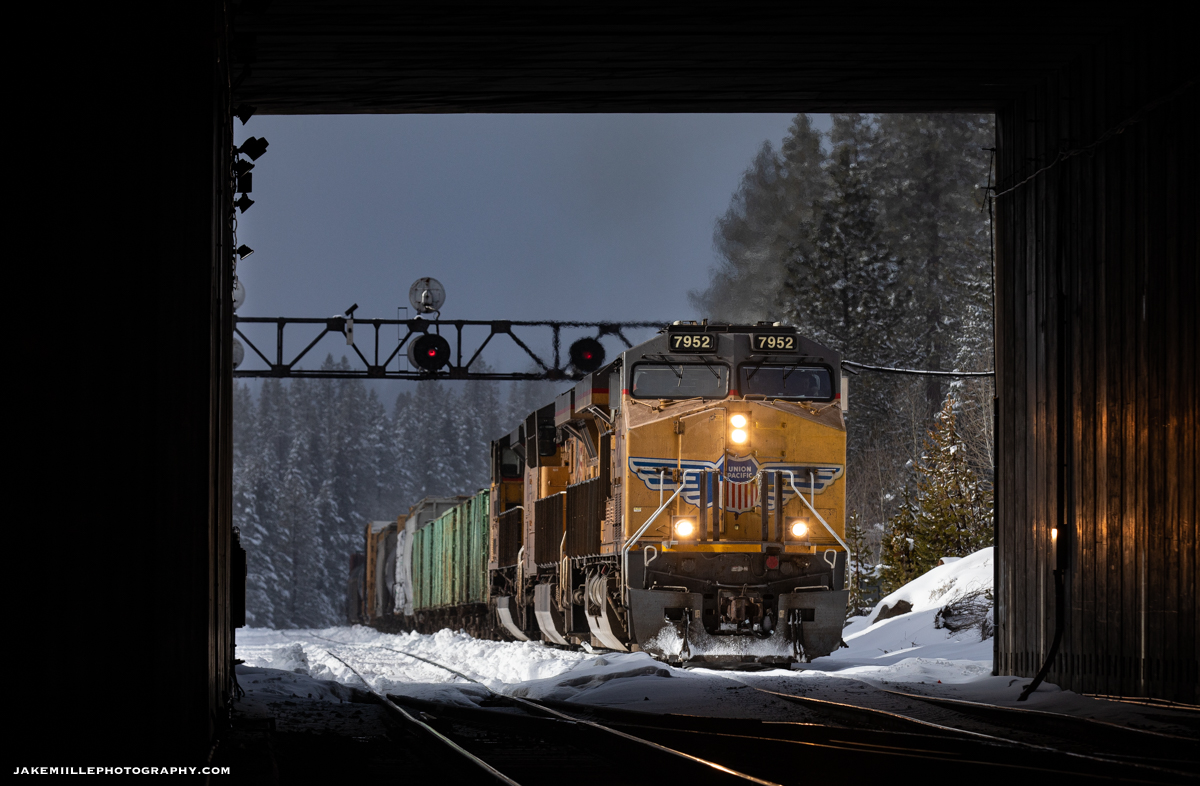
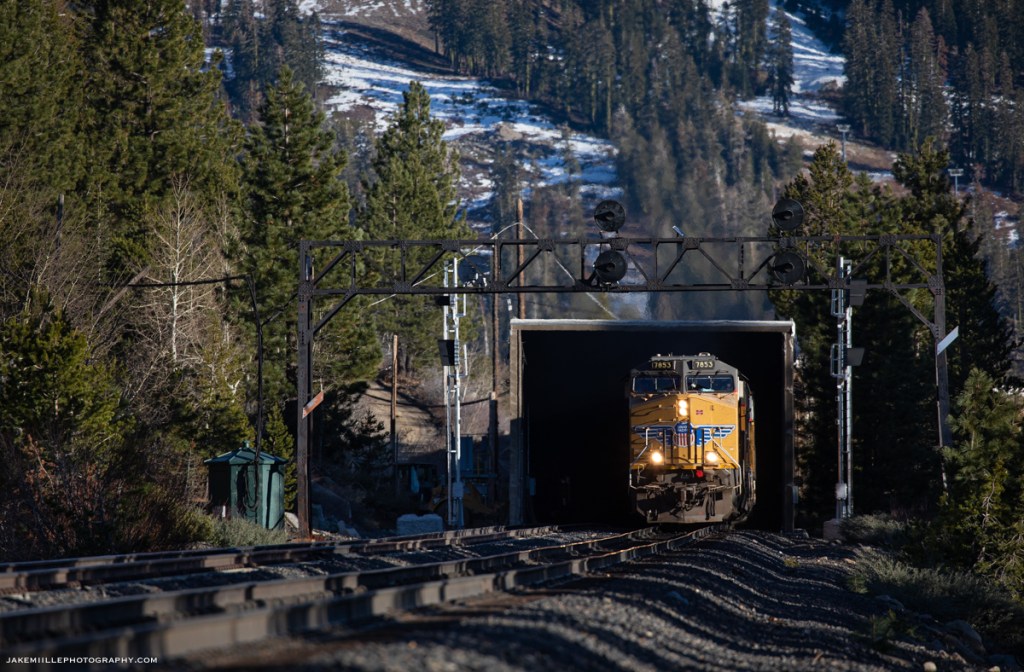
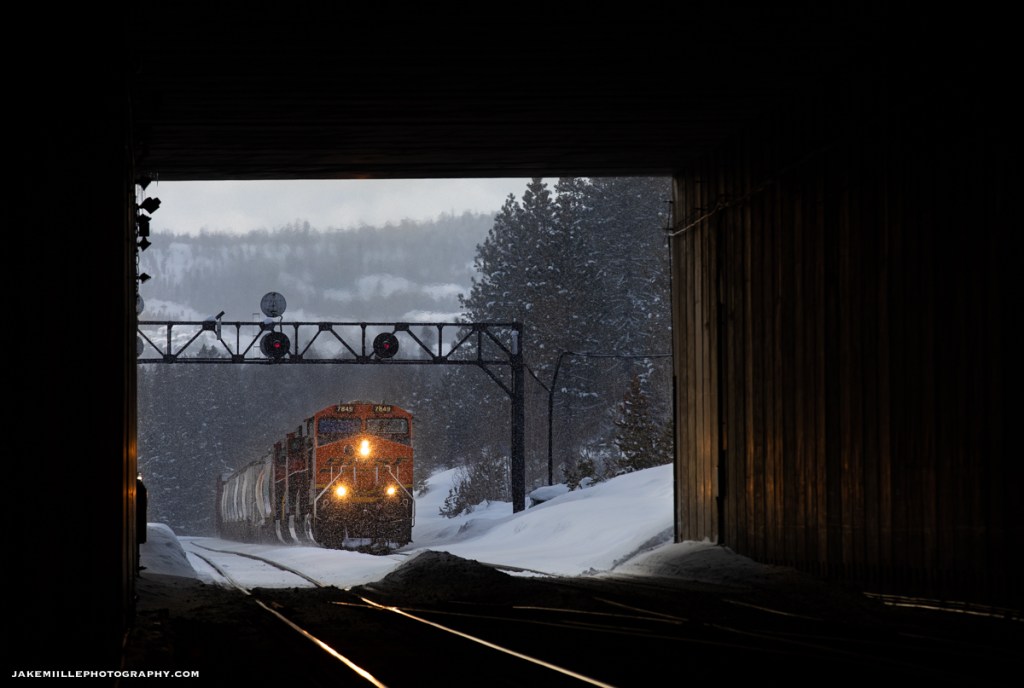
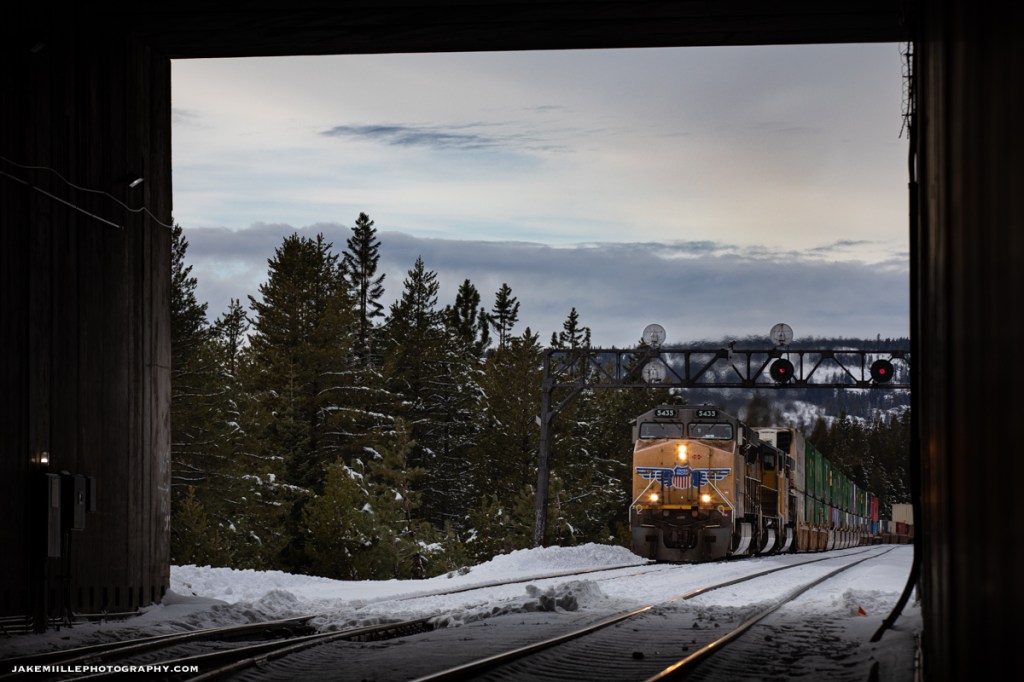
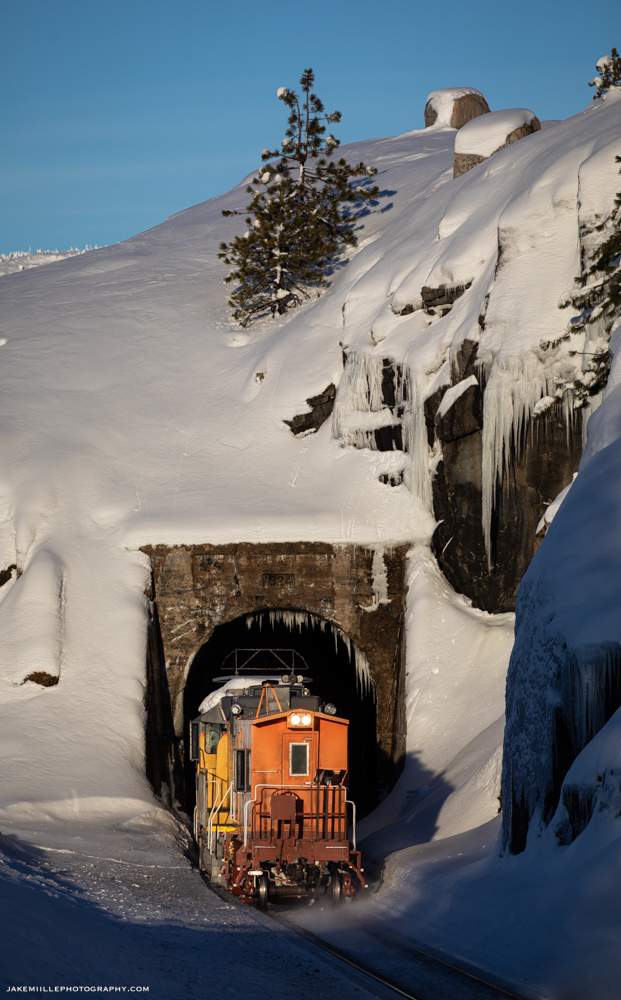
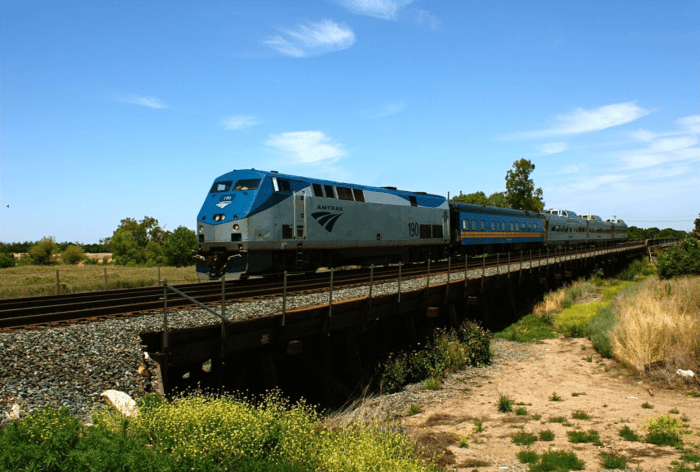
Heading east on the #1 track, Union Pacific 7952 ducks into the Norden snow shed while dragging a heavy manifest over Donner Summit.
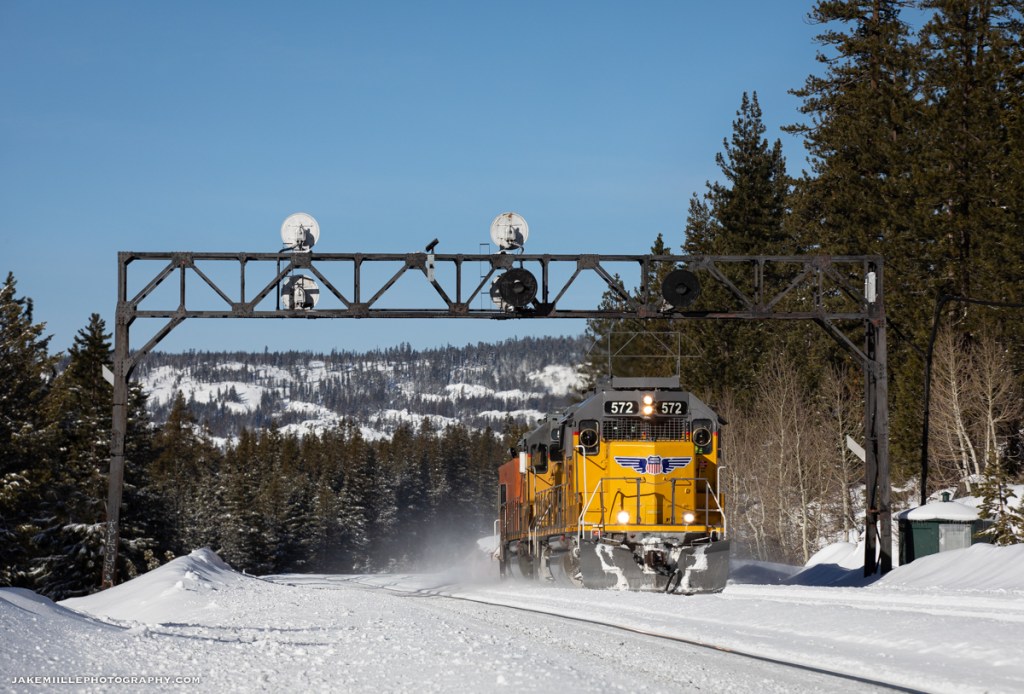
A flanger set races past the searchlight signals at East Norden.
With only single track through “The Big Hole” (1.3 miles east), these signals and crossovers were often utilized by the dispatcher to move trains and keep the railroad running efficiently. The original mainline between Norden and Eder (also known as track 1), was retired in the mid 1990’s due to dwindling traffic levels. This left only a single track (through the Big Hole) connecting Eder and the western slope. Because of this, Norden was often a great place to watch rail traffic and train meets.
A Particular Interest
Over the last several years, I had taken a particular interest in photographing the Norden Searchlights. Knowing that replacement plans were scheduled, it was just a matter of time before the classic signals would be replaced.
Searchlight signals are being replaced nationwide due to legislation passed by Congress. Many searchlight signals have already fallen across Northern California. Because of this, documenting searchlight signals has become one of my special projects.
Fortunately, the Norden searchlights provided many unique photo opportunities. At over 7,000′ in elevation, capturing the signals in all four unique seasons was a challenge. Fall colors, followed by snow and a springtime thaw were quickly replaced by smokey skies during the California summers.
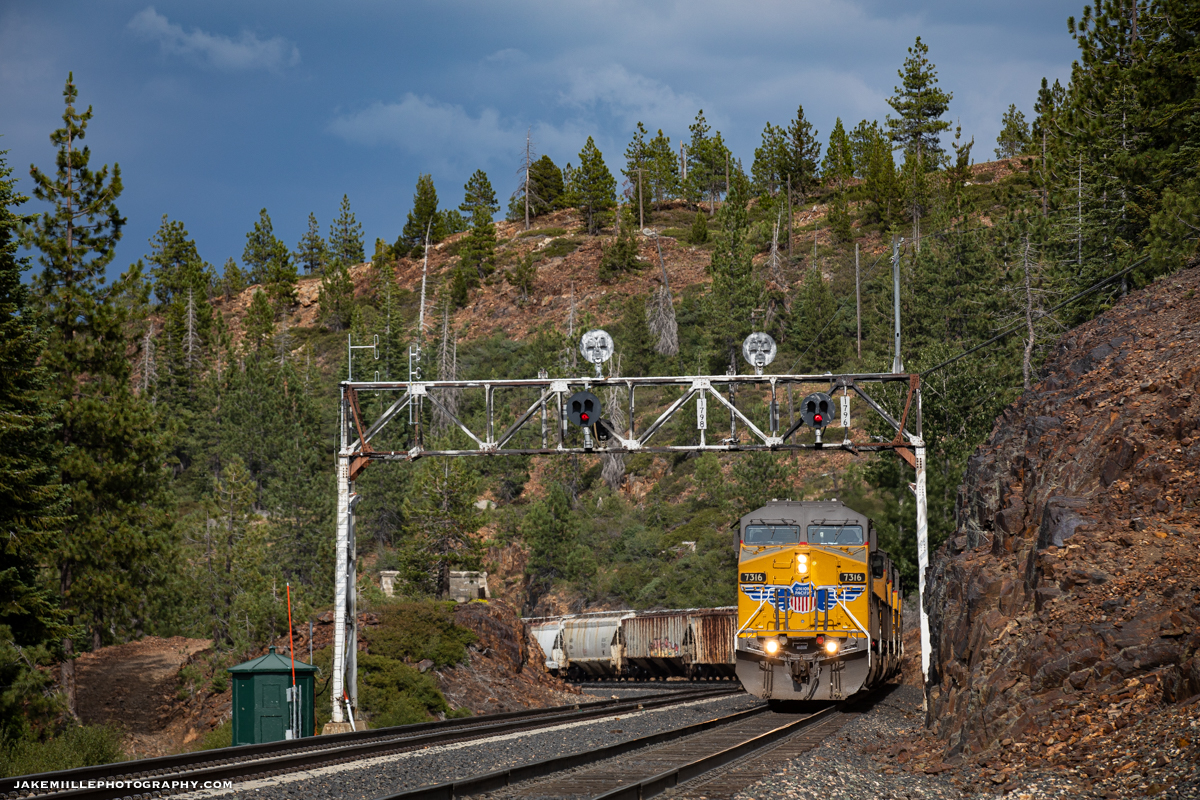
In addition to the Norden signals, Union Pacific replaced many of Southern Pacific’s target tri-lights and signal bridges. The target tri-lights have a similar shape to searchlights, but sport three individual signal lights. The signals at Cisco and Troy were replaced prior to the searchlights at Norden. Fortunately, the signal bridge at Truckee still stands… for now.
Thunderstorms build across the Sierra Summit as the Union Pacific MOGRV passes under the signal bridge at Cisco. These signals were replaced in addition to the searchlights at Norden.
The UP 5781 passes under Truckee signal bridge after a cold morning trip over Donner Pass. The Truckee signal bridge is still in service (as of November 2022). Unknown on replacement timeline.
Replacement
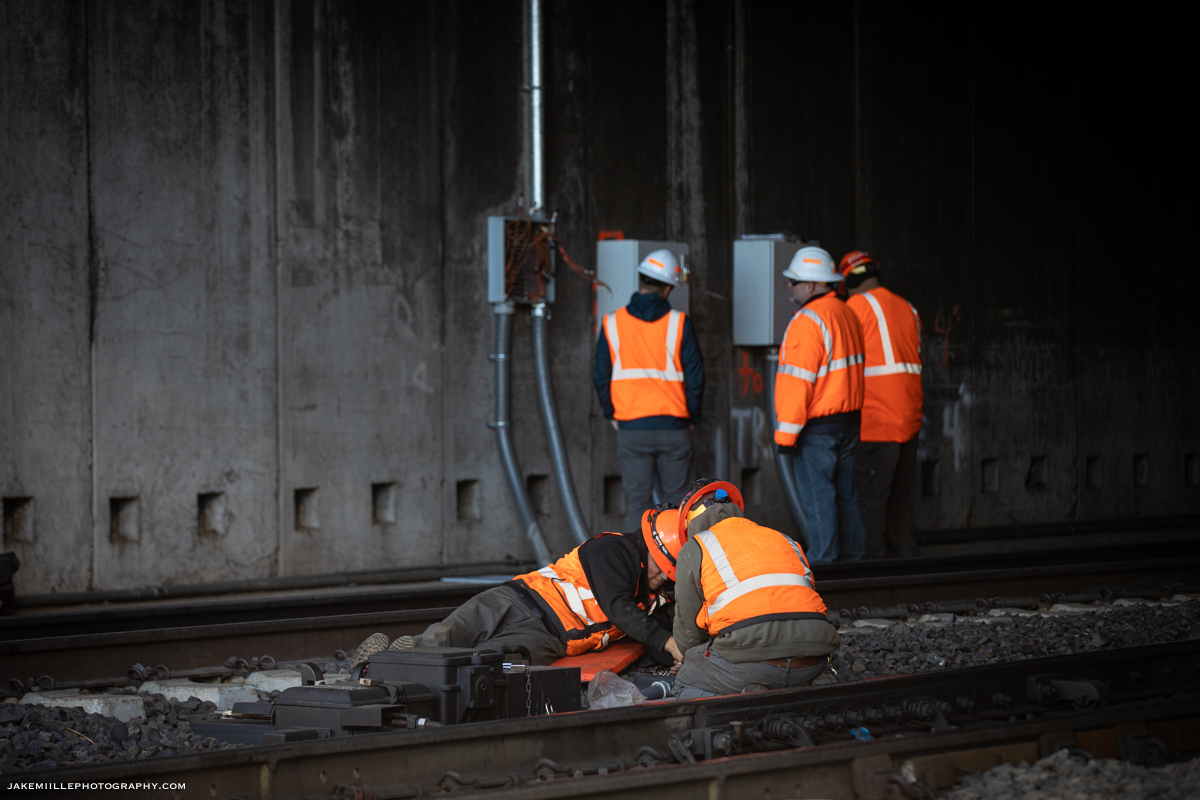
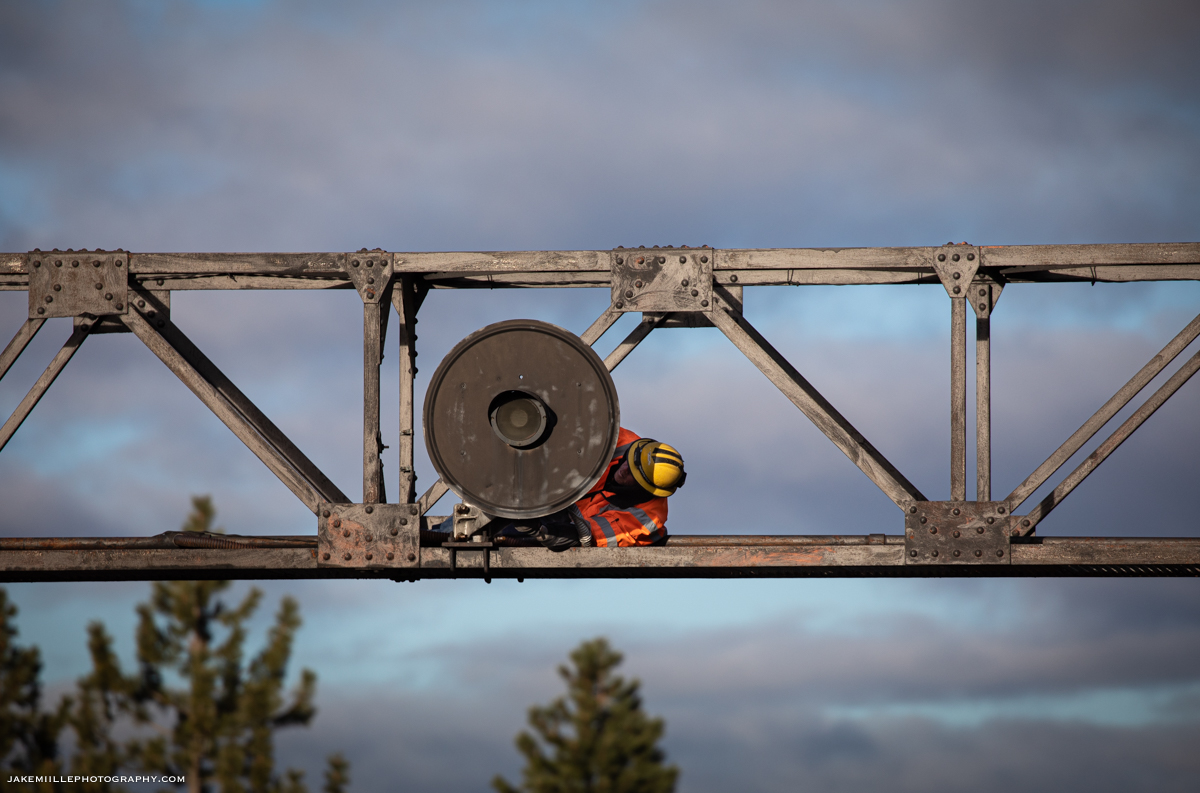
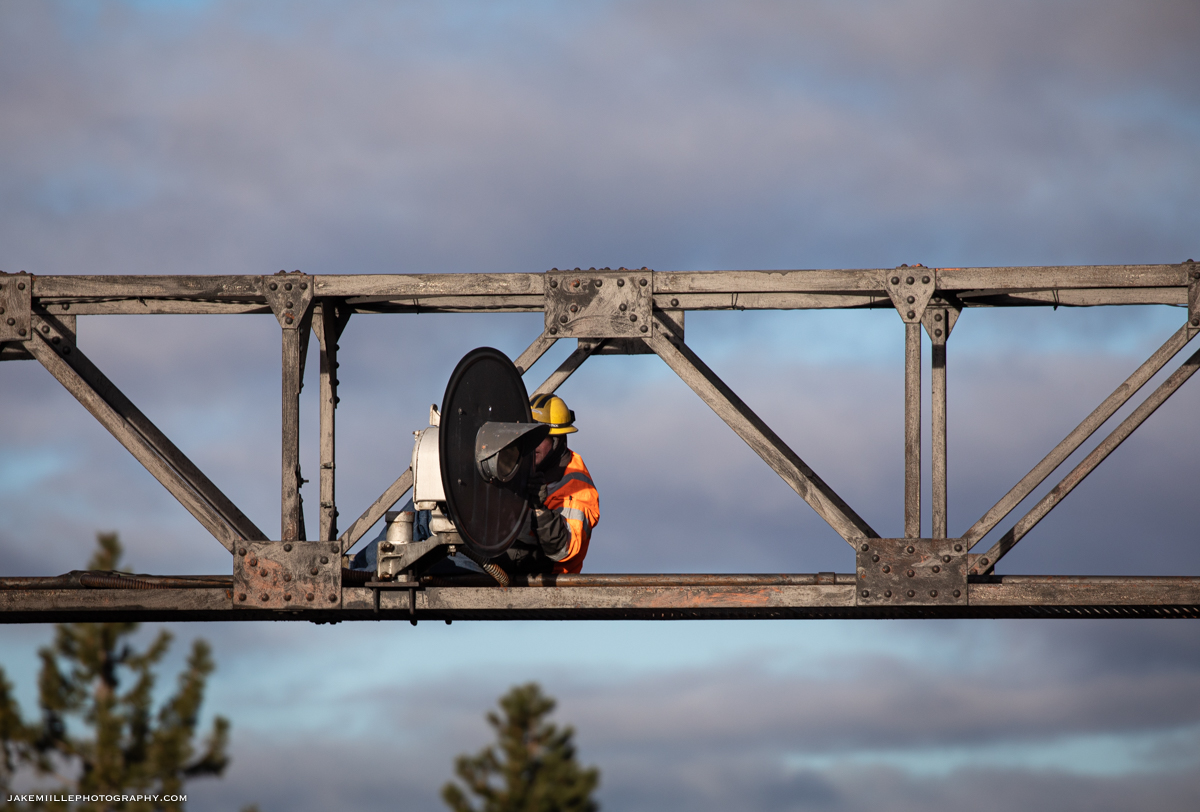
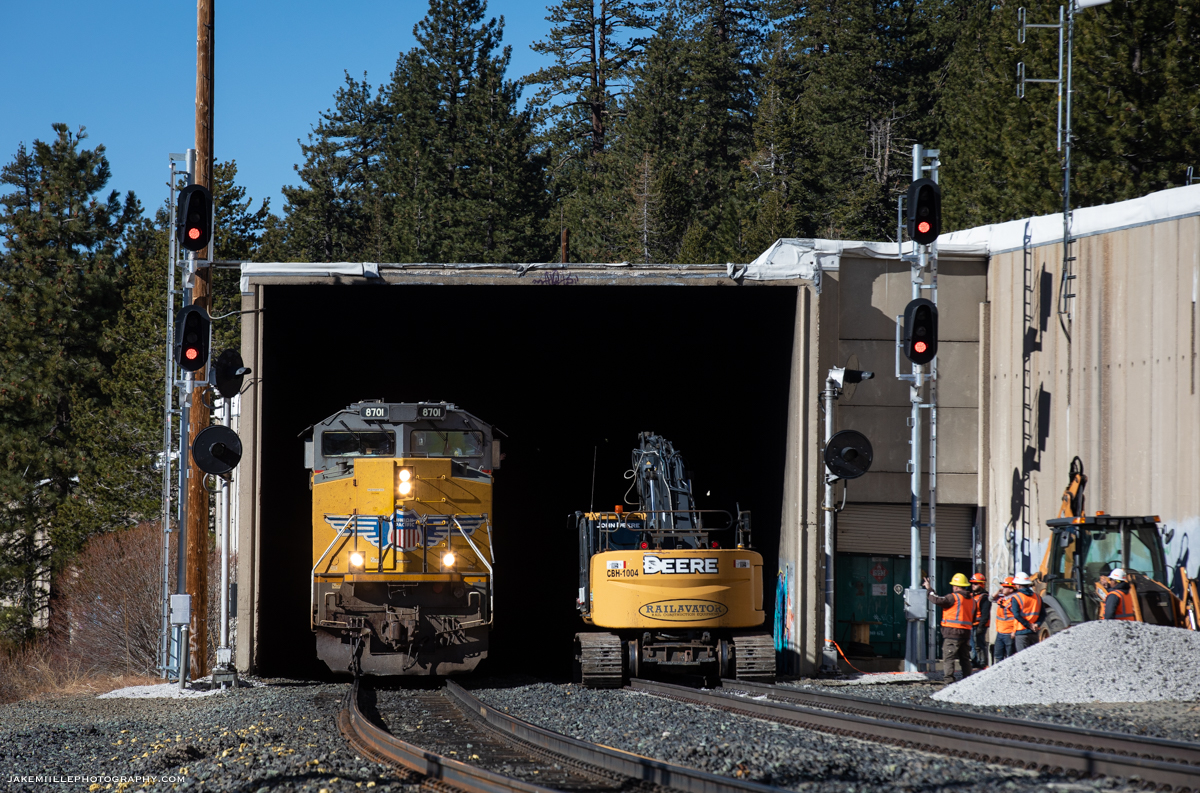
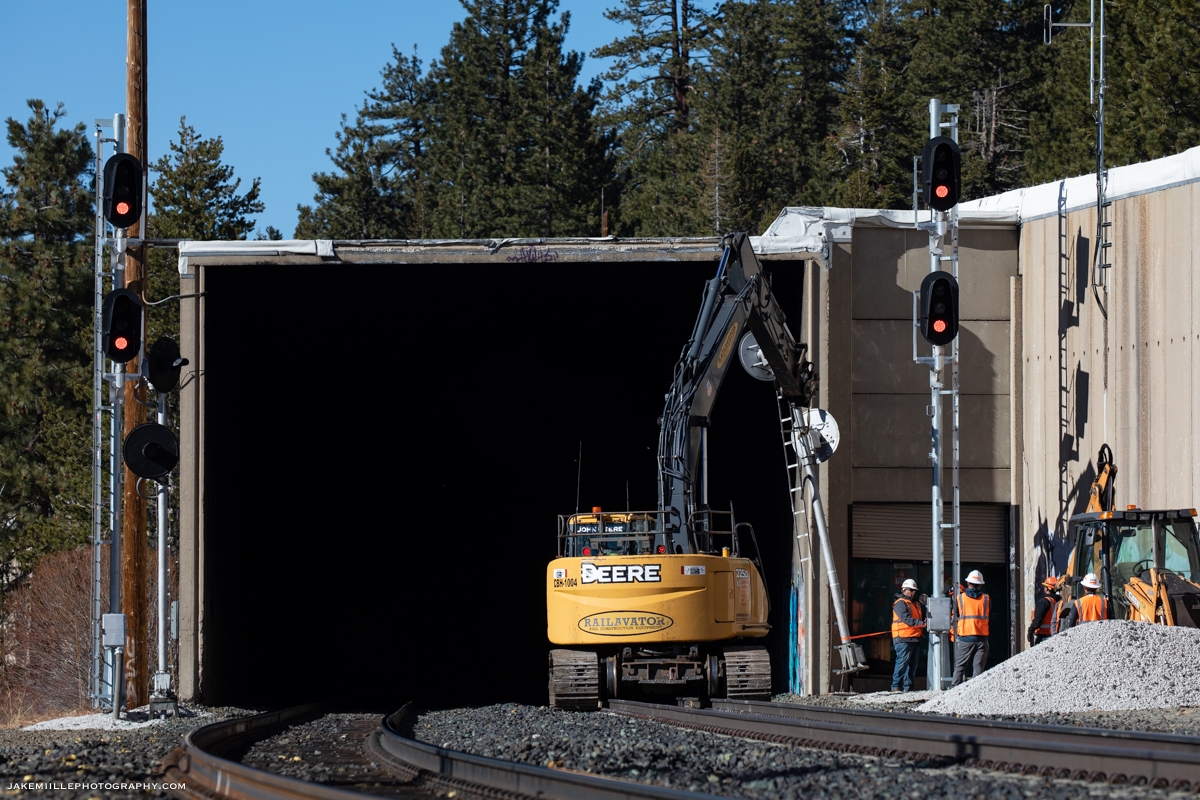
On the morning of November 23rd, 2021, I traveled to Norden to document the signal replacement process. The week prior, signal crews had completed extensive work and were preparing for the “cut over” to the new signals.
The signal foreman requested track & time as crews prepared to physically turn the signals. The process appeared relatively simple from an outsider’s prospective. The new signals were energized and tested while the old signals were de-energized and rotated. I am sure the real complexity of the signal replacement process happens in the signal box, where computers and fuses control the indications.
Within a couple of hours, the process was complete and the new signals were in service. Dispatcher 9 impatiently waited for the release of track & time since there was a high priority Z train and Amtrak’s California Zephyr waiting to come west. Once track & time was released, the UP 7834 quickly arrived leading the ZG2LT 21. The UP 7834 became the first train to pass the new signals.
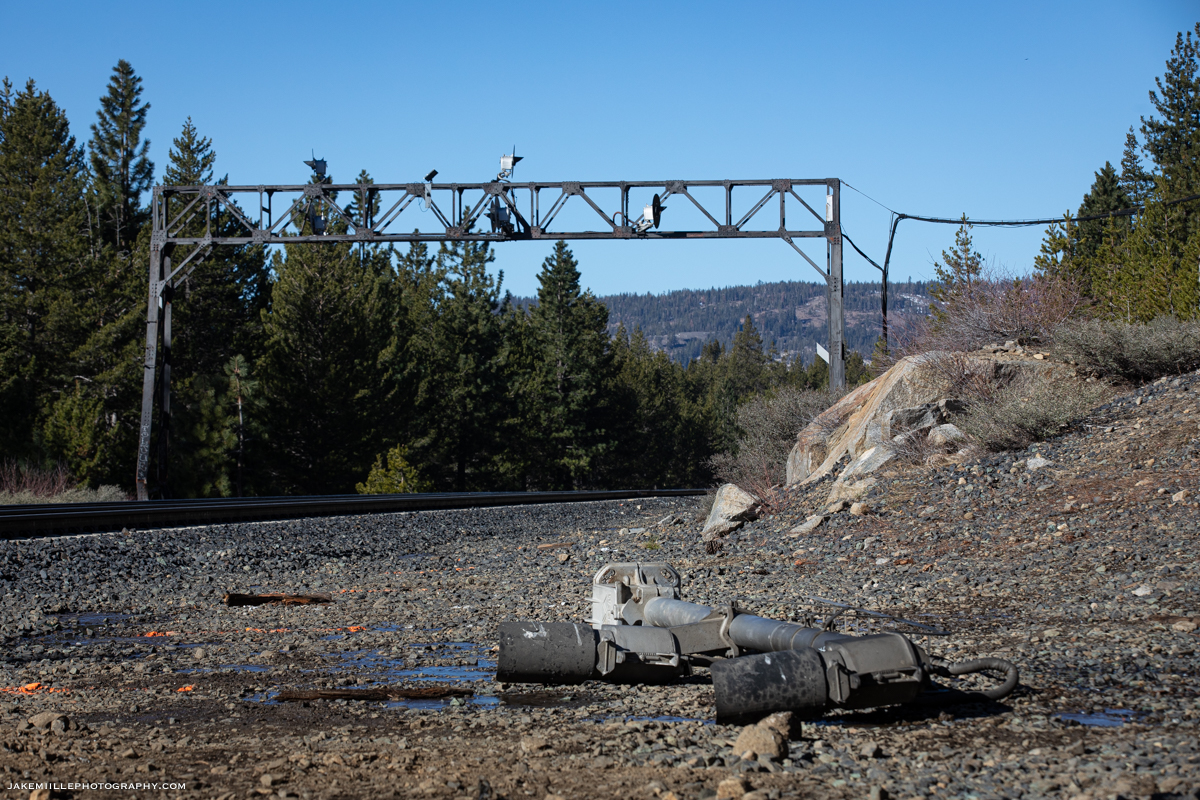
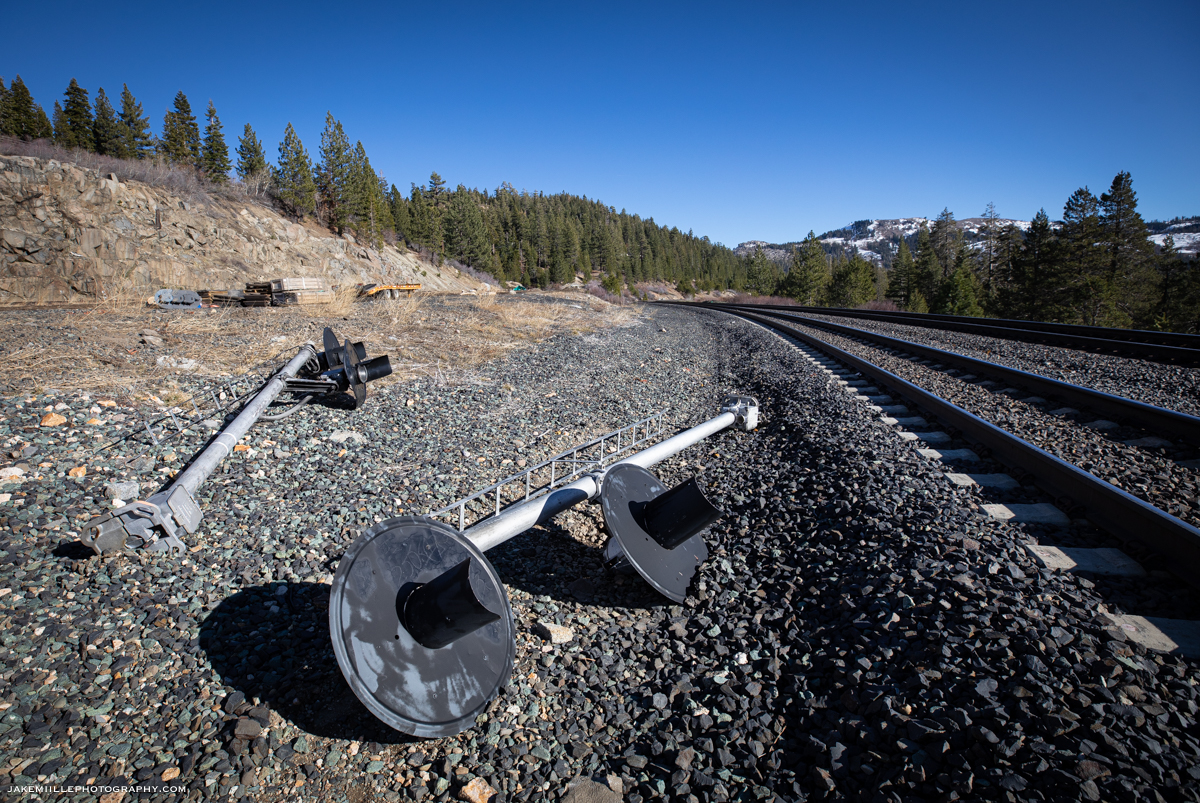
After the signals were cut over, crews began work to remove the signal masts from East Norden. Utilizing some heavy equipment, the crews were able to quickly remove the masts. The signal bridge would be a little more challenging and would be removed during the following week.
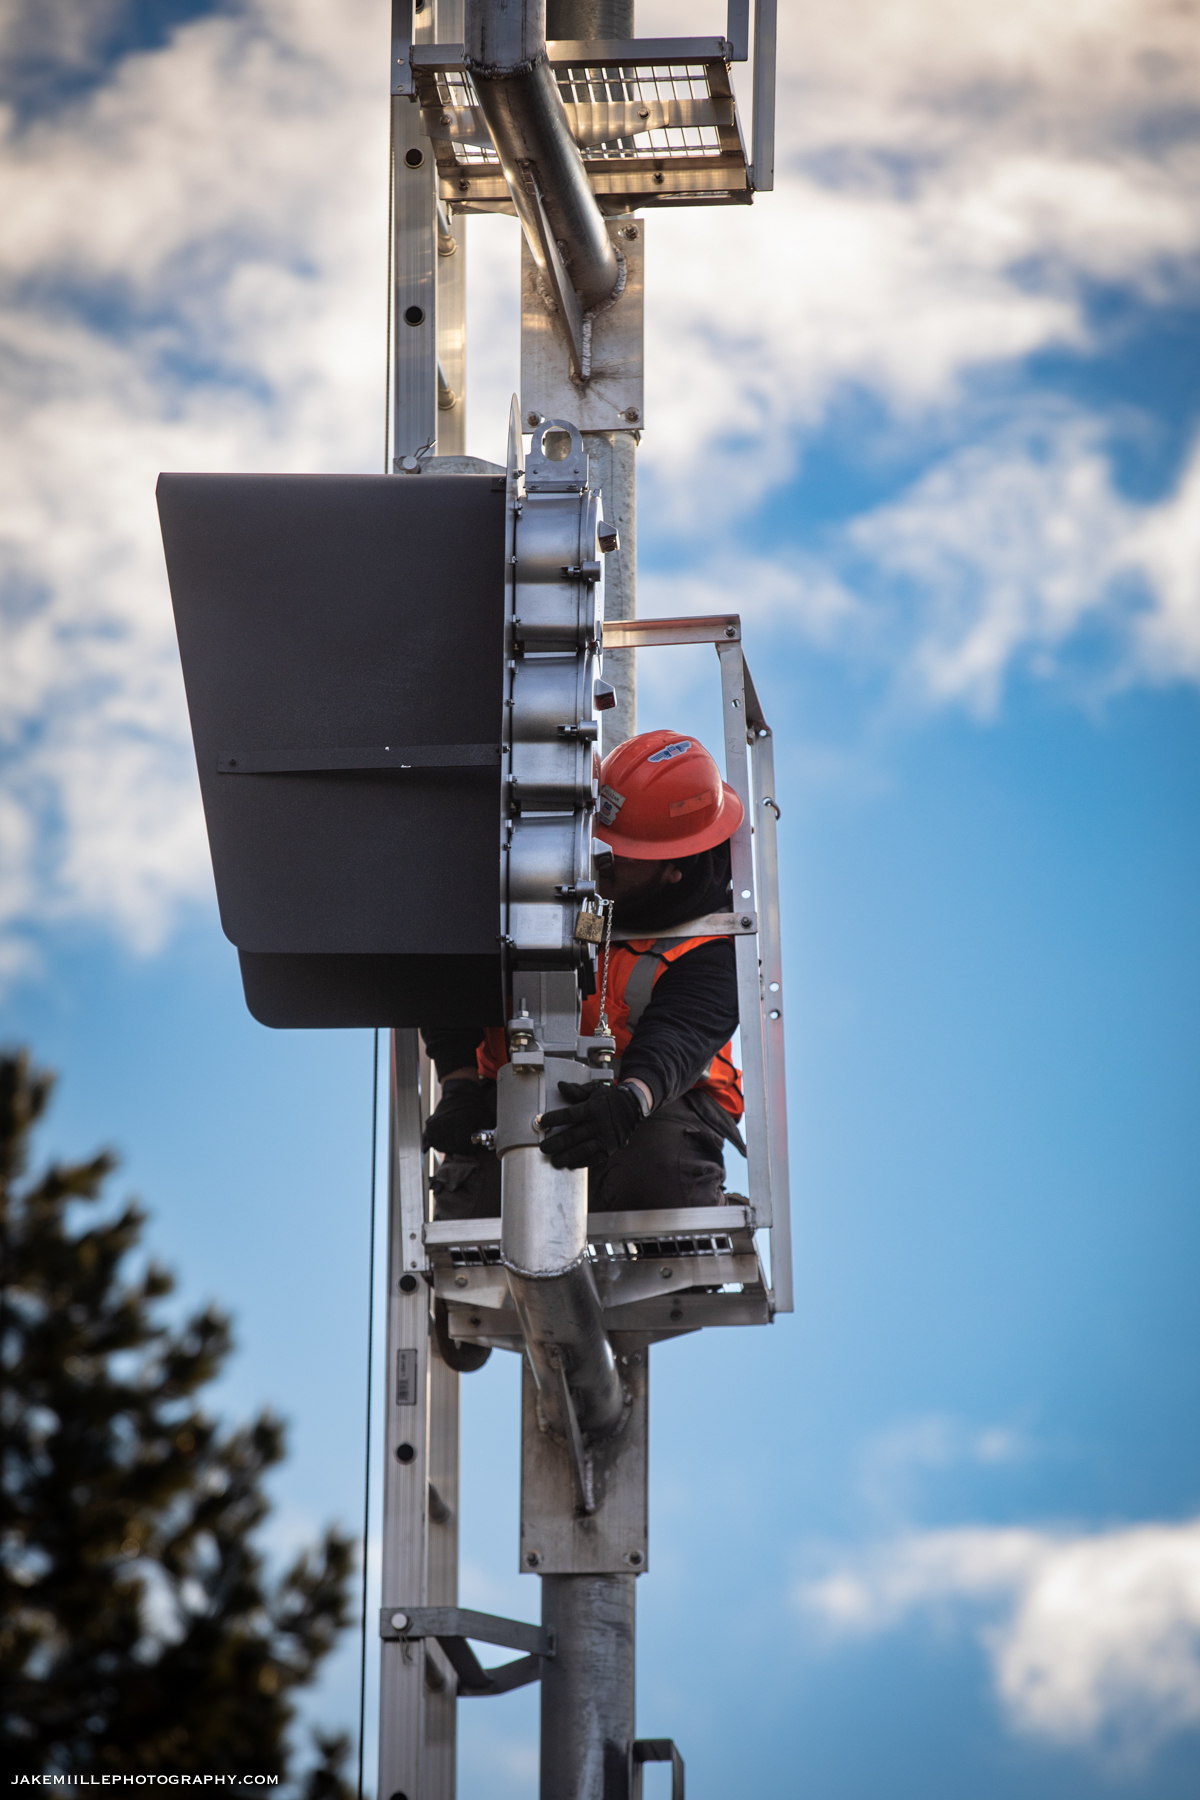
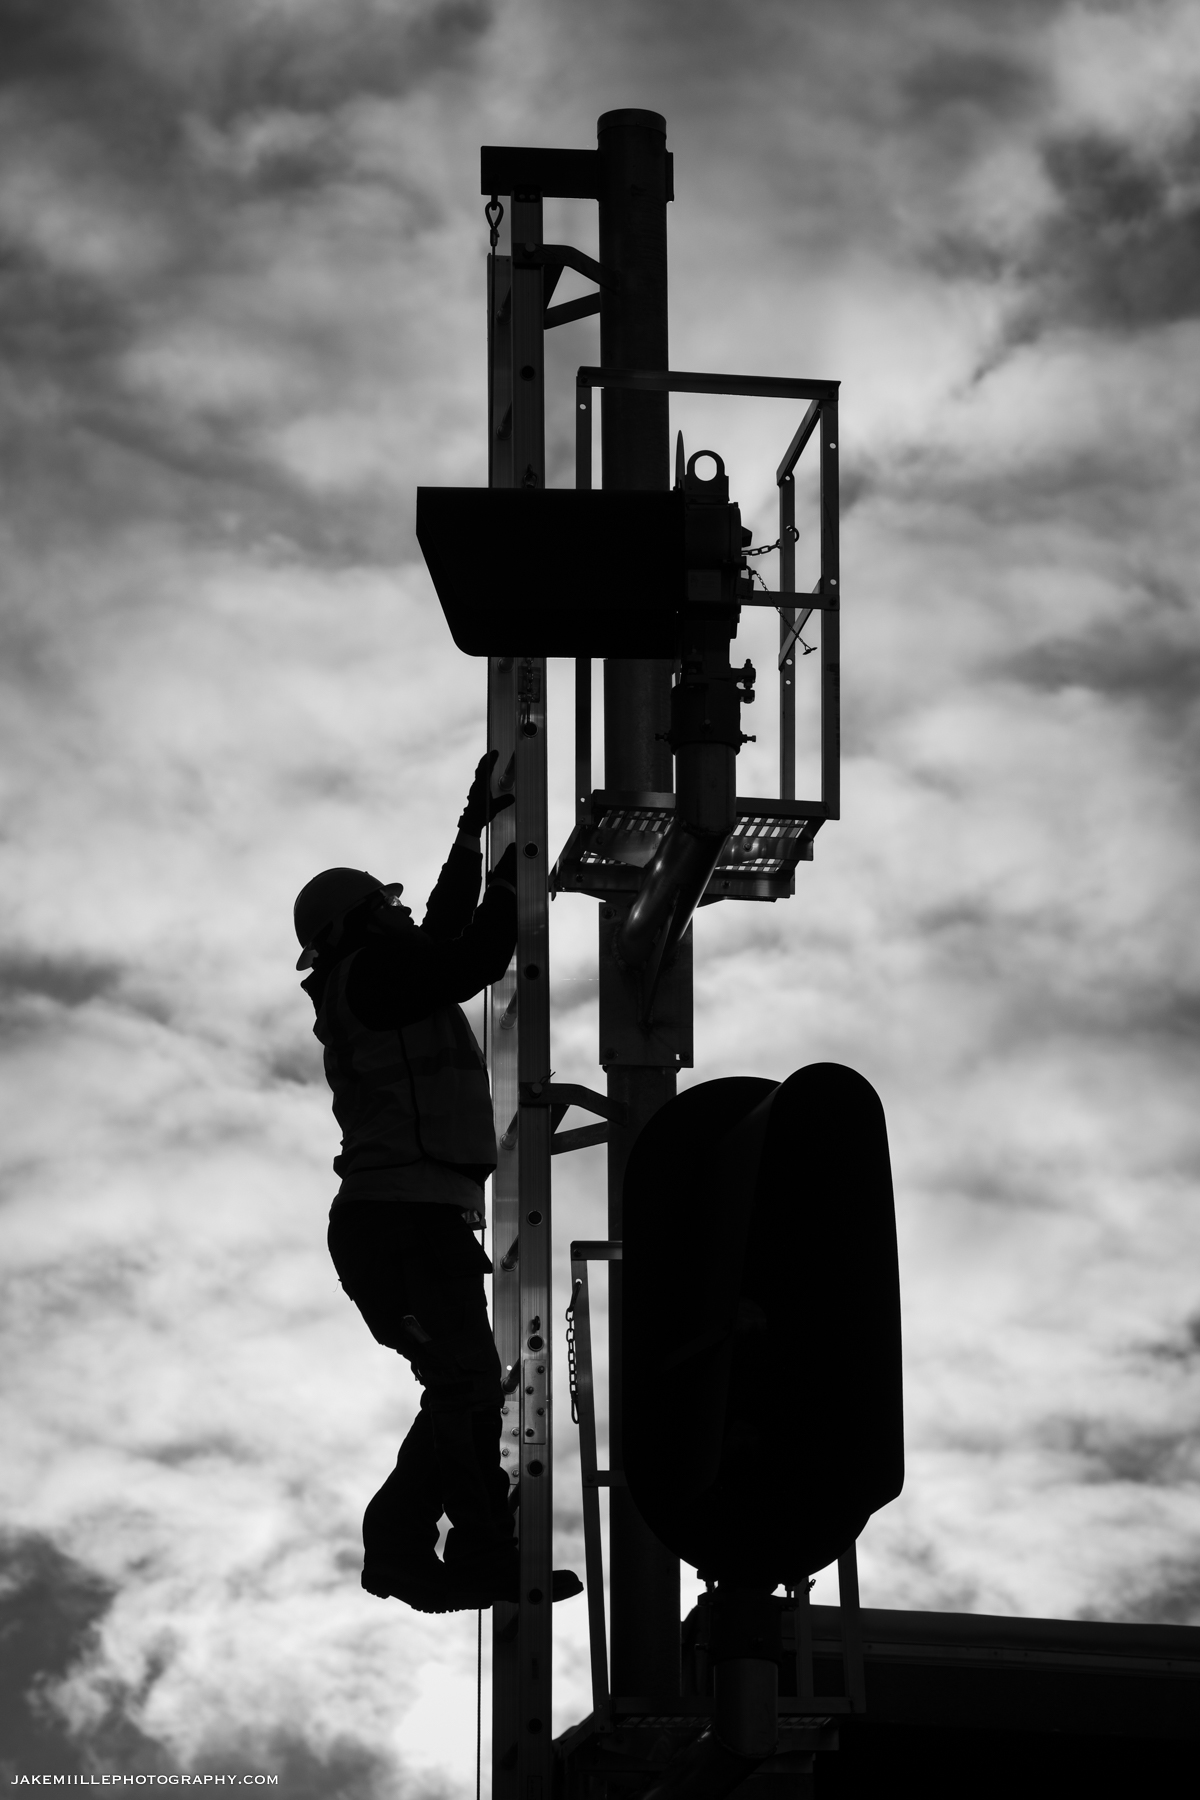
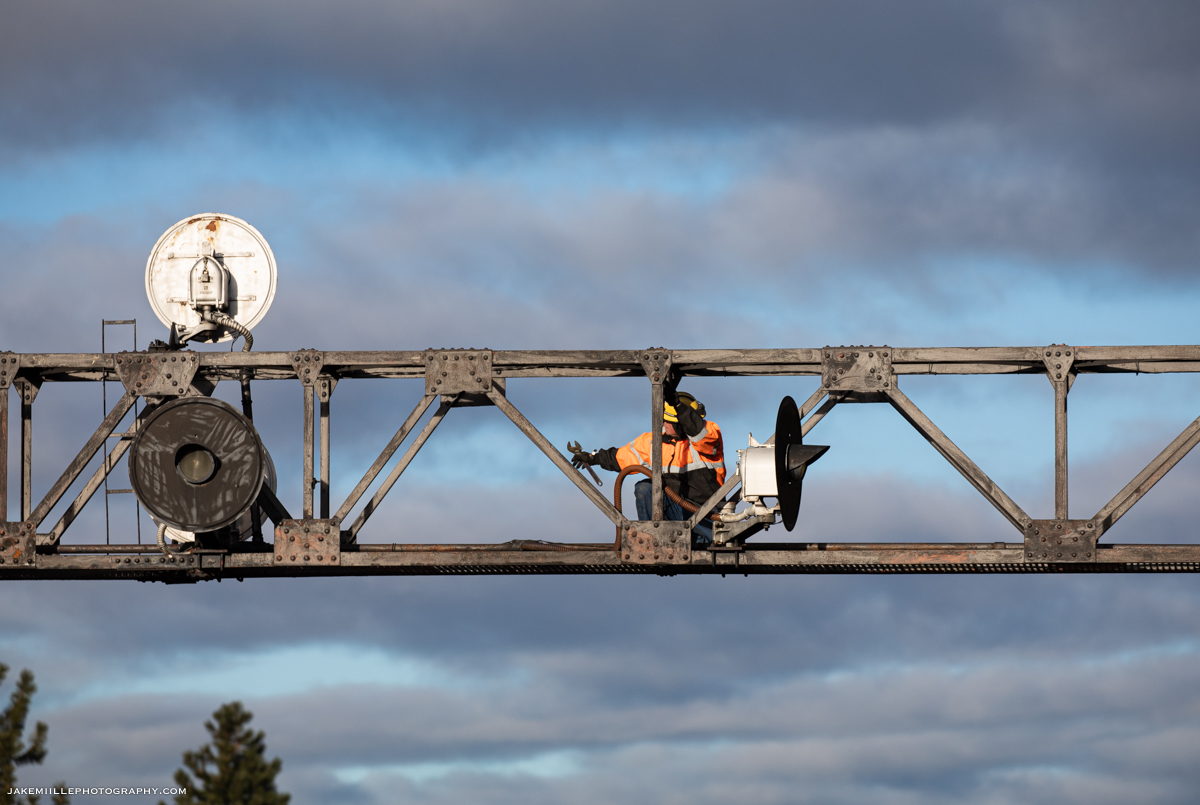
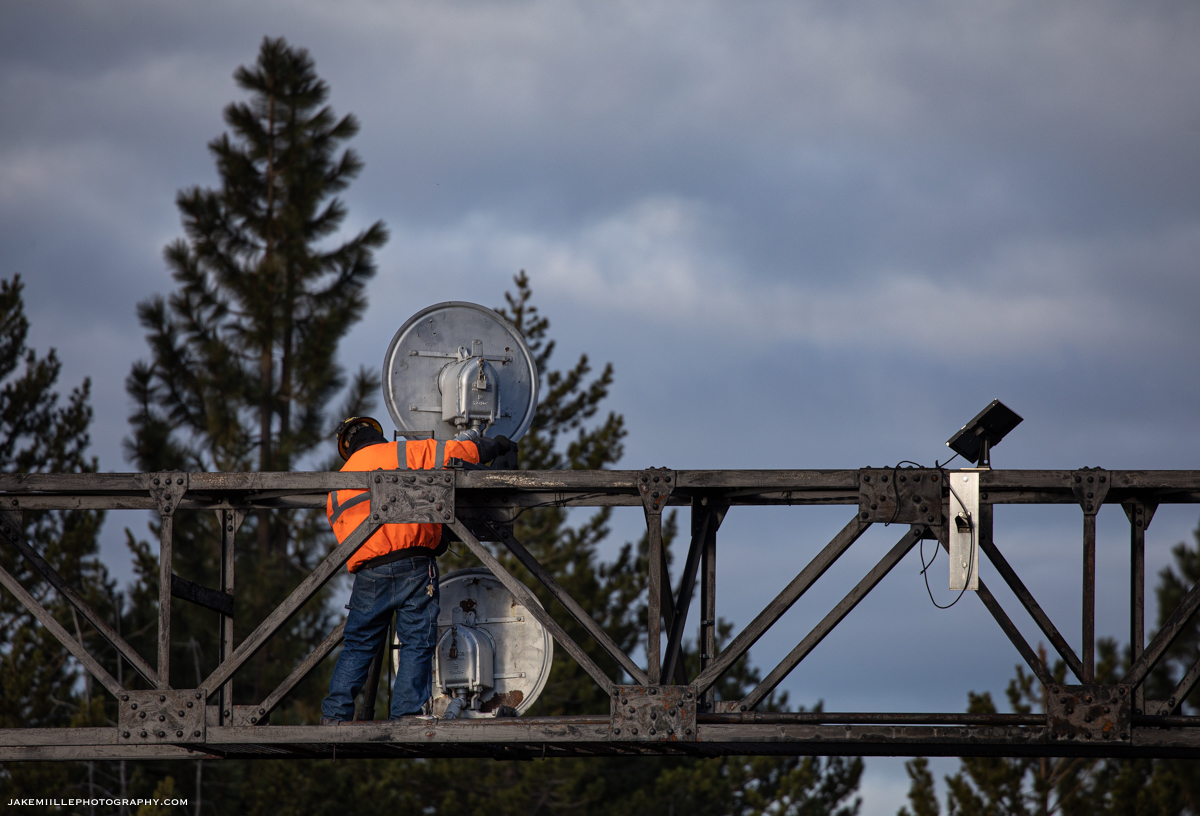
A signal worker prepares to place the new “Darth Vader” tri-lights in service at West Norden.
The signal gang performs the finishing touches before placing the new signals in service.
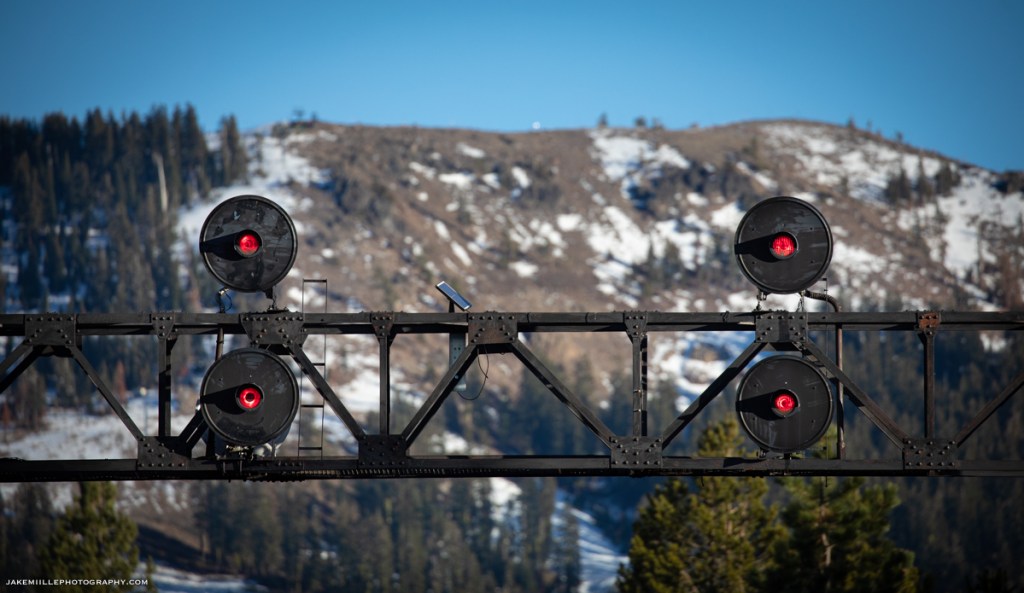
Just before the cut over, the Norden searchlights shine red one last time.
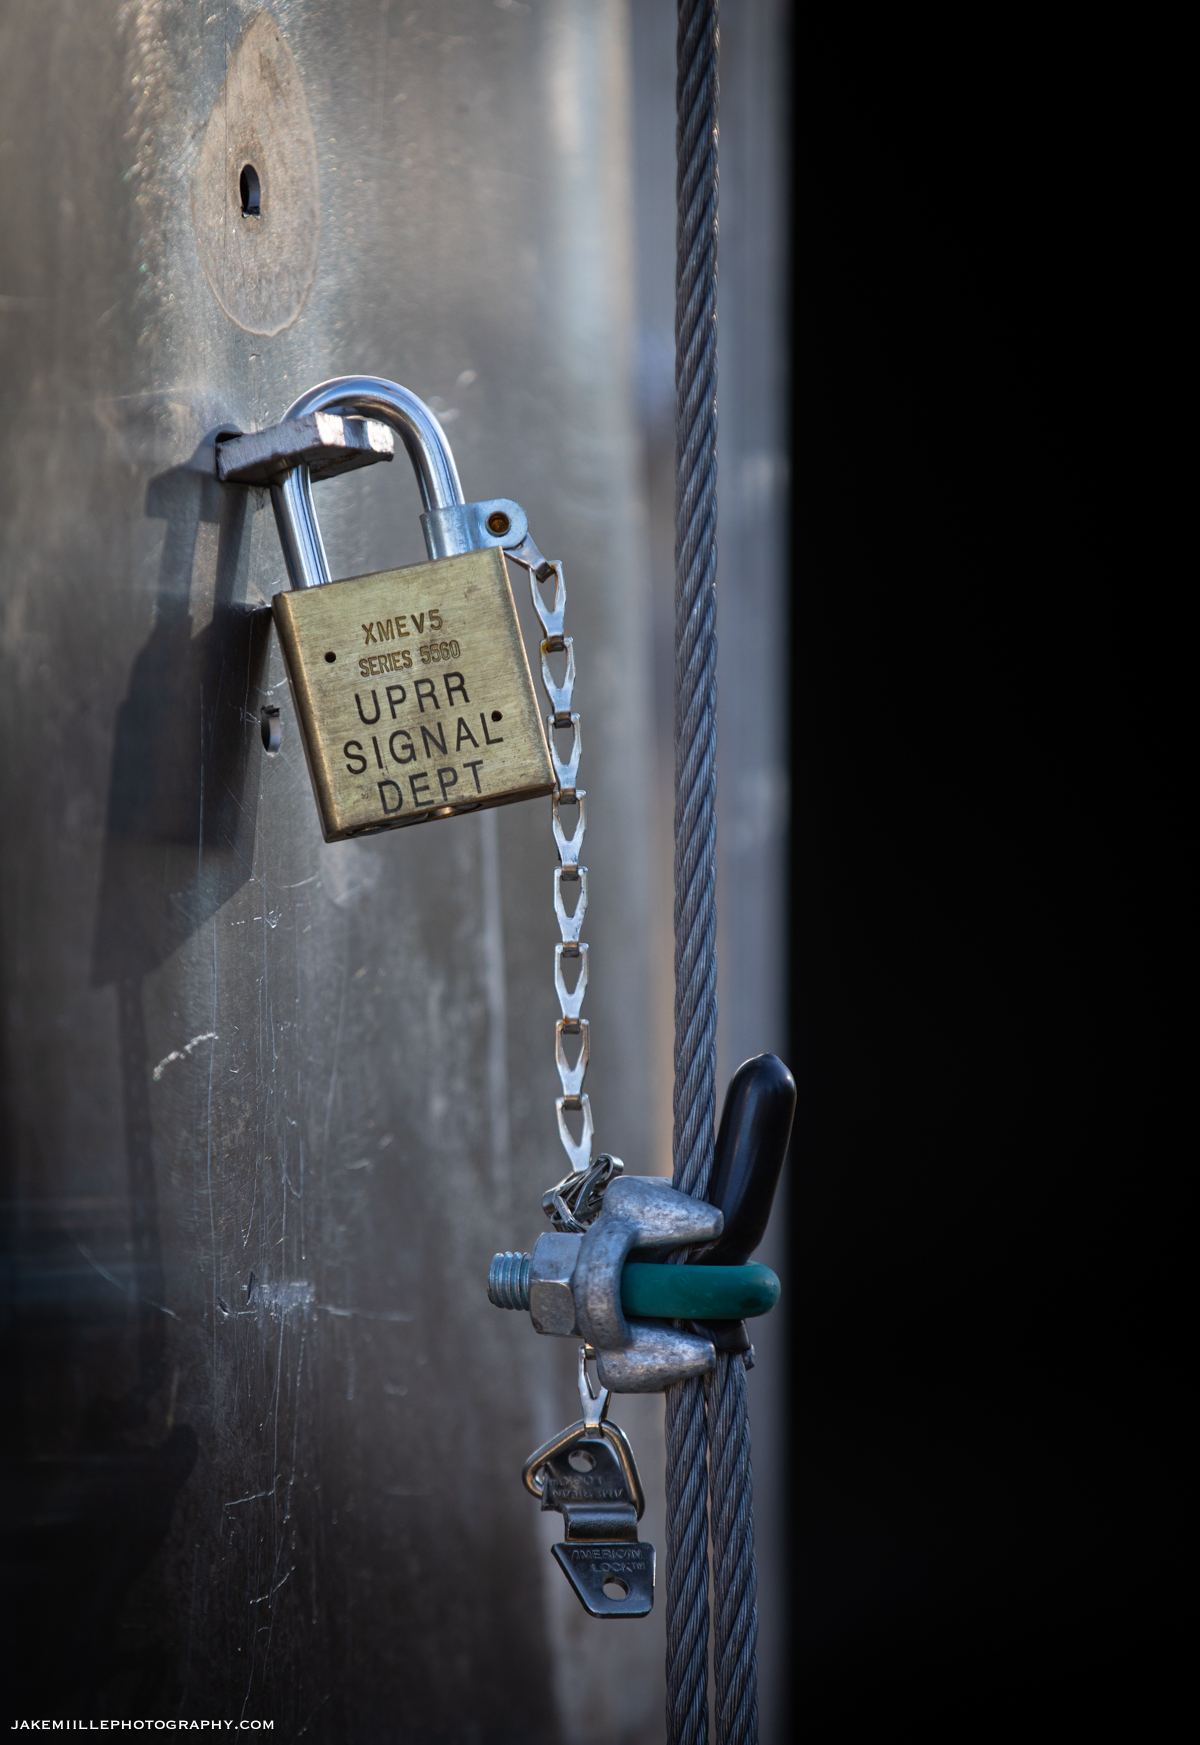
New hardware guards the signals at West Norden.
The last signal head is prepped and ready to be placed in service.
With the new signals ready, the Norden searchlights are placed out-of-service.
Within minutes, the decades of service are brought to an end.
The ZG2LT heads west under the out-of-service searchlight signal bridge.
The replacement of the Norden Searchlights serves as a good reminder that nothing lasts forever along the railroad. An image you may capture today could hold increasing sentimental value as things change in the future. So get out there and shoot!
Here are some of my favorite moments from Norden over the years.
I often receive many questions regarding snow fighting operations on Donner Pass. In this article, we will take a look at how the Union Pacific Railroad keeps the infamous Donner Pass Route open during fierce winter storms. So if you’re planning on visiting Donner Pass this winter, check this out!
Since the beginning, winter on Donner Pass has been a challenge for the railroad. During the original construction of the transcontinental railroad, work crews for the Central Pacific Railroad had to contend with 44′ of snow in one winter season (1866). Snow storms dramatically slowed construction and cost the railroad a tremendous amount of money.
In 1952, Southern Pacific’s “City of San Francisco” (a premier passenger train from Chicago, IL to the S.F. Bay Area) became stranded during a snow storm on Donner Pass. Over 200 passengers and crew members were forced to endure a cold night aboard the train until they could be evacuated to the highway. It took Southern Pacific crews several days to rescue the train and clear the railroad from snow.
In 2011, a fierce winter storm caused an avalanche near Shed 10 (Eagle Lakes). The avalanche buried a flanger (snow fighting train), forcing to the crew members to climb out of a window and seek rescue. After several days utilizing the rotary snow plows, the Union Pacific Railroad was able to clear the tracks and open the route.
Fierce winter storms have made the Donner Pass Route infamous among railroaders. The route is commonly referred to as the “snowiest mainline” on Union Pacific’s system. Every winter, the railroad utilizes special “snow fighting” crews and equipment to clear the tracks and keep the mainline open. Let’s take a look at how they operate.
The Snow Fighters
Truckee Headquarters
The snow fighting effort along the Donner Pass Route is headquartered in Truckee, California. “Truckee Snow HQ” is staffed by hard working railroaders who have experience along the Donner Pass Route. They coordinate snow fighting operations, working closely with the Roseville Yard and the Omaha dispatchers. During the winter months, snow fighting equipment is staged in Truckee. Crews monitor weather conditions, rail traffic and maintenance needs from this headquarters office.
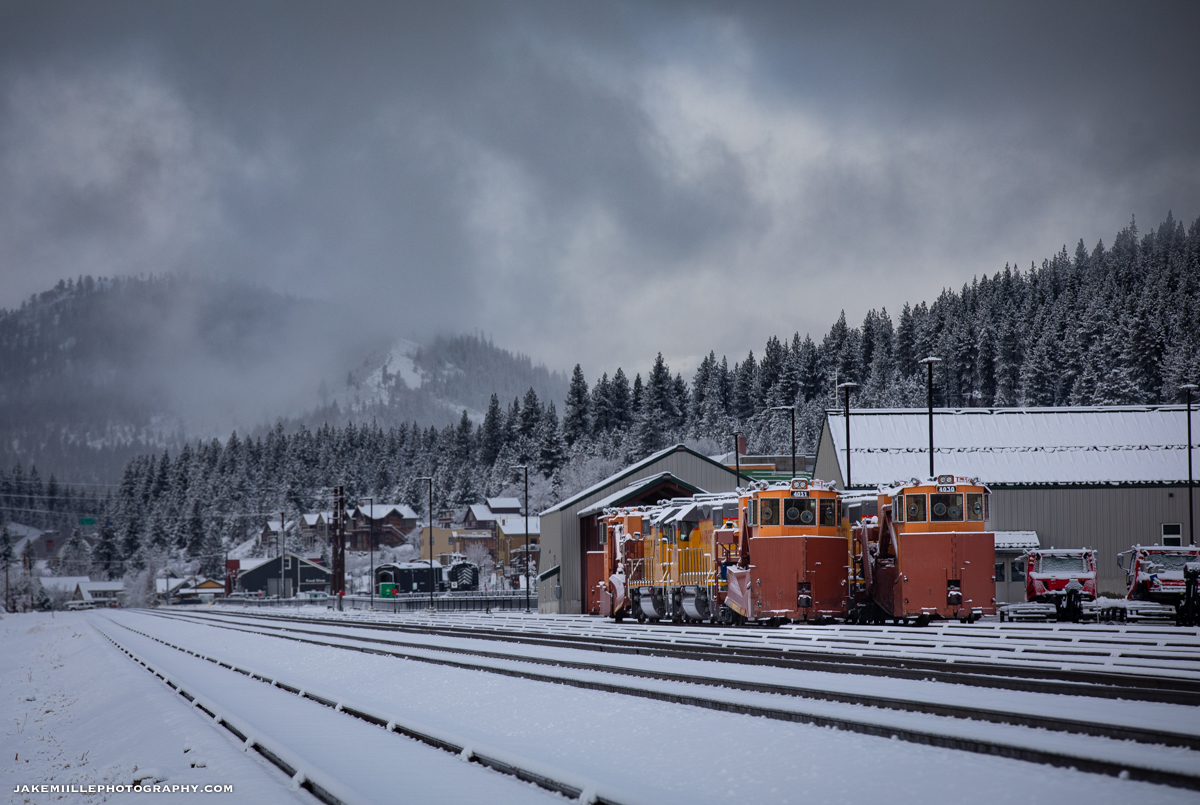
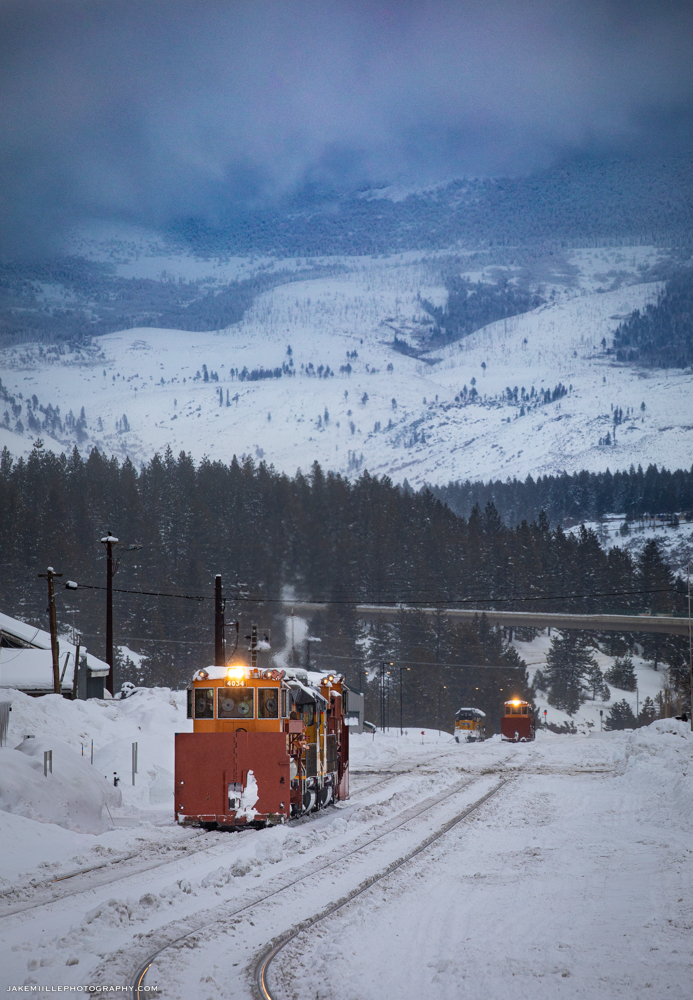
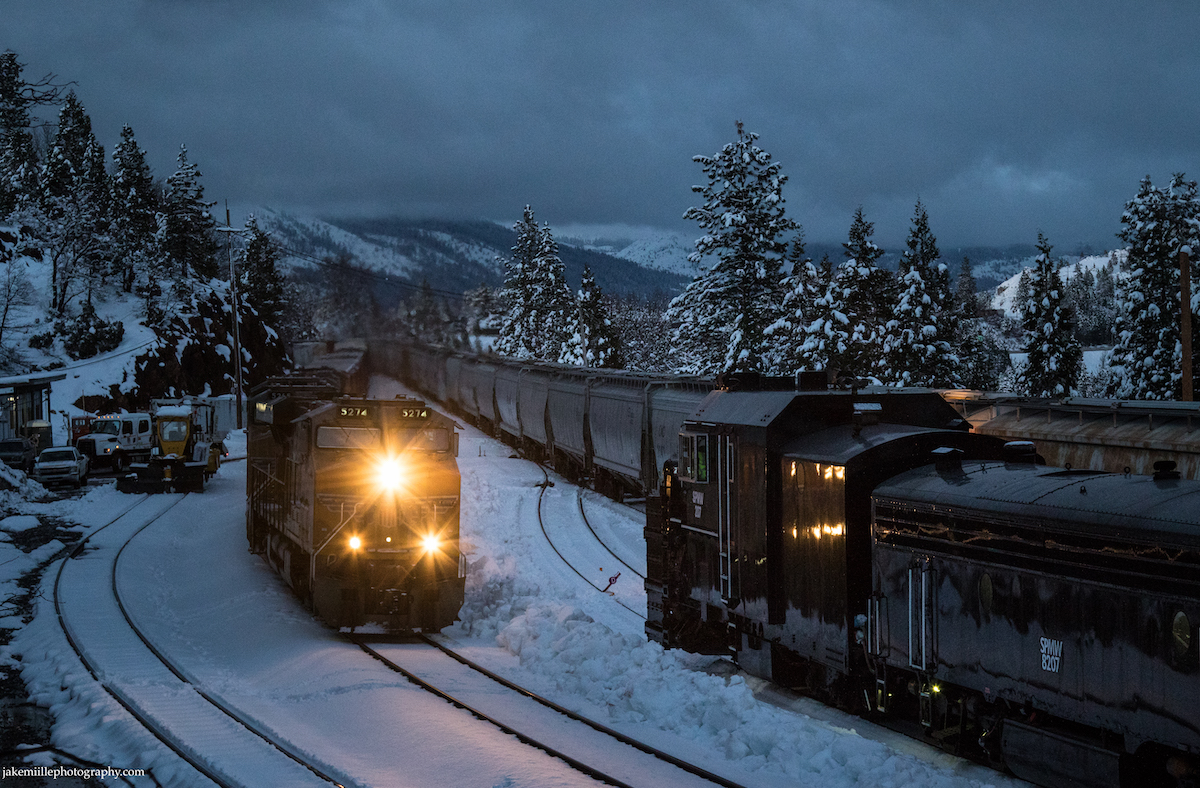
Two sets of spreaders and several snowcats are staged at the Truckee Snow Headquarters. On a cold winter evening, a flanger set is staged on the ballon track at Truckee Snow HQ.Westbound flangers preparing to leave Truckee on a frigid winter morning.
Snow Sheds
The railroad’s original solution for snow fighting was by utilizing “snow sheds”. The Central Pacific Railroad constructed over 40 miles of wooden snow sheds along the Donner Pass Route. These sheds would shield the tracks from snow storms and avalanches.
While snow sheds were a great concept and helped keep the railroad open for many years, they had drawbacks. Often, the blowing snow would create large snow drifts at the shed portals. These were difficult to remove due to the confined space inherent with a snow shed. The sheds would also create ice due to the snow melting, seeping into the shed and then refreezing. During the summertime, the large wooden sheds created a considerable fire risk. Dry, wooden boards next to railroad operations were a perfect recipe for fire. Lastly, the snow sheds were despised by passengers. The sheds blocked the scenic views for passengers as they ventured through the Sierra Nevada Mountains. As snow removal techniques improved, most of the snow sheds were eventually removed from service.
Today, there are still a few snow sheds left in service. They serve to protect “cross overs” from snow and ice. A crossover is a pair of switches that connects two parallel rail tracks, allowing a train on one track to cross over to the other. Crossovers have moving parts, making them especially susceptible to failure from snow and ice buildup. Snow sheds on Donner Pass are still located at Shed 10 (M.P. 178), Norden (M.P. 191) and Shed 47 (M.P. 196).
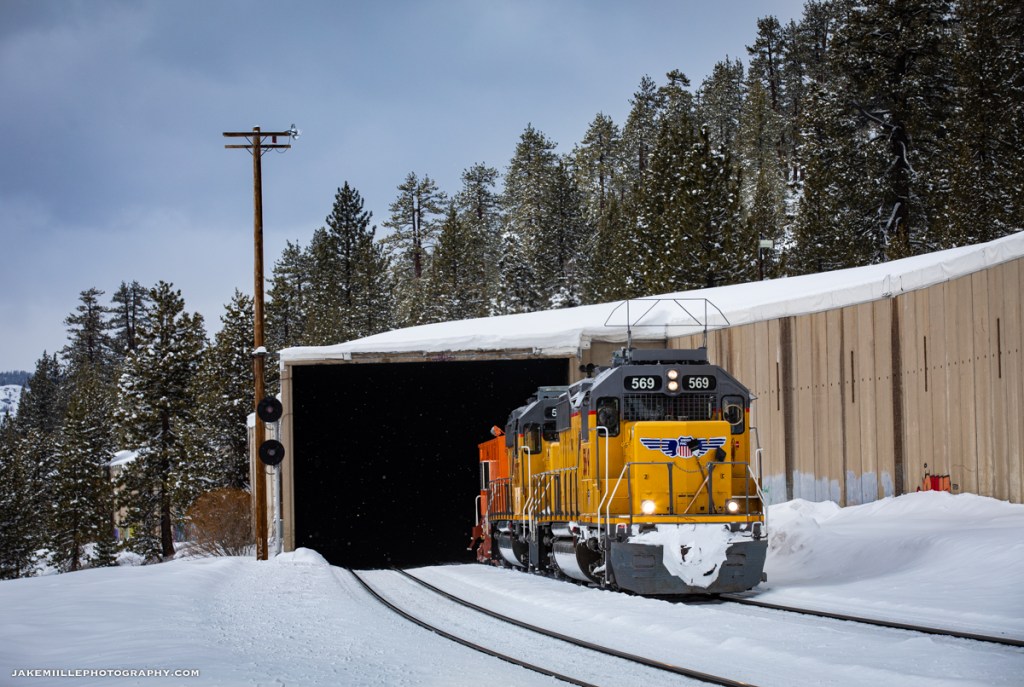
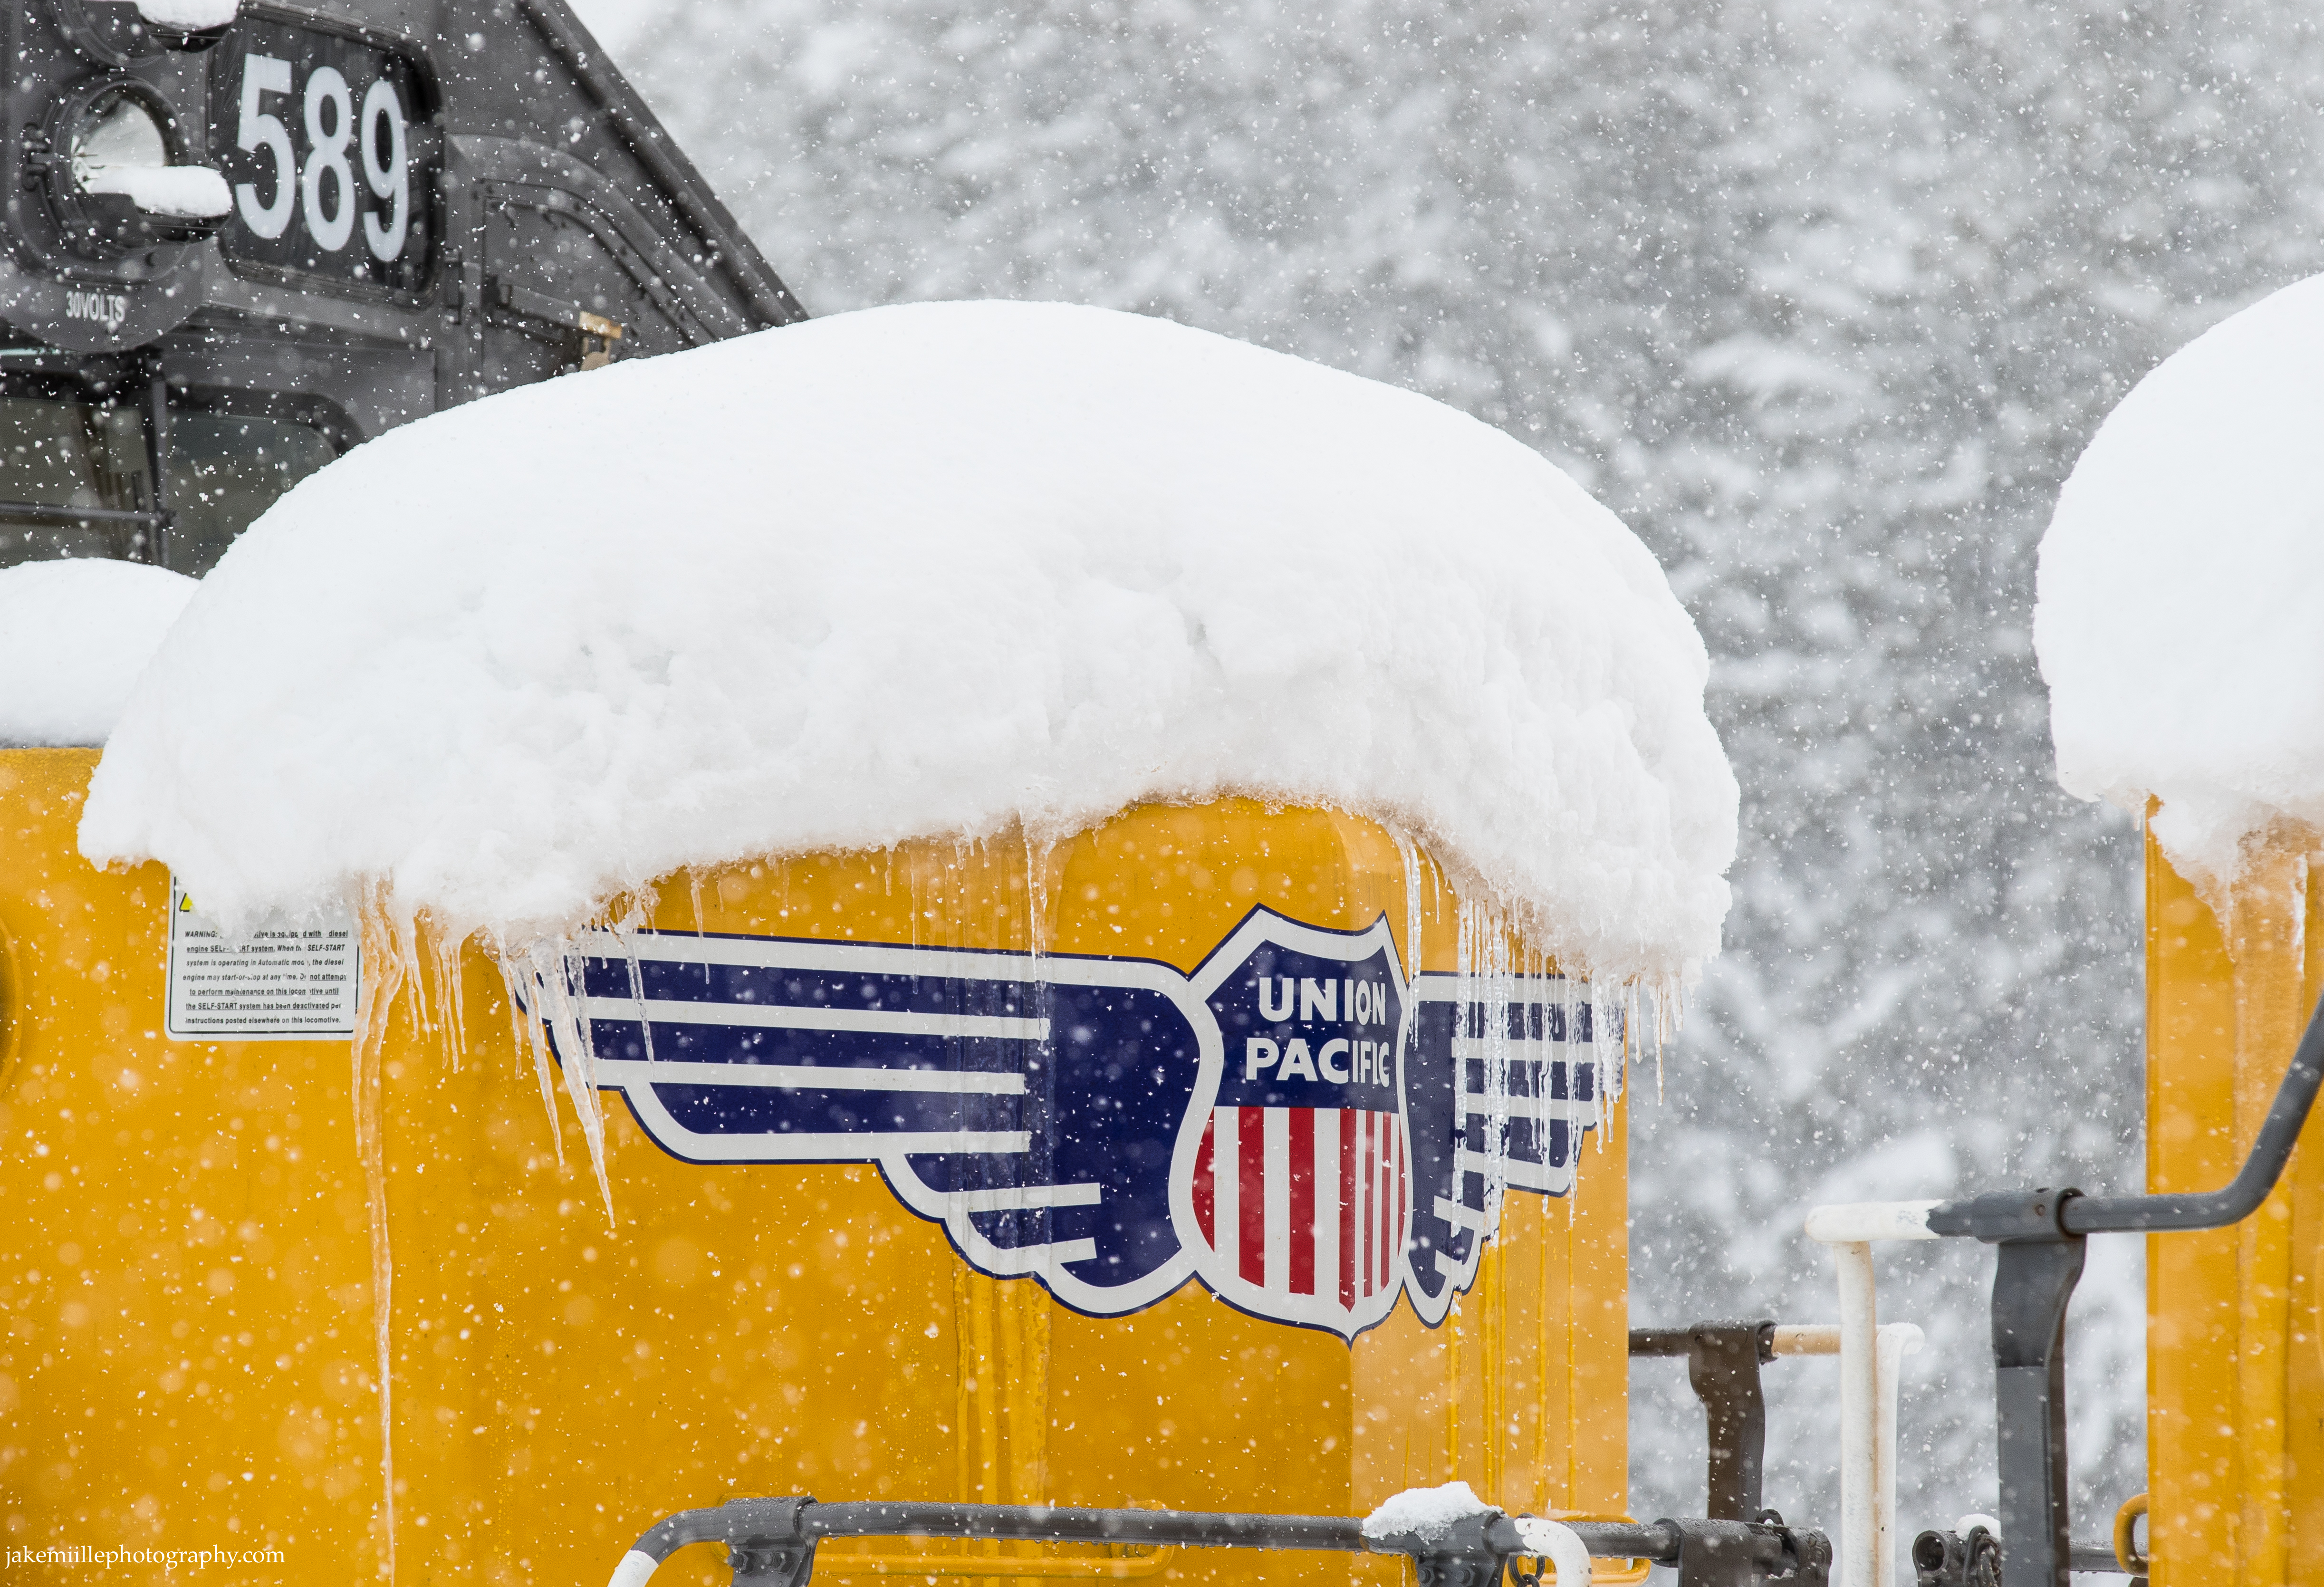
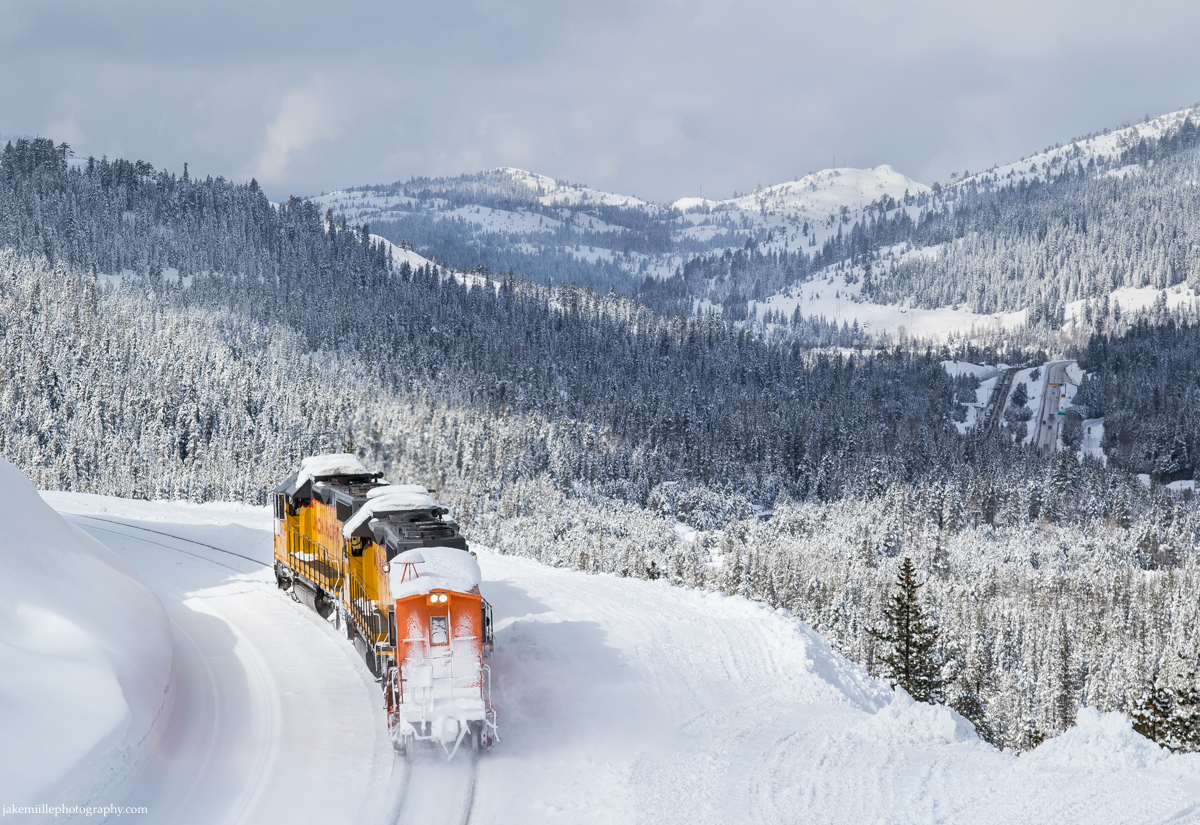
A westbound flanger exits the Norden snow shed after crossing over from main track #1 to #2. Notice how the crossover in the foreground is protected from snow and ice. The Union Pacific ZG2OA meets the MRVNP at the Norden snow shed. An old set of US&S searchlight signals guarded this crossover until November of 2021. Union Pacific 7952 enters the Norden snow shed as it drags a heavy manifest east. A BNSF trackage rights train exits the safe confines of the Norden snow shed and begins a long, cold journey down Donner Pass. Emerging from the snow shed at Norden, Union Pacific 569 leads an eastbound flanger towards the summit.
Flangers
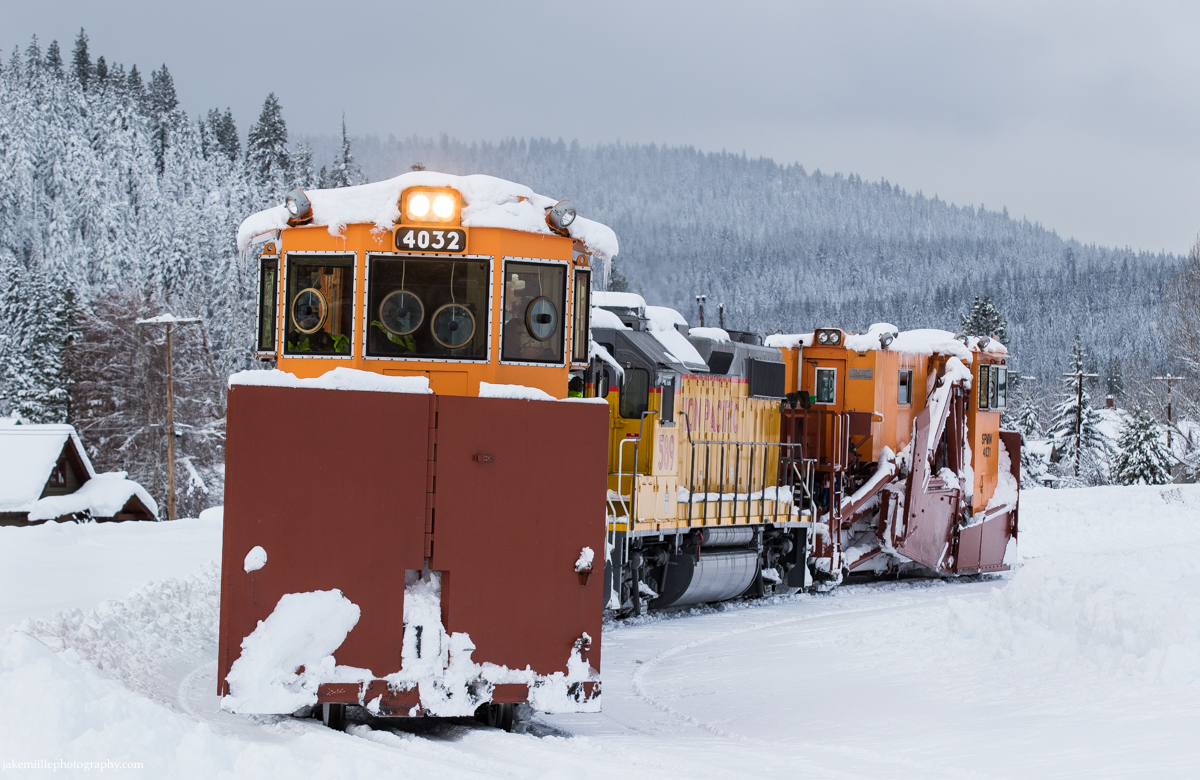
Today, the railroad’s “first line of defense” against snowstorms are the flangers. To the untrained eye, a flanger may appear to be a caboose. A flanger is designed to clear snow and ice from between the rails (where the wheel flange fits). Flangers have two blades, one which throws snow to the left and one which throws snow to the right. As soon as snow starts to accumulate, the flangers will begin making “flips” between Truckee and Fulda. Two specially designed “balloon tracks” allow the flangers to go back and forth without having to make reverse movements. Flangers are relatively lightweight, therefore they are more susceptible to derailment during reverse moves.
Under stormy skies, an eastbound flanger heads through Yuba Pass, California. This is very close to where the “City of San Francisco” became snowbound in 1952.
During winter storms, flangers will often “escort” trains over the pass. By running a flanger just ahead of a freight or passenger train, the railroad can ensure the tracks remain safe and clear of snow. Often, flanger crews are on duty for 12 hours, making flips between Truckee and Fulda. The best bet to see a flanger is just ahead of Amtrak’s California Zephyr. Due to the high priority and sensitivity of these trains, a flanger will almost always escort the California Zephyr over Donner Pass (during winter storm months).
Besides clearing snow, flangers are also equipped with icicle breakers atop the locomotives. These metal structures prevent the buildup of icicles near tunnel portals and snow sheds. Flanger crews also provide critical, first hand intelligence on mountain conditions. While the railroad utilizes experienced meteorologists, it can be important to have “boots on the ground” who can report on the current weather conditions.
A westbound flanger clears main track #1 near Soda Springs, California. The flanger is throwing left onto track #2. On the return trip to Truckee, the flanger clear track #2.
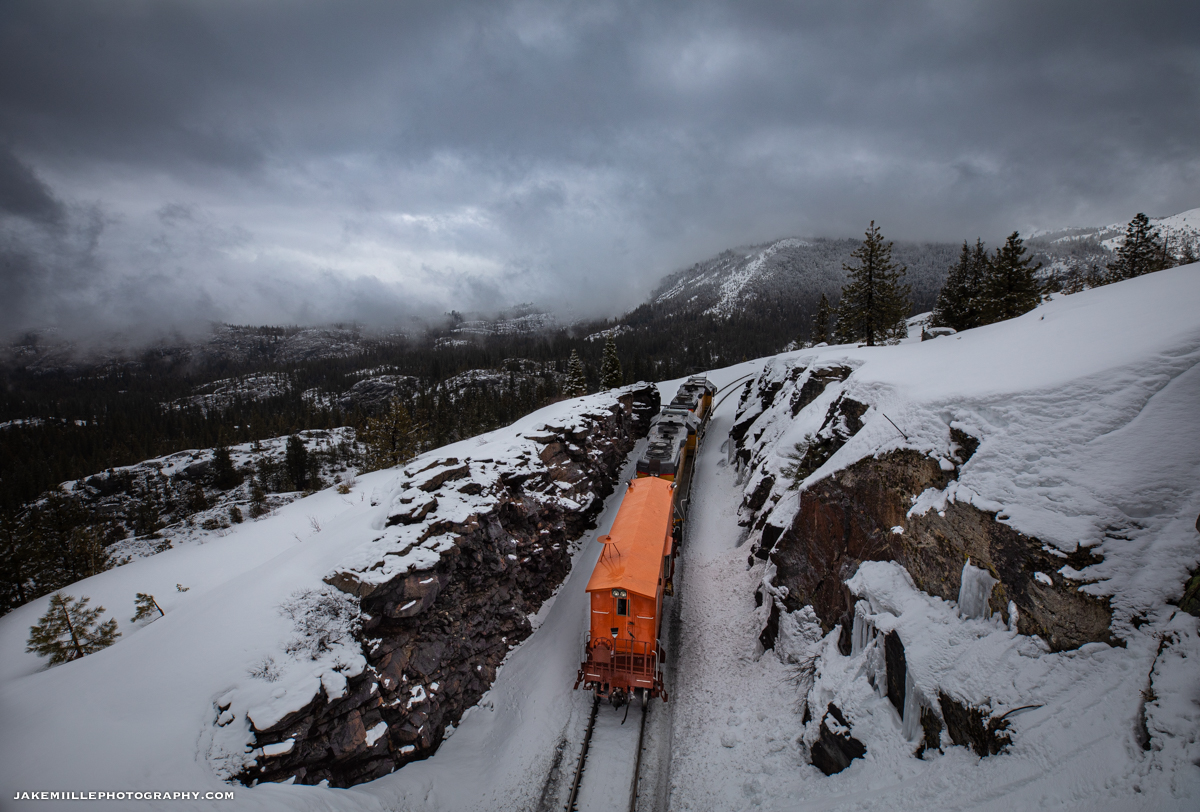
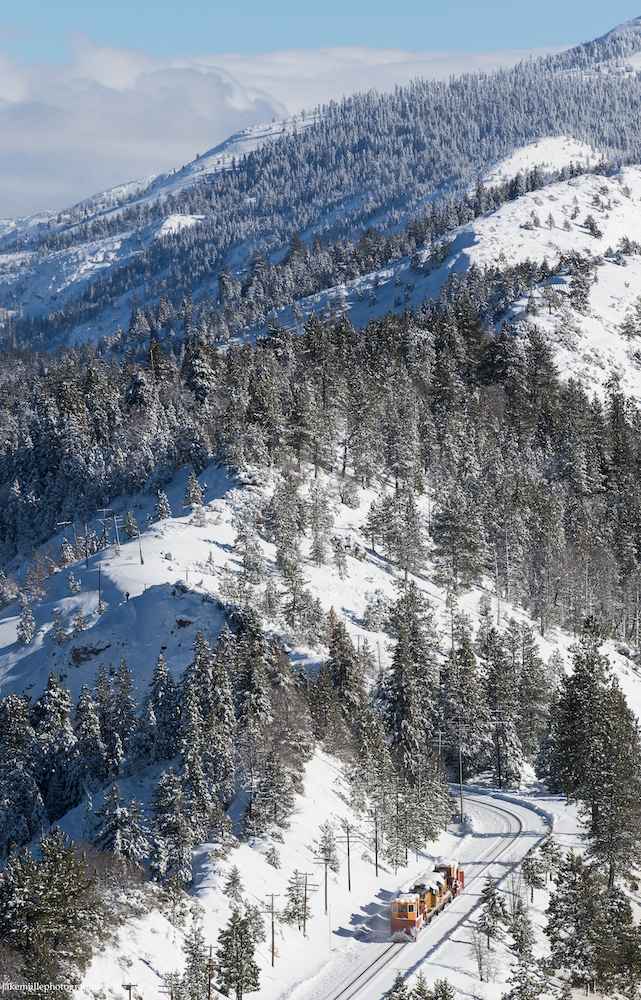
Under stormy skies, an eastbound flanger patrols Donner Summit near Norden, California.
An early morning flanger exits Tunnel 35 near Yuba Pass, California.
Catching some late afternoon sun, an eastbound flanger ducks into Tunnel 36 at Yuba Pass.
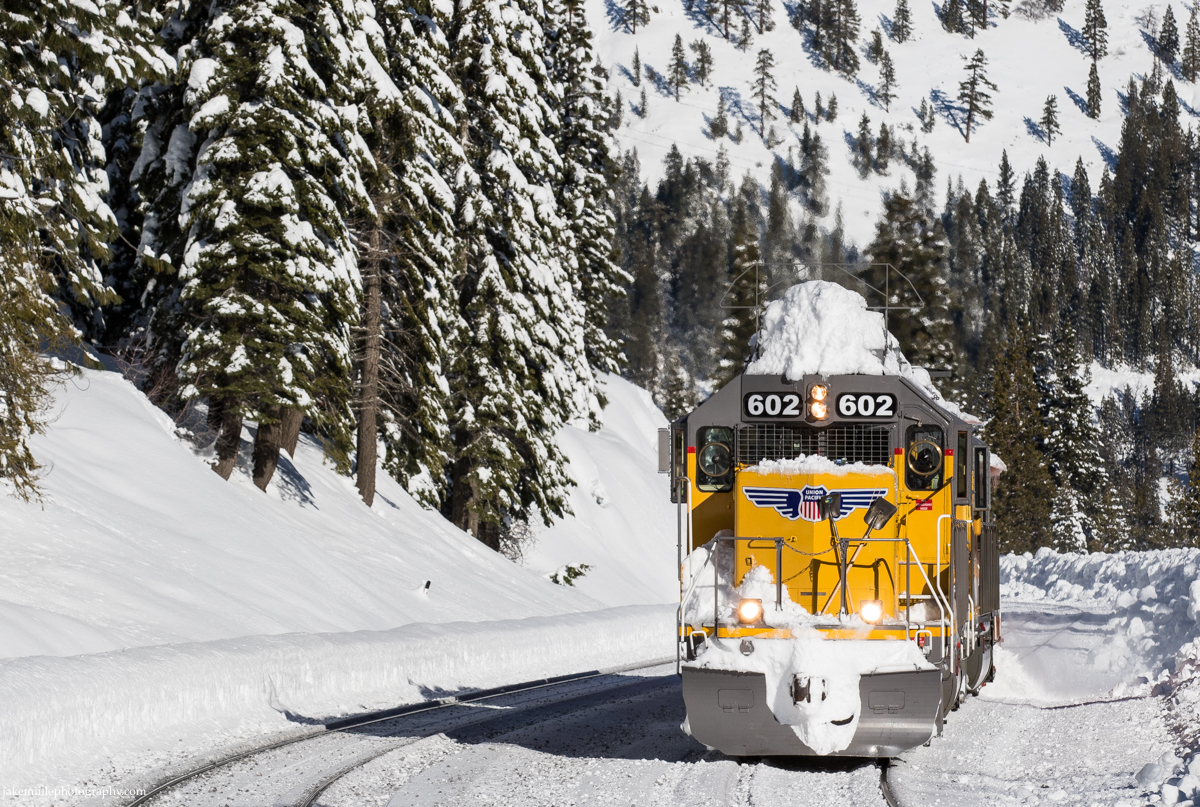
After a night of heavy snow fall, a flanger heads east through Cisco under sunny skies. Notice the icicle breaker atop the UP 602.
On a frosty winter morning, a westbound flanger escorts a Z train through Troy, California.
The flangers on patrol during another snowy afternoon in the High Sierras.
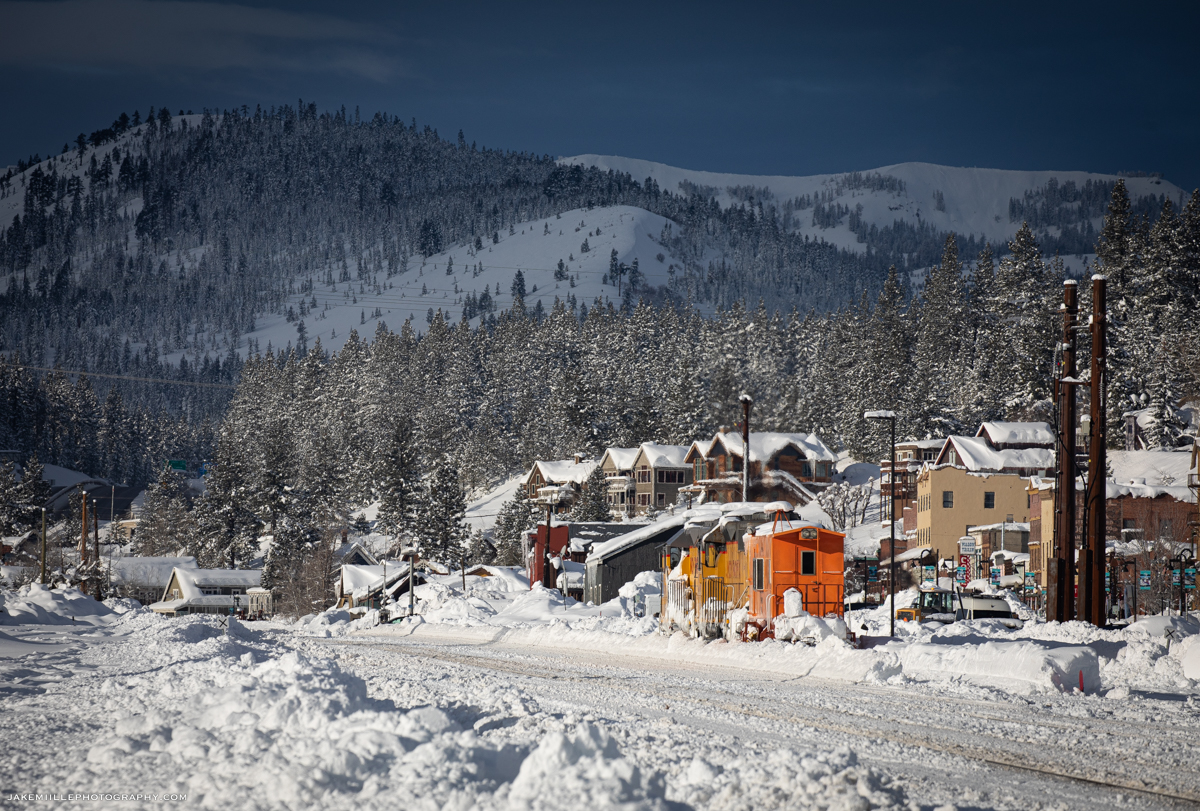
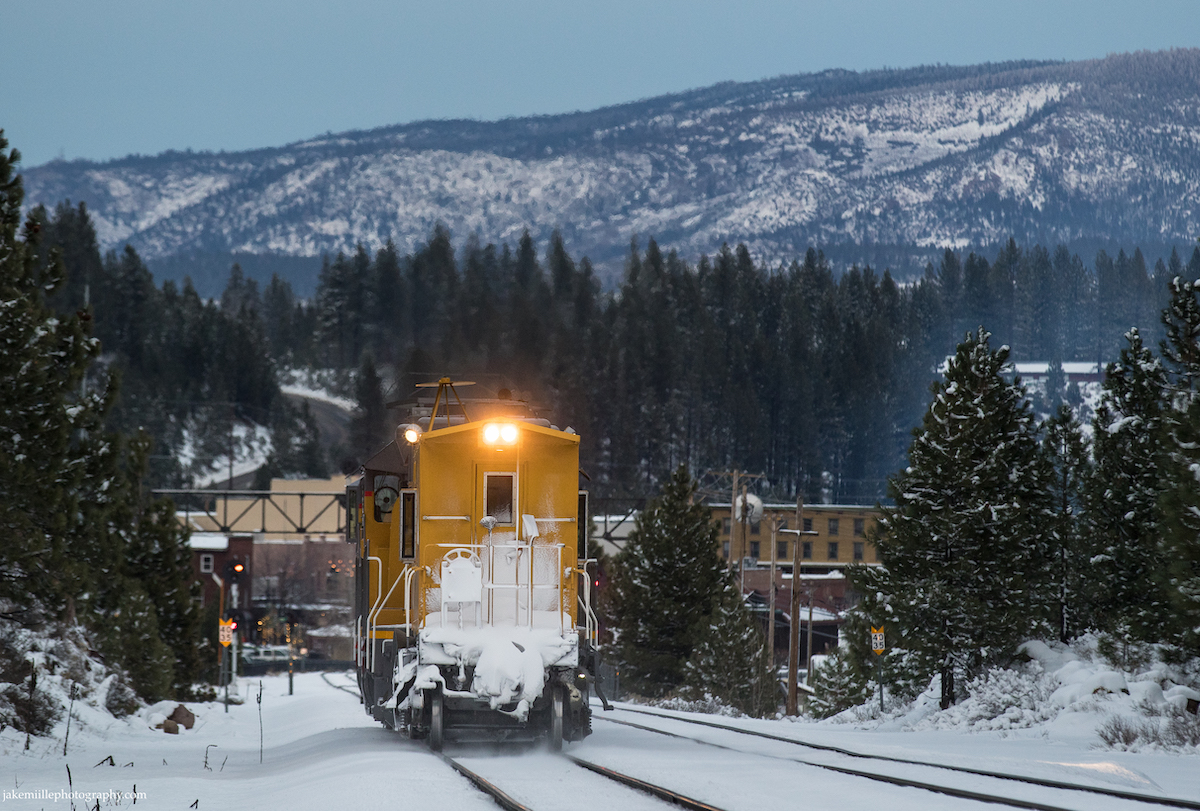
A late evening arrival into Truckee after a long day of snow fighting.
Snow fighting does not stop when the sun goes down. A westbound flanger leaves Truckee for a long night of snow fighting.
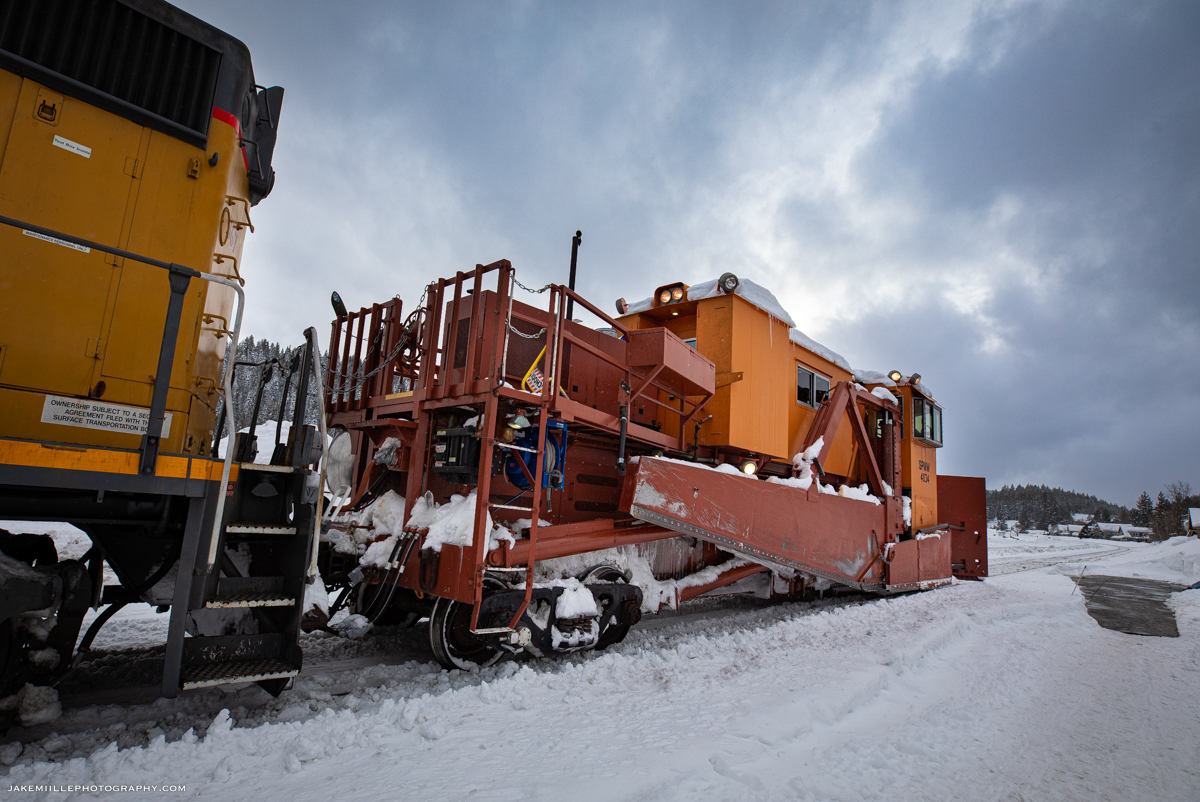
Spreaders
While flangers clear snow from around tracks, they do not clear the entire right-of-way. As snow builds up along the roadbed, Union Pacific will call in the spreaders. These massive snow plows use powerful, hydraulic arms to clear snow away from the tracks. Preventing snow build up along the tracks can help keep the railroad open after several days of heavy snow.
The spreaders are huge machines capable of moving walls of heavy snow away from the tracks.
In some locations, the spreaders are able to push the snow directly off a hillside. This helps prevent the “tailings” from building up and creating a solid wall of snow. Where there is not a hillside, Union Pacific utilizes “snowcats”. Snowcats are fully tracked vehicles that are designed to operate in snow. They are equipped with plows, which allow them to clear the tailings left by the spreaders.
Snowcats and spreaders have become a very effective combination for snow removal.
The spreaders have unique operations. They can usually be found operating between Truckee and Shed 10 during or just after a heavy snowstorm. Two spreaders are typically staffed and go on duty around 4am. “Truckee Snow” will take both mainlines out-of-service as the spreaders work west. The spreaders work in conjunction with each other, clearing both mainlines. After they arrive at Shed 10, one spreader set will head back to Truckee while the other will continue to Switch 9 or Fulda (clearly the single track portion between Shed 10 and Switch 9). On the way east, the spreaders will often stop to fuel & service generators and the snowcats.
The spreaders head around the balloon track at Truckee. Check out the various design features which allow this machine to move a tremendous amount of snow.
Notice how the spreaders are equipped with hydraulic “arms”, allowing crews to remove snow well away from the tracks.
Dual spreaders roll along the Truckee River as they race back towards Snow HQ.
The sheer size of the Sierra Nevada Mountains dwarf the spreaders as they head west into Emigrant Gap.
The spreaders head east along the Truckee River during an unusual trip east of Truckee. The Eastern Sierra often receives less snowfall than the western slope due to the rain shadow effect.
Dual spreader sets make a late evening appearance in Truckee after an unusual trip east to Boca. Due to heavy snow in December of 2021, spreaders were also needed east of Truckee.
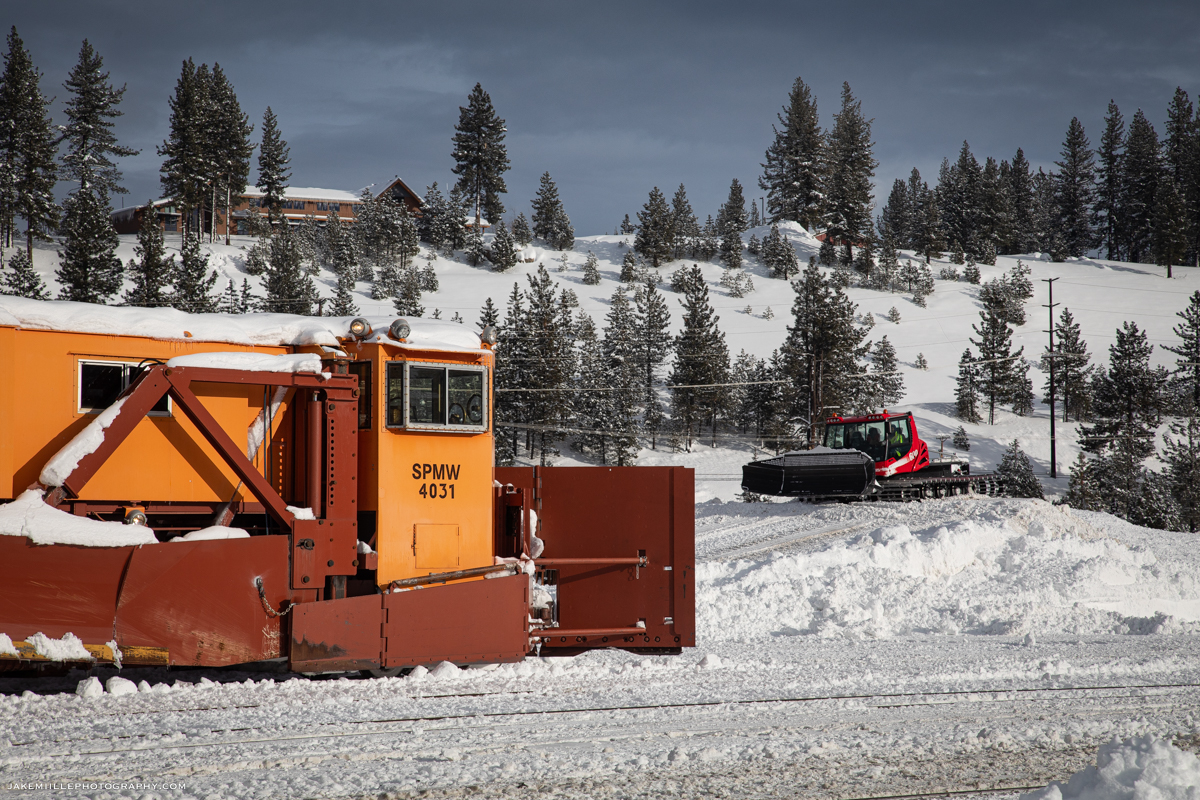
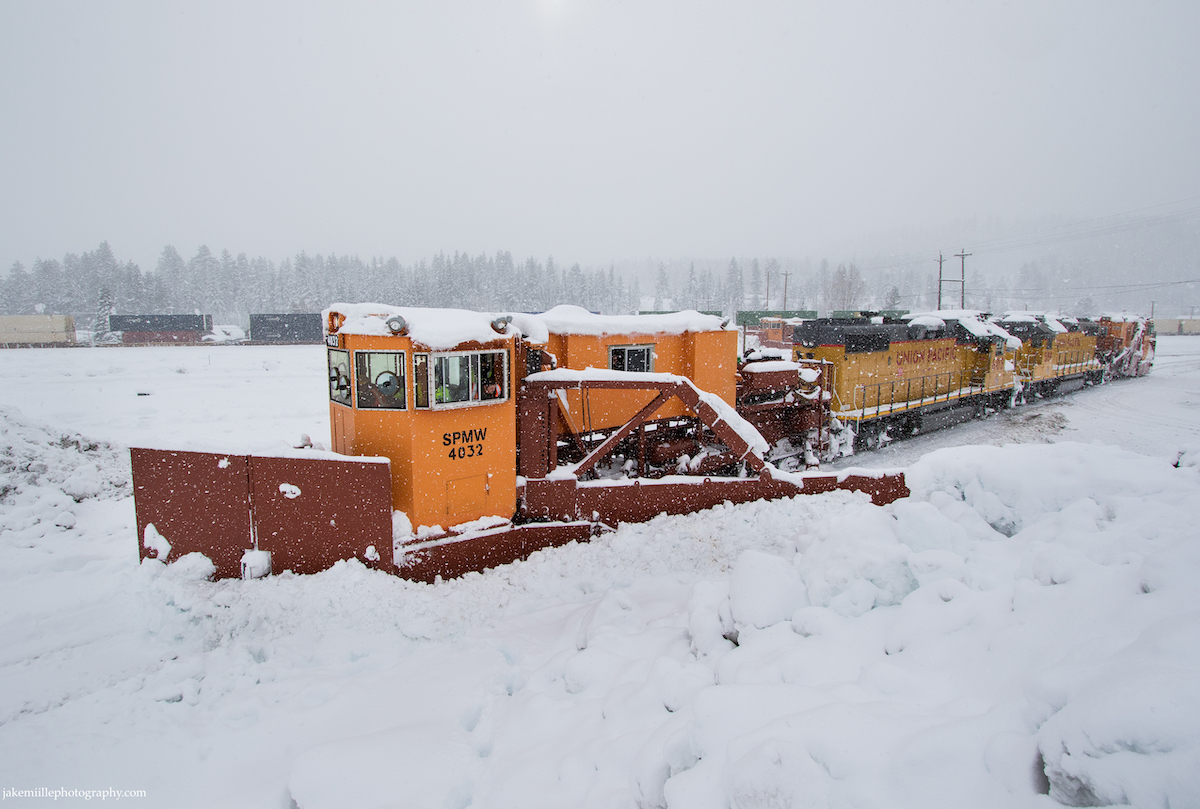
After a day of spreading snow, SPMW 4030 heads east through Soda Springs. Hot on its tail is an eastbound Z train which was delayed due to snow fighting operations. Union Pacific’s Roseville Sub Dispatcher is anxious to get trains moving.
The orange coloring of Union Pacific’s spreader sets make them easy to spot in snowy conditions.
Most winters, the spreaders, flangers and snowcats are enough to keep the railroad open. When conditions get really tough, Union Pacific has to go to the last line of defense.
Rotaries
The iconic rotary snowplows are the railroad’s last hope during fierce winter storms. Although the flangers and spreaders work tirelessly throughout the winter months, their efforts are not always enough. As snow accumulates beyond the pace of the spreaders, the rotaries are called to the rescue. Years of service in the harshest conditions have made the rotaries somewhat of a legend along the railroad.
“They were sometimes called war wagons” said retired Southern Pacific superintendent Bill Lynch, “going to war against Mother Nature.”
Historically, the rotaries have only been called out once every ten years or so. During a historic winter in February of 2017, Union Pacific called upon the rotaries to clear snow from the Donner Pass Route. Union Pacific issued the following special statement to their customers:
“To Our Customers,
Union Pacific’s most powerful snow-removal machine, the rotary snow plow, was in full operation this past weekend during the third snowiest winter in the Sierras in recorded history. The plow cut through snow that reached depths of 13 feet, across 14 miles near the Donner Pass. The railroad’s first and second lines of defense against snowstorms – flangers and spreaders – were unable to keep the tracks clear due to the depth of snow walls, so the rotary was required to clear large amounts of snow in a timely manner.
We have three one-of-a-kind rotary snow plows to use as needed during winter months. Union Pacific’s plows were originally built in the 1920s and operated by steam, then overhauled and converted to diesel electric in the 1950s. In 2012, we made the first major makeover in more than 60 years to one rotary plow enhancing its productivity, reliability and power. We plan to enhance another rotary plow in 2017.
Union Pacific is working diligently during the winter months to keep our lines cleared of snow and ready for your business.”
The powerful rotary snowplow works east through Troy, California.
SPMW 207 shows off its impressive “throw” as it cuts through heavy snow at Norden.
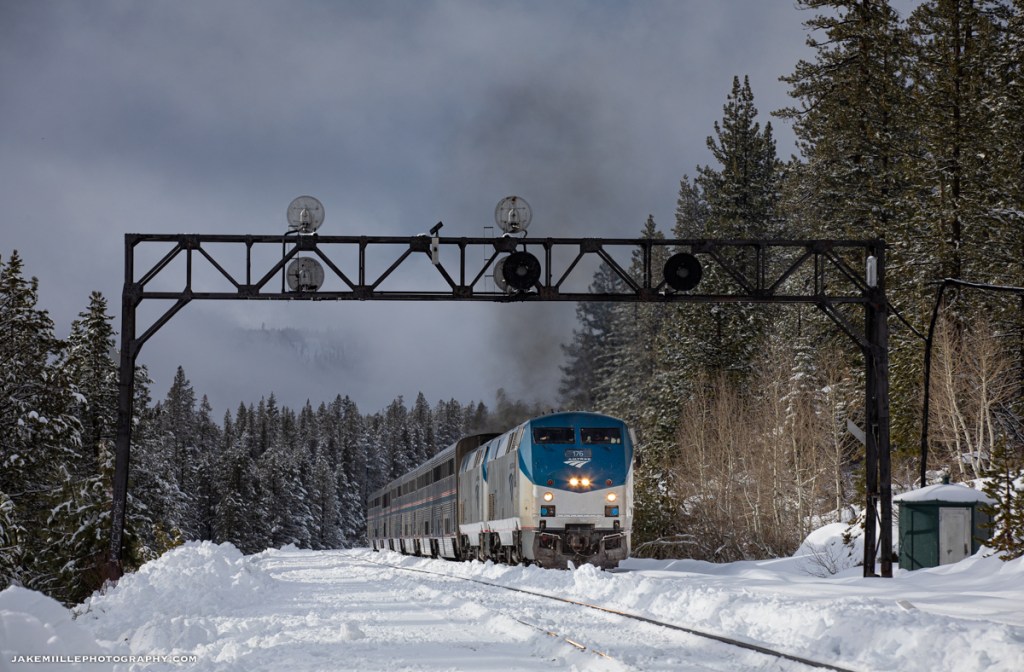
As the rotaries work to clear snow from the Donner Pass Route, Amtrak’s eastbound California Zephyr rolls by on main track #2 at Norden.
The unique design of the rotary snowplow makes it quite the spectacle.
Without snow fighters, this critical transportation corridor would be cut off.
A late winter evening finds the SPMW 207 (rotary) is in the siding at Emigrant Gap. Meanwhile, a westbound manifest heads down main track #1 while an eastbound grain train waits at Switch 9.
The rotary snowplows are incredible pieces of machinery. Their power is unmatched and is called upon during the worst conditions. If you have the opportunity to see a rotary in action, it will be a memorable experience.
Railroad Photography Tips
An old Norwegian saying… “There is no such thing as bad weather, only bad gear.”
Safety
As always, remain a safe distance away from the tracks. Remember that these trains are designed to move snow, and therefore a normally safe distance away from the tracks may be inadequate. Always prepare for snow & ice tailings coming from flangers, spreaders and rotaries.
Conditions on the Donner Pass Route can change quickly. Often times, road conditions will deteriorate first. Make sure your vehicle is winterized. In addition to having a full tank of gas, it is important to carry tire chains, extra winter clothing, food and water. Stay up to date on road conditions by googling “CalTrans Road Conditions”.
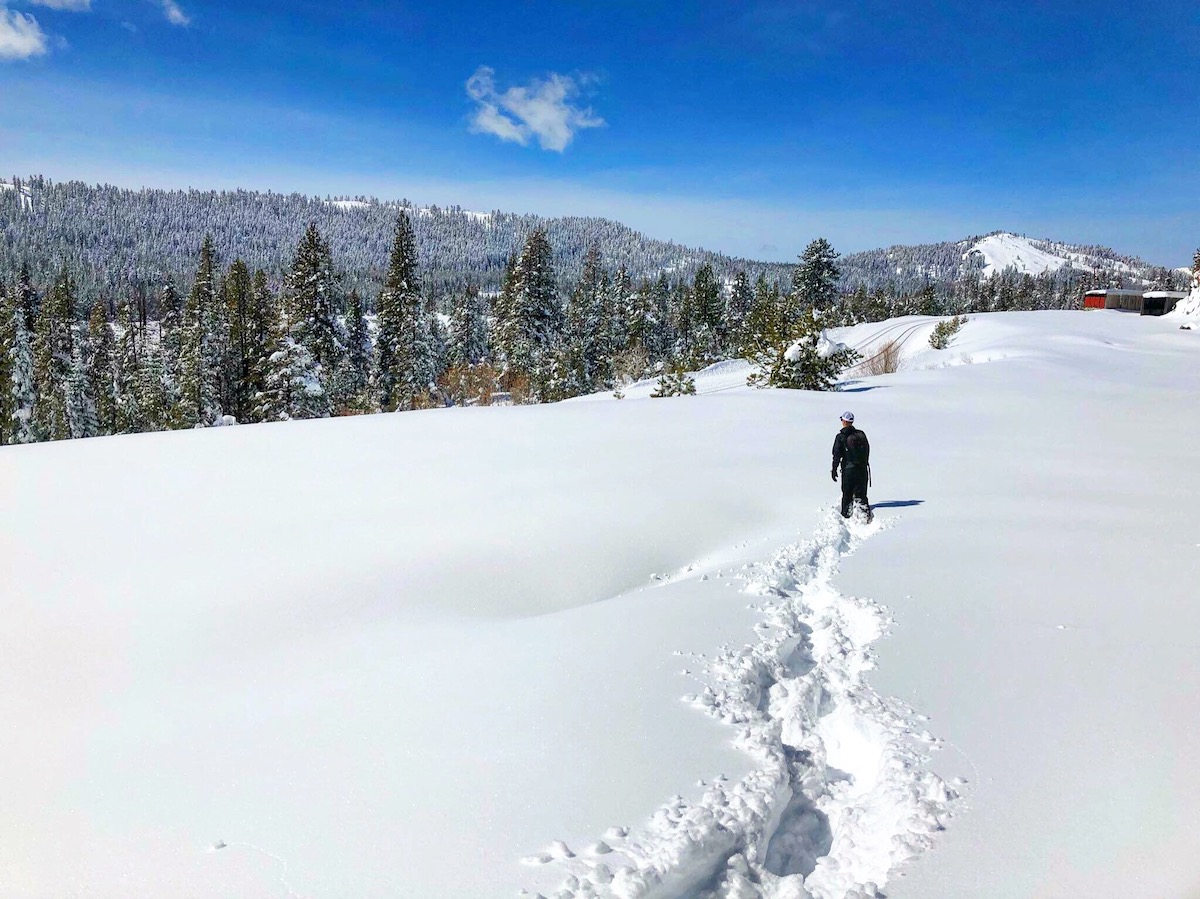
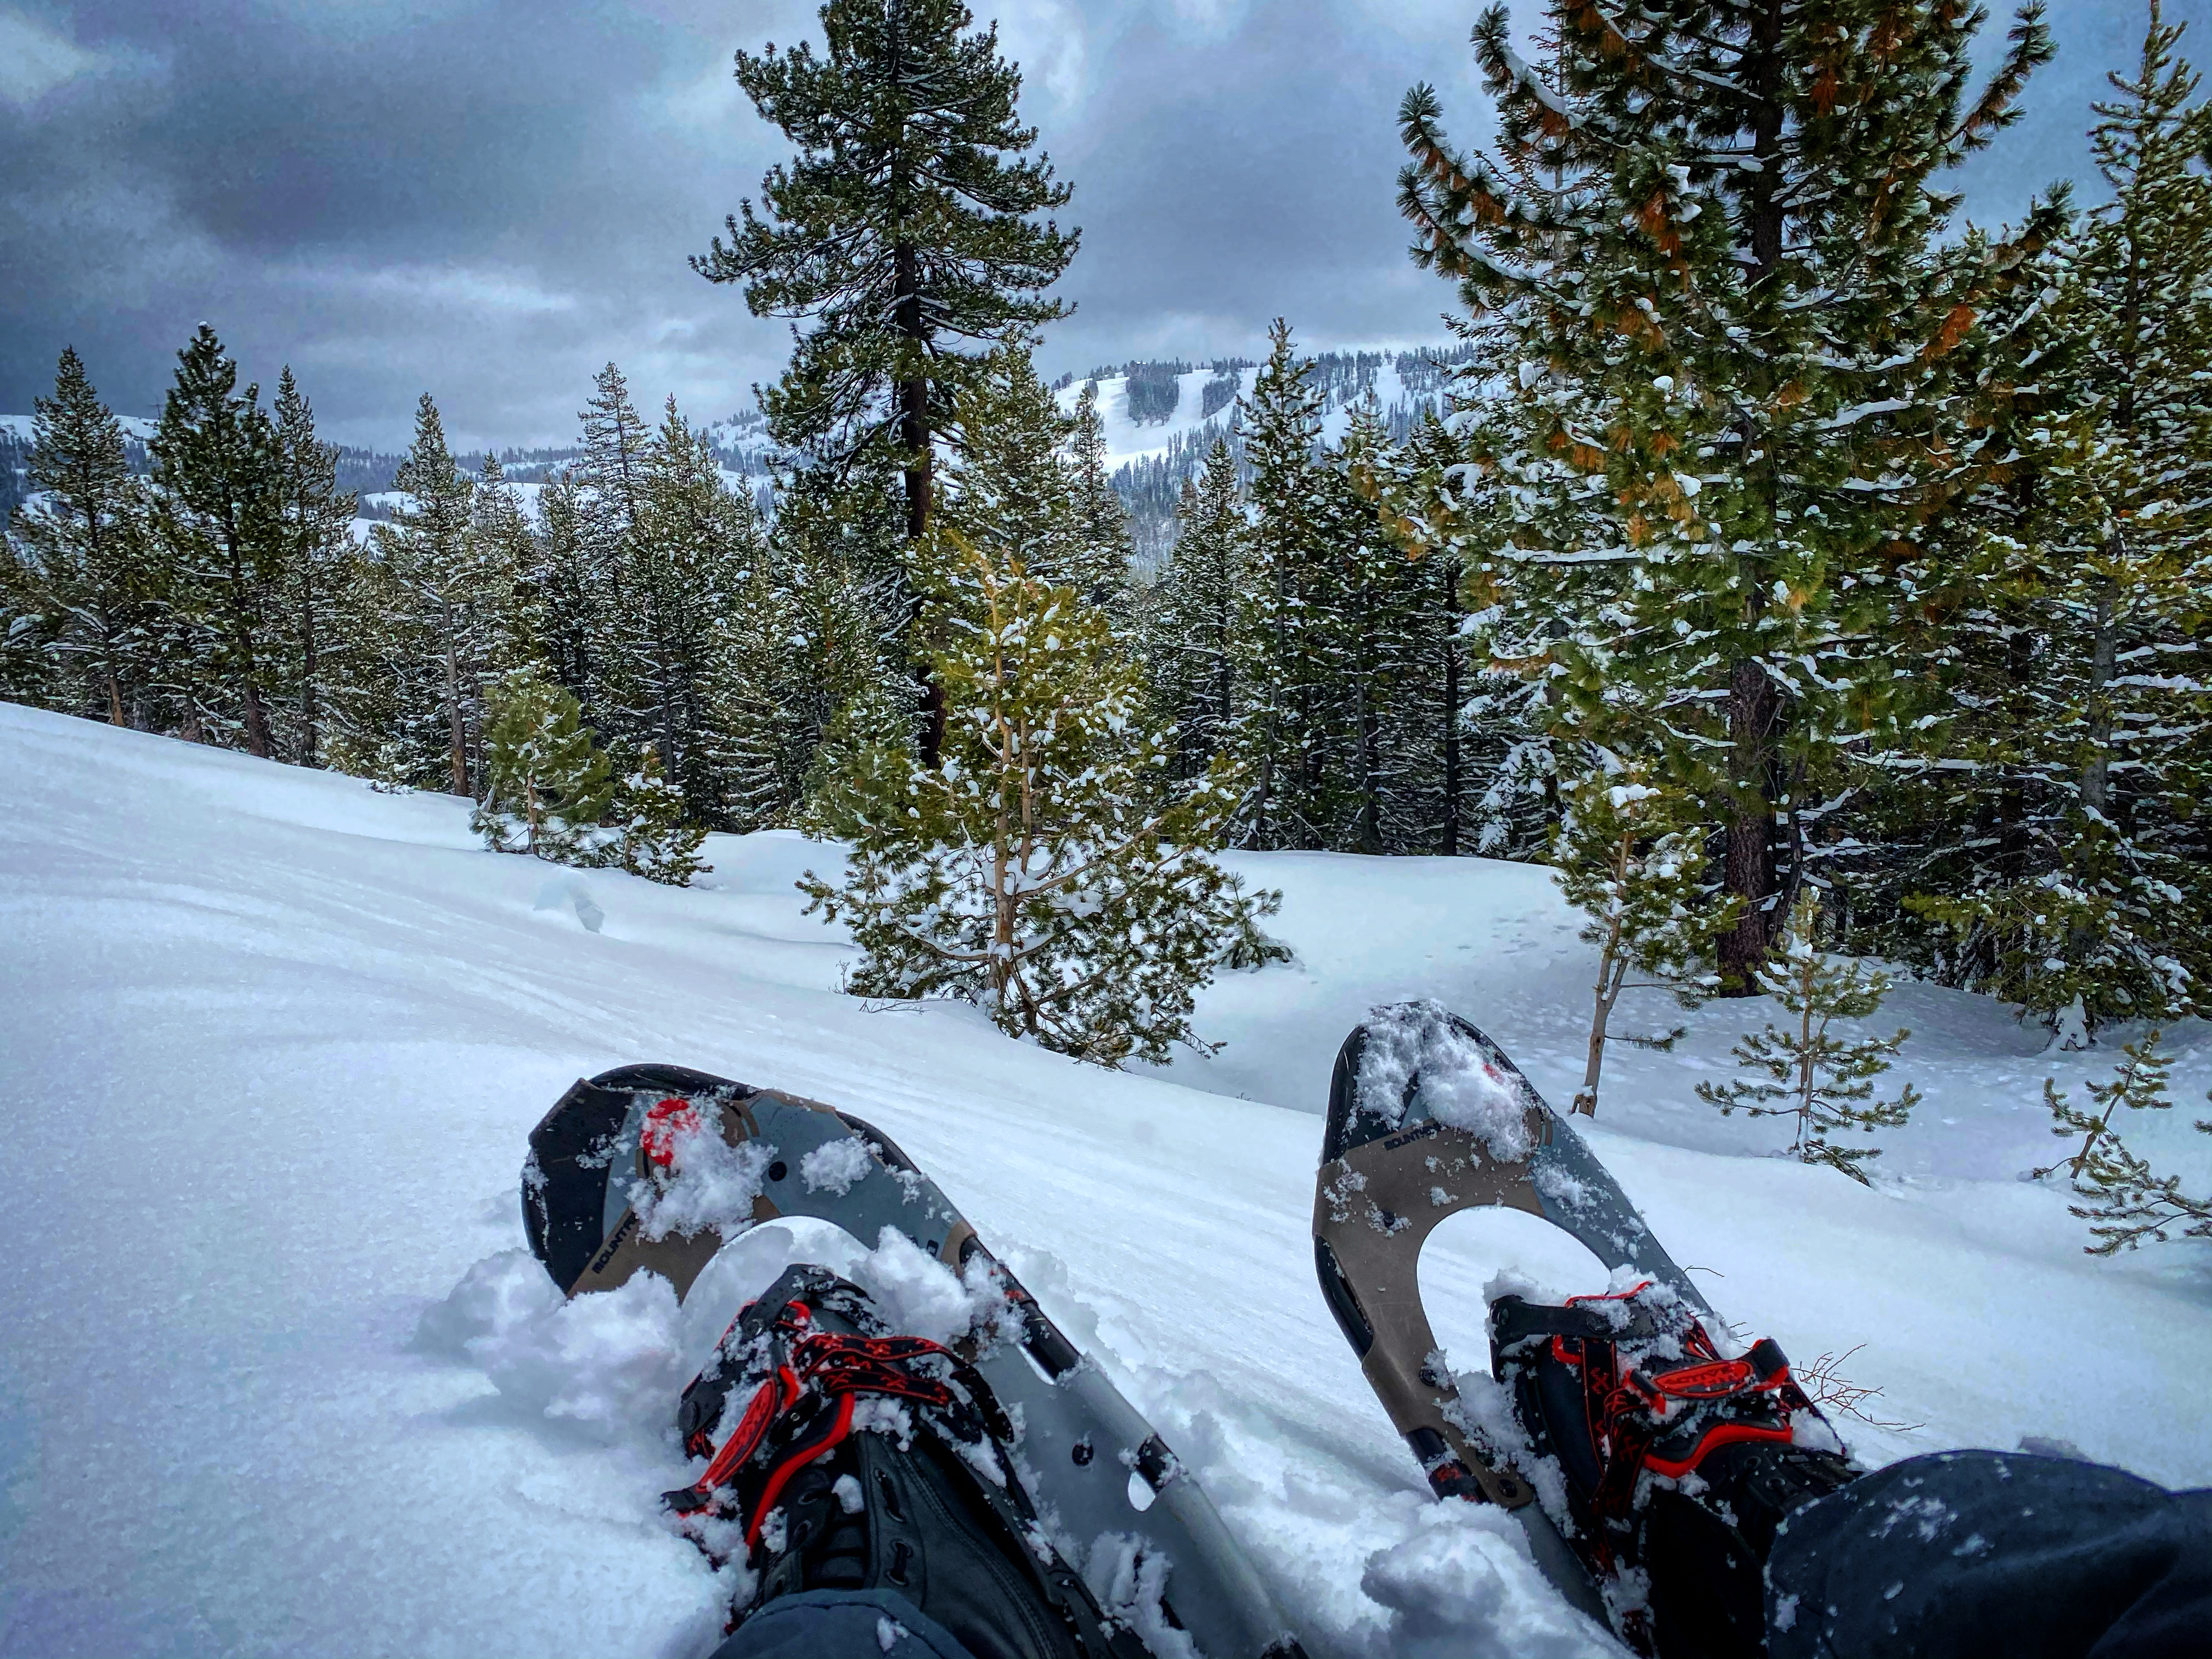
A midmorning hike through fresh snow at Norden.
Equipment
Photographing snow fighting operations can require additional equipment in order to be successful. Remember, if you are not comfortable, your images and creativity are going to suffer. Plan ahead!
Make sure you have proper snow attire. Wearing waterproof, insulated snow boots along with heavy winter socks will keep your feet warm. Waterproof snow pants, jackets and gloves are also critical. When it comes to staying warm, layers are the key. A beanie and/or hat can help keep your head and ears comfortable as well.
Snowshoes will make your life much easier while hiking in snow-covered terrain. Most of the Donner Pass Route is inaccessible by car during the winter months. In order to access desirable photo locations, snowshoes are a must-have. I use the Tubbs Mountaineering Snowshoes. While pricey, they are built for extreme environments and will keep you safe. Check them out: https://tubbssnowshoes.com
The best adventures start on snowshoes.
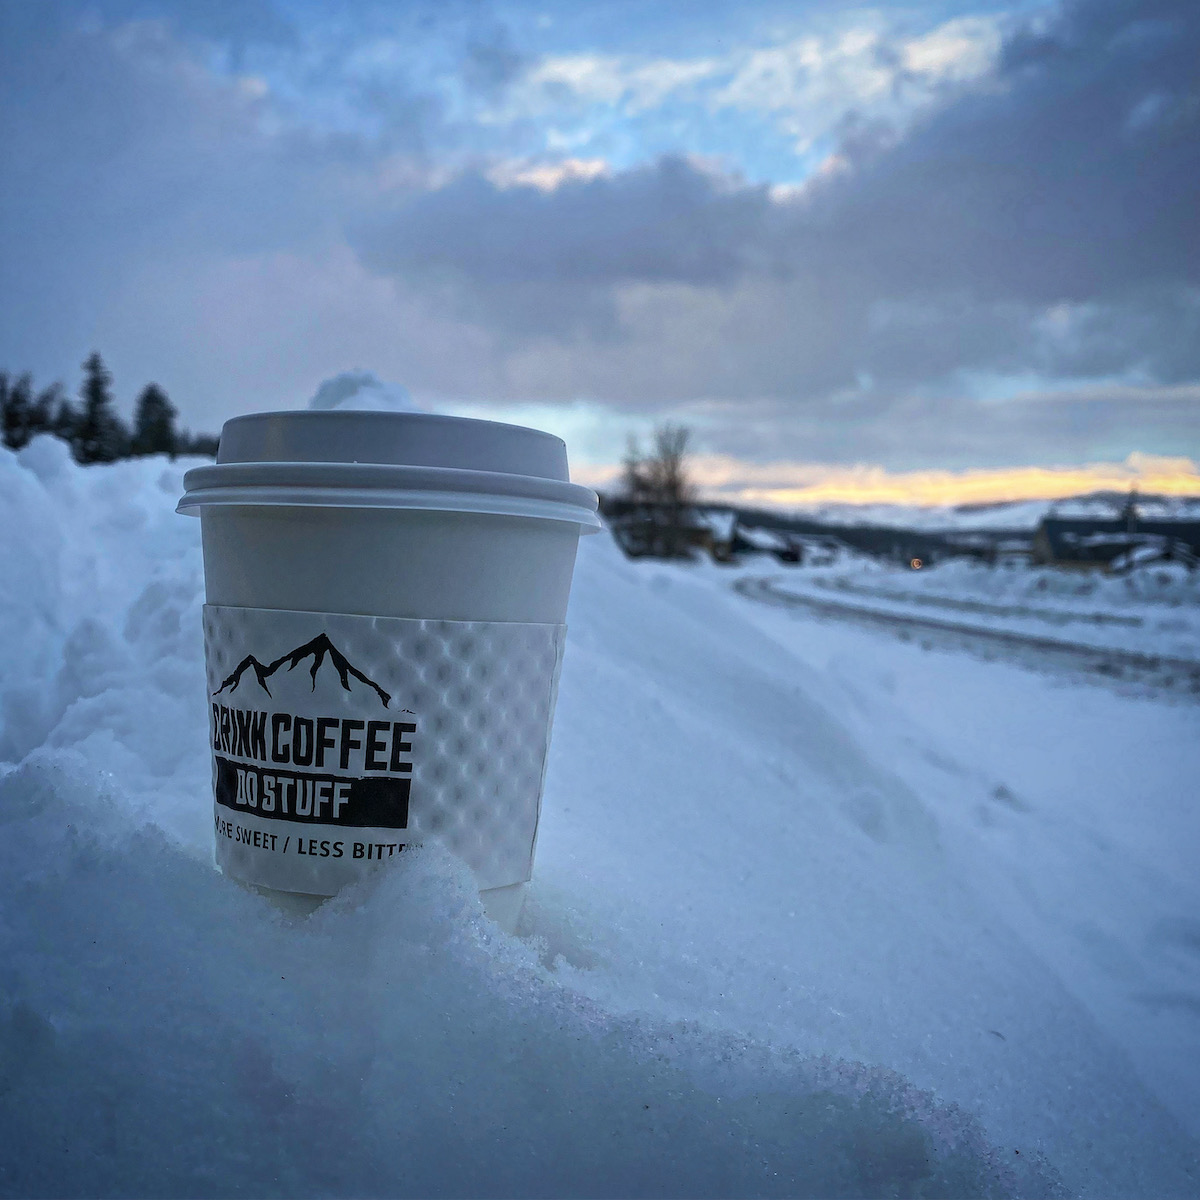
A hot cup of coffee on a cold morning can help take the chill out of the air. Support local businesses.
A waterproof camera bag and water-resistant camera equipment will keep your gear safe. There is an inherent danger of using electronic equipment in bad weather. Water and ice can wreak havoc on your equipment if it is not properly protected. Invest in a good camera bag that is easy to wear and will protect your equipment. I trust LowePro: https://www.lowepro.com
Radio Communications
Radio communications can be very useful during snow fighting operations. There is often additional radio traffic between trains, Truckee Snow HQ and UP Omaha Dispatcher 9. Being able to hear and understand radio traffic will make you more successful trackside.
Radio Frequency: 160.320
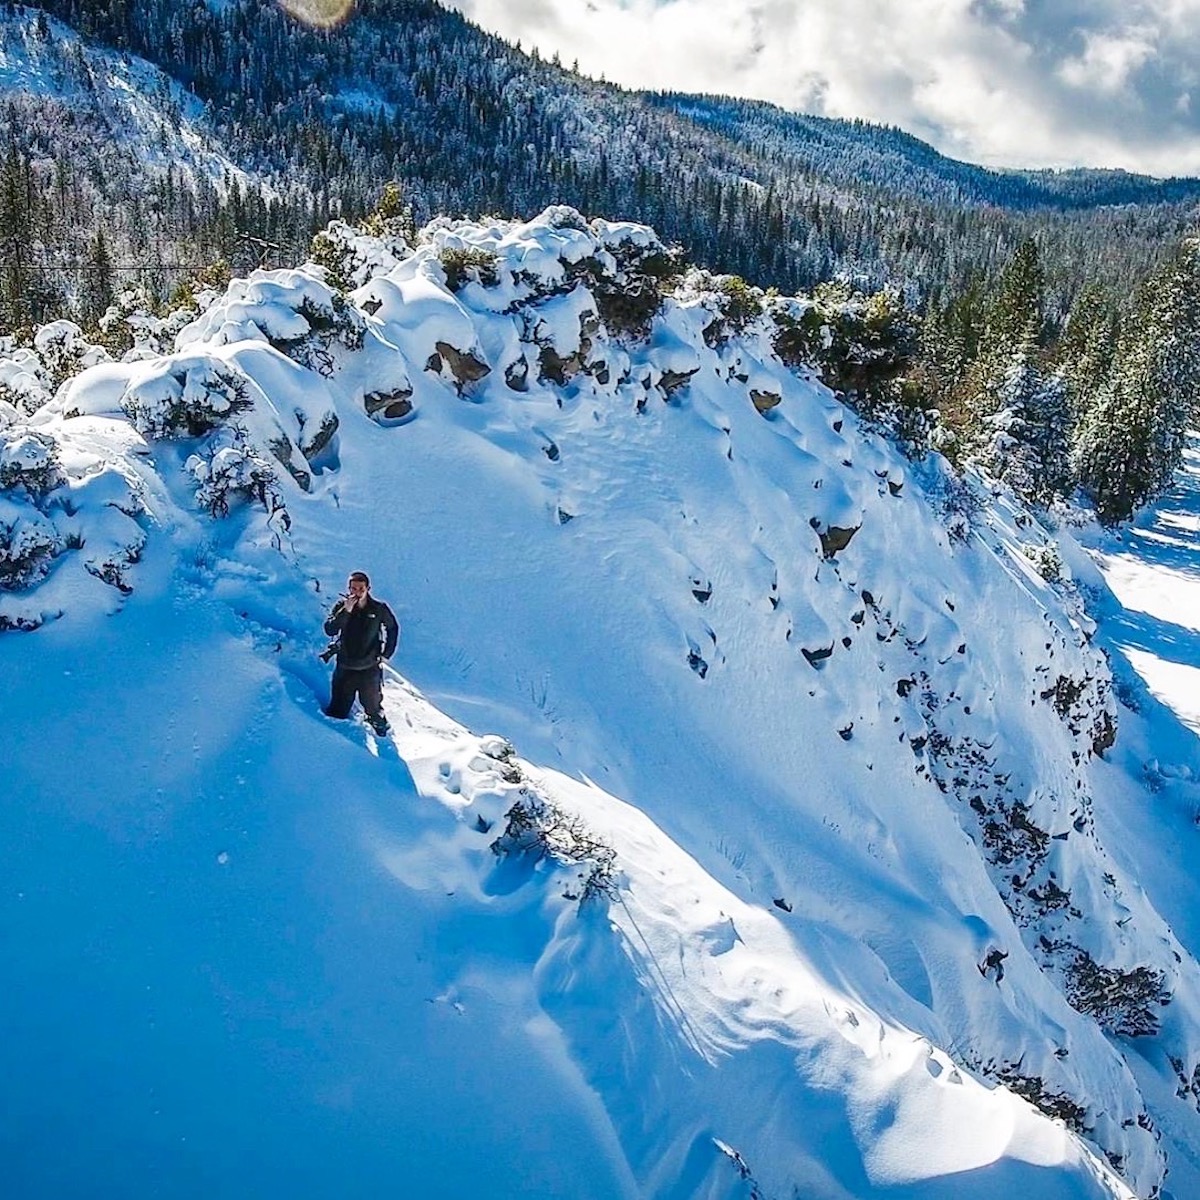
On a mountain while waiting on a train.
Closing Out
I hope this article provided insight into snow fighting operations along the Donner Pass Route. As always, if you have any questions, please send me a message. Find “Contact Jake” on my website and I will happily get back to you.
Finally, I would like to thank the Union Pacific snow fighting crews. While many folks are at home enjoying the holidays, the snow fighters are working around the clock to the keep the railroad open. It is a difficult job, but they have always displayed a great deal of professionalism and pride in what they do. I’ll see you guys out there soon!
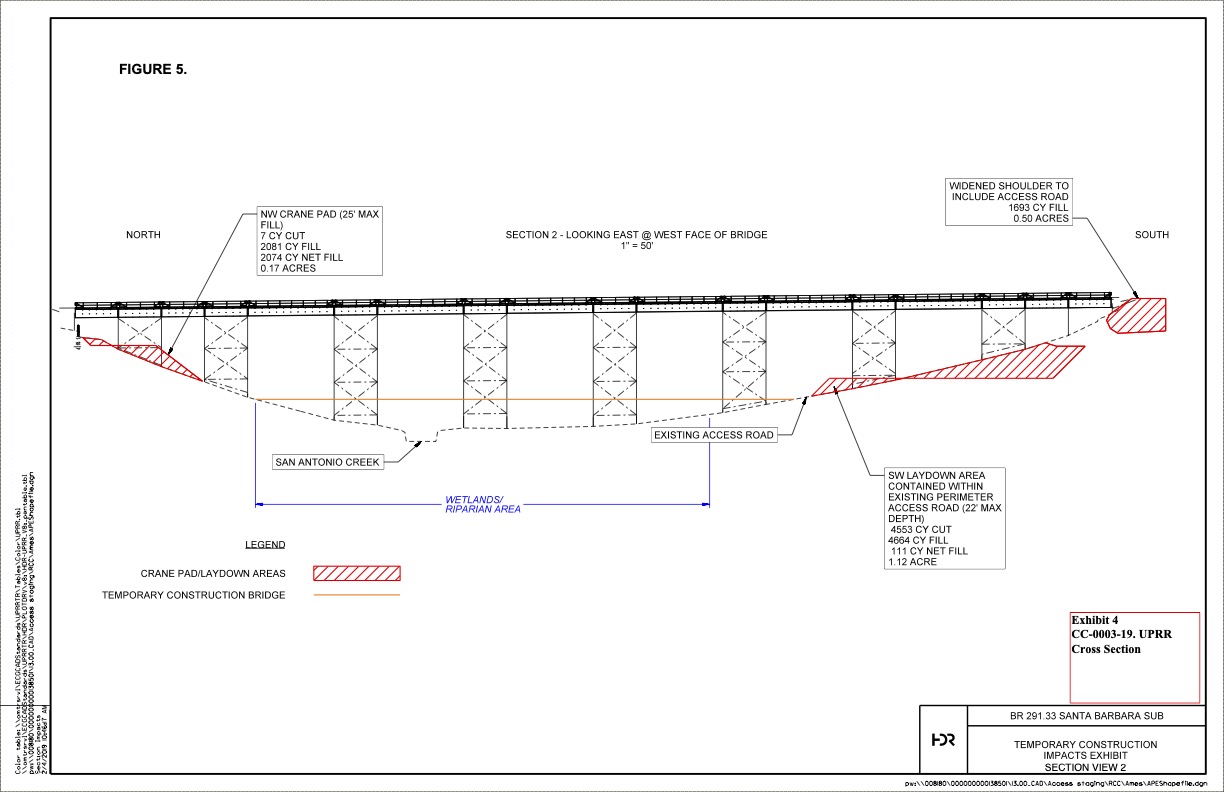
During August of 2021, Union Pacific began a bridge replacement project along the Santa Barbara Subdivision near Narlon, California (Vandenberg Air Force Base; between Guadalupe and Santa Barbara). The original bridge, built in 1896, spanned the San Antonio Creek and was 720-feet long. Due to the age and condition of the bridge, replacement was necessary in order to prevent future, unplanned service disruptions along the Coast Route.
Blueprint for the new San Antonio Creek Bridge. Courtesy of the California Coastal Commission.
During the replacement project, a hard closure of the Santa Barbara Subdivision was in effect at Narlon. No trains, including Amtrak’s Coast Starlight or Pacific Surfliner could traverse the route. Amtrak trains were annulled (canceled). Fortunately for Union Pacific, there is only one regularly scheduled freight train that travels through Narlon. The “Guadalupe Hauler”, or more simply “The Guad”, runs twice a week between Van Nuys and Guadalupe. It services many agricultural and industrial customers in the Santa Maria region. Some shipments include time sensitive, refrigerated produce cars.
With the line shutdown at Narlon, Union Pacific needed to detour The Guad. The only detour option was to send the train north towards San Luis Obispo (SLO). Once in SLO, The Guad would head north over the infamous Cuesta Pass.
Cuesta Pass is a 16 mile stretch of track which crosses the Santa Lucia Mountains between San Luis Obispo and Santa Margarita. Cuesta Pass is commonly known as the most difficult stretch of railroad on the entire Coast Route. It highlights five tunnels, many tight curves and a maximum grade of 2.2%.
During the Southern Pacific era, it was common to see freight and passenger trains traversing Cuesta Pass. Unfortunately, today is a different story. Union Pacific rarely utilizes Cuesta Pass for freight traffic, opting to send “thru trains” (from the Bay Area to LA) via the Central Valley and Tehachapi Pass. No local trains service this region either. Therefore, the only regularly scheduled rail traffic on Cuesta Pass is Amtrak’s Coast Starlight.
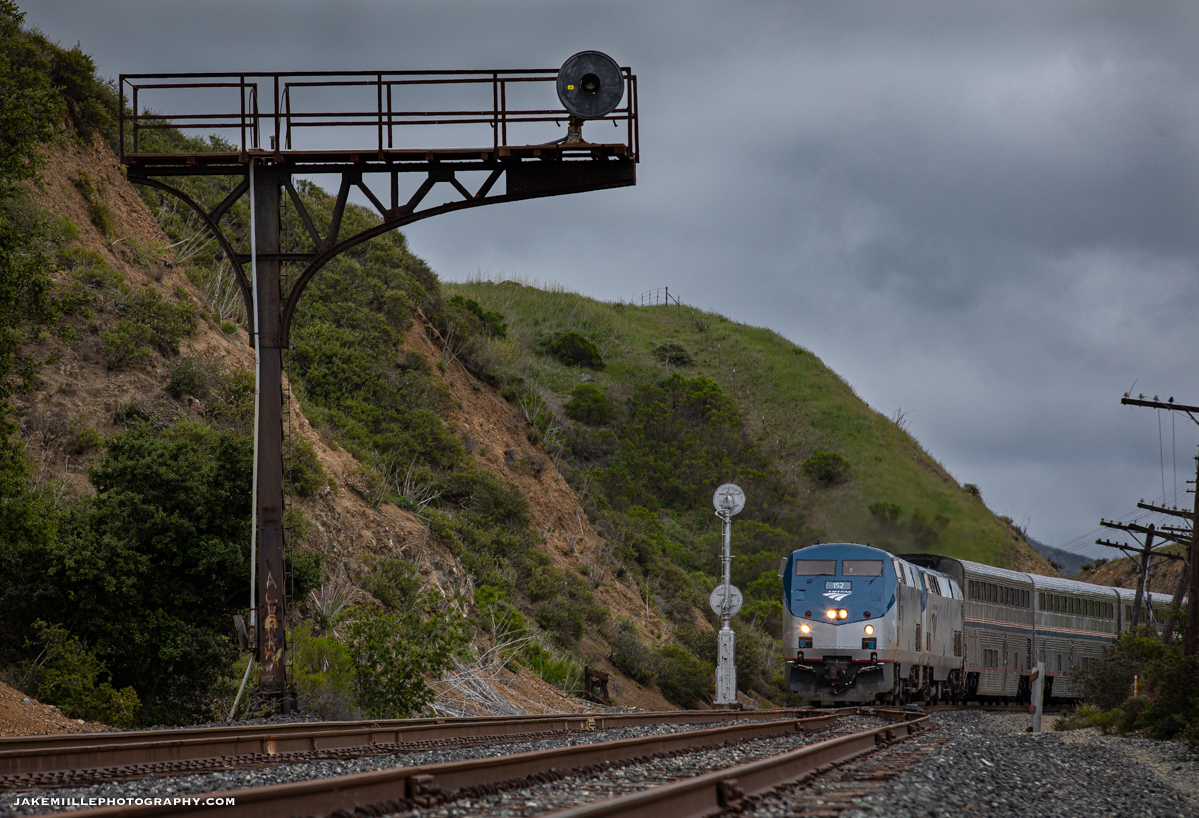
Cuesta Pass is home to some of the last remaining searchlight signals in California. These signals, installed in the 1940’s, were part of the second CTC (Centralized Traffic Control) project on the Southern Pacific network. SP installed CTC on Cuesta Pass due to an increase in rail traffic during World War II.
In April of this year, I drove to San Luis Obispo to photograph the searchlight cantilever located at North Serrano. Due to the Covid-19 pandemic, Amtrak’s southbound Coast Starlight was the only train in a 24 hour period. I was fortunate to capture an image but felt as if there was more. When I heard The Guad was detouring, I knew I had to make a trip.
On a cold and rainy April afternoon, Amtrak’s southbound Coast Starlight passes the searchlights at Serrano as it tackles the infamous Cuesta Pass.
Leaving my home in Northern California, I decided to take the scenic route via Highway 1 between Monterey and San Luis Obispo. I arrived in San Luis Obispo a day early so I would be in position to shoot The Guad the following morning. On Sunday, August 15th, 2021, I hiked up to the Serrano cantilever. The cool temperatures and scenic hike through the golden California hills made for a picture-perfect morning.
Highway 1 between Monterey and Big Sur.
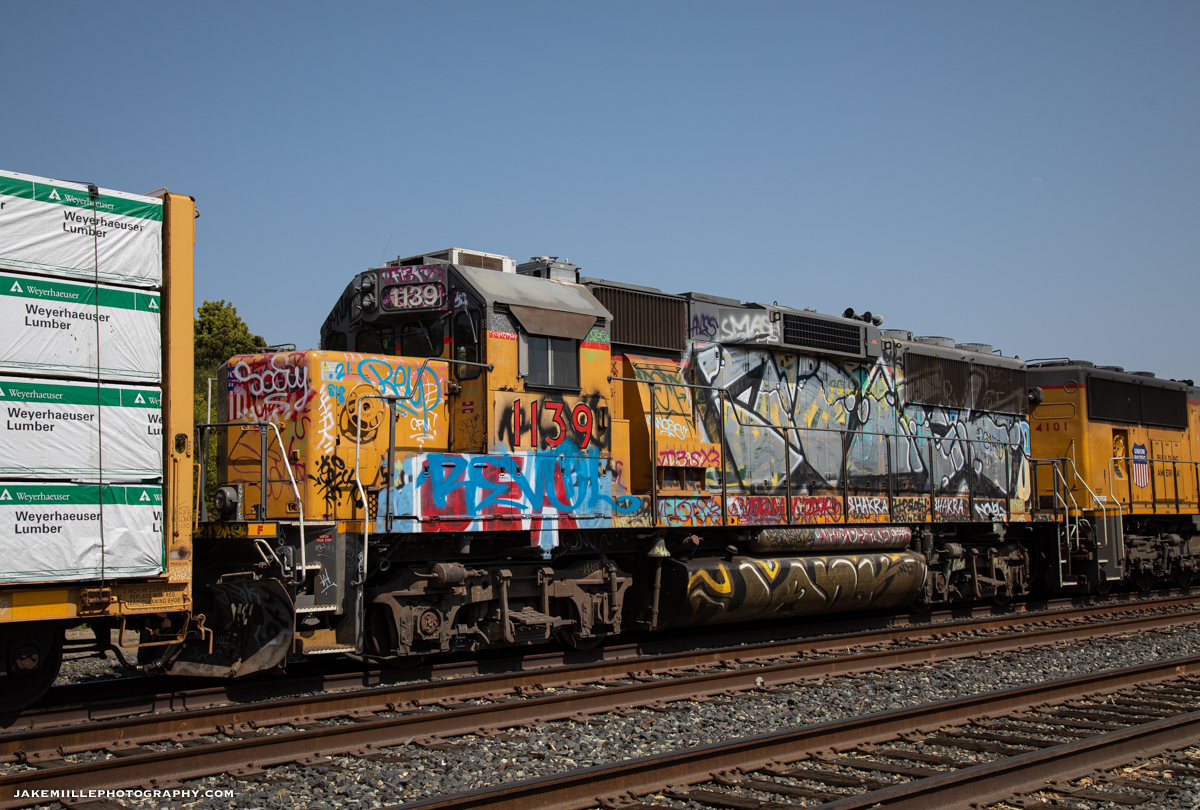
Within 15 minutes, the whine of two EMD locomotives echoed throughout Cuesta Pass. Soon after, the UP 1139 appeared, dragging nine cars passed the searchlight signals at North Serrano. The UP 1139 was recently assigned to the El Segundo Local in South Los Angeles, where it picked up a unique assortment of graffiti tags.
Union Pacific 1139 leads The Guad passed the North Serrano Searchlights. UP 1139 sporting a South Los Angeles paint job.
As The Guad headed north for McKay, I repositioned to above Tunnel 11 near Chorro. Within a couple hours, the sound of dynamic brakes broke the peaceful silence. The Guad reappeared, hauling an impressive 28 cars down the steep Cuesta Grade towards San Luis Obispo.
Union Pacific 4101 prepares to enter Tunnel 11 as it guides a 28-car train down the Cuesta Grade.
Once the train arrived in San Luis Obispo, it tied down for the night. The following morning, a fresh crew came aboard and took the train to its final destination of Guadalupe.
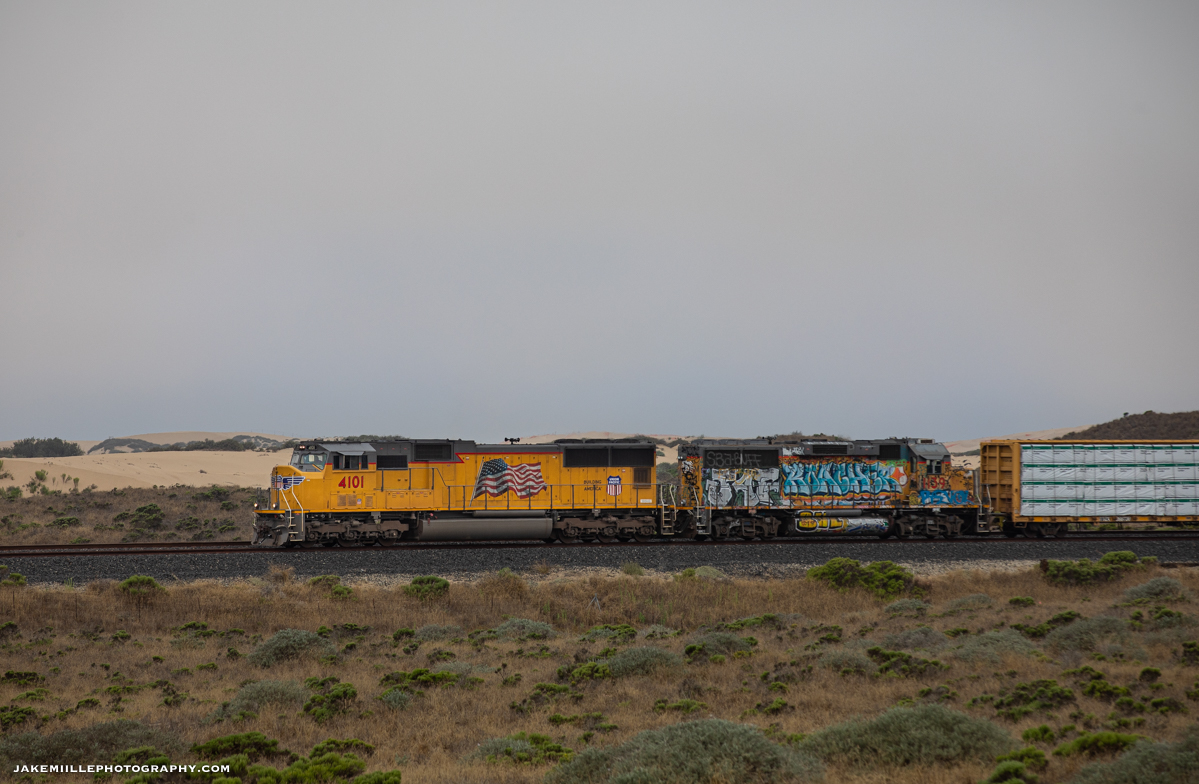
Union Pacific 4101 passes the Oceano Dunes as it heads south along the Santa Barbara Subdivision.
After a lengthy detour, The Guad arrives in its namesake destination.
Photographing freight trains on Cuesta Pass can be a difficult assignment. The rarity of freight traffic combined with historic searchlight signals and beautiful scenery can make for unique images. I am looking forward to the next opportunity to photograph trains along this unique stretch of railroad.
Thank you for reading my blog! If you have a question, please leave me a comment below.
It’s summertime! I just finished up another awesome semester at Chico State. Now that classes are over, I can focus more on creating, editing and sharing my images. Instead of staying up late to work on managerial accounting homework, I can stay up late posting photos. What an awesome time this is!
I recently posted a number of new photos to the website. You can find all of them in my portfolio on jakemiillephotography.com. I thought I would take a minute to share with you some of my favorite images from the most recent upload. Take a look and tell me what you think!
The Spectacular Feather River Canyon
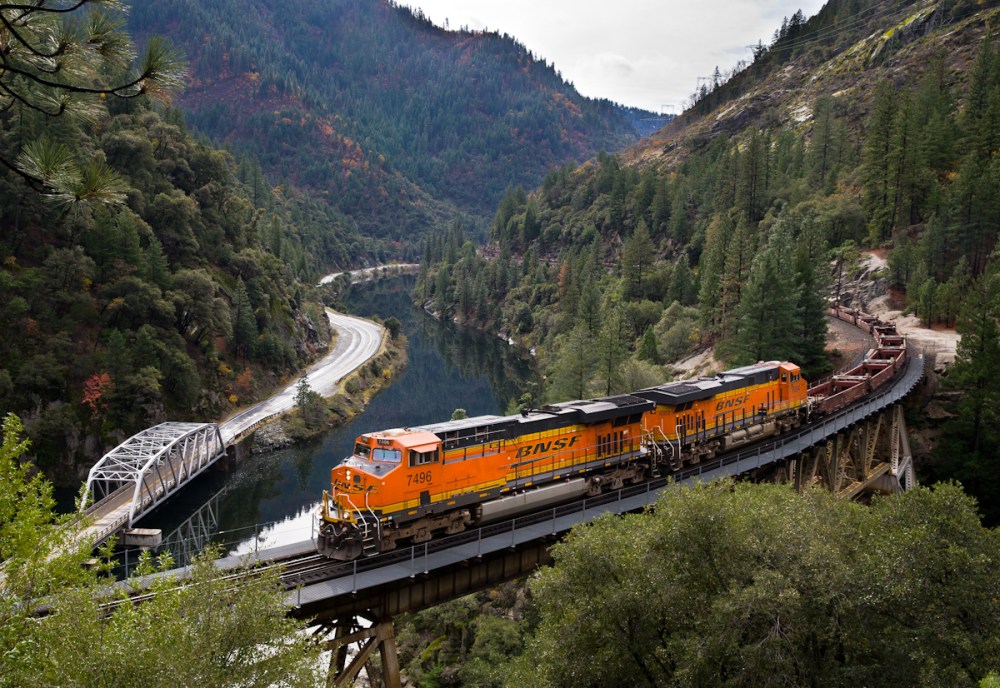
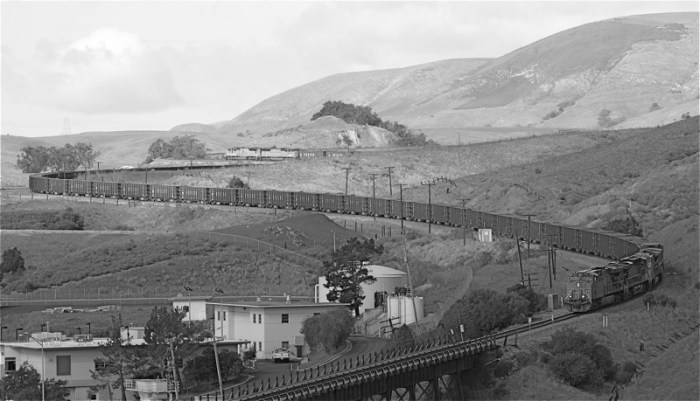
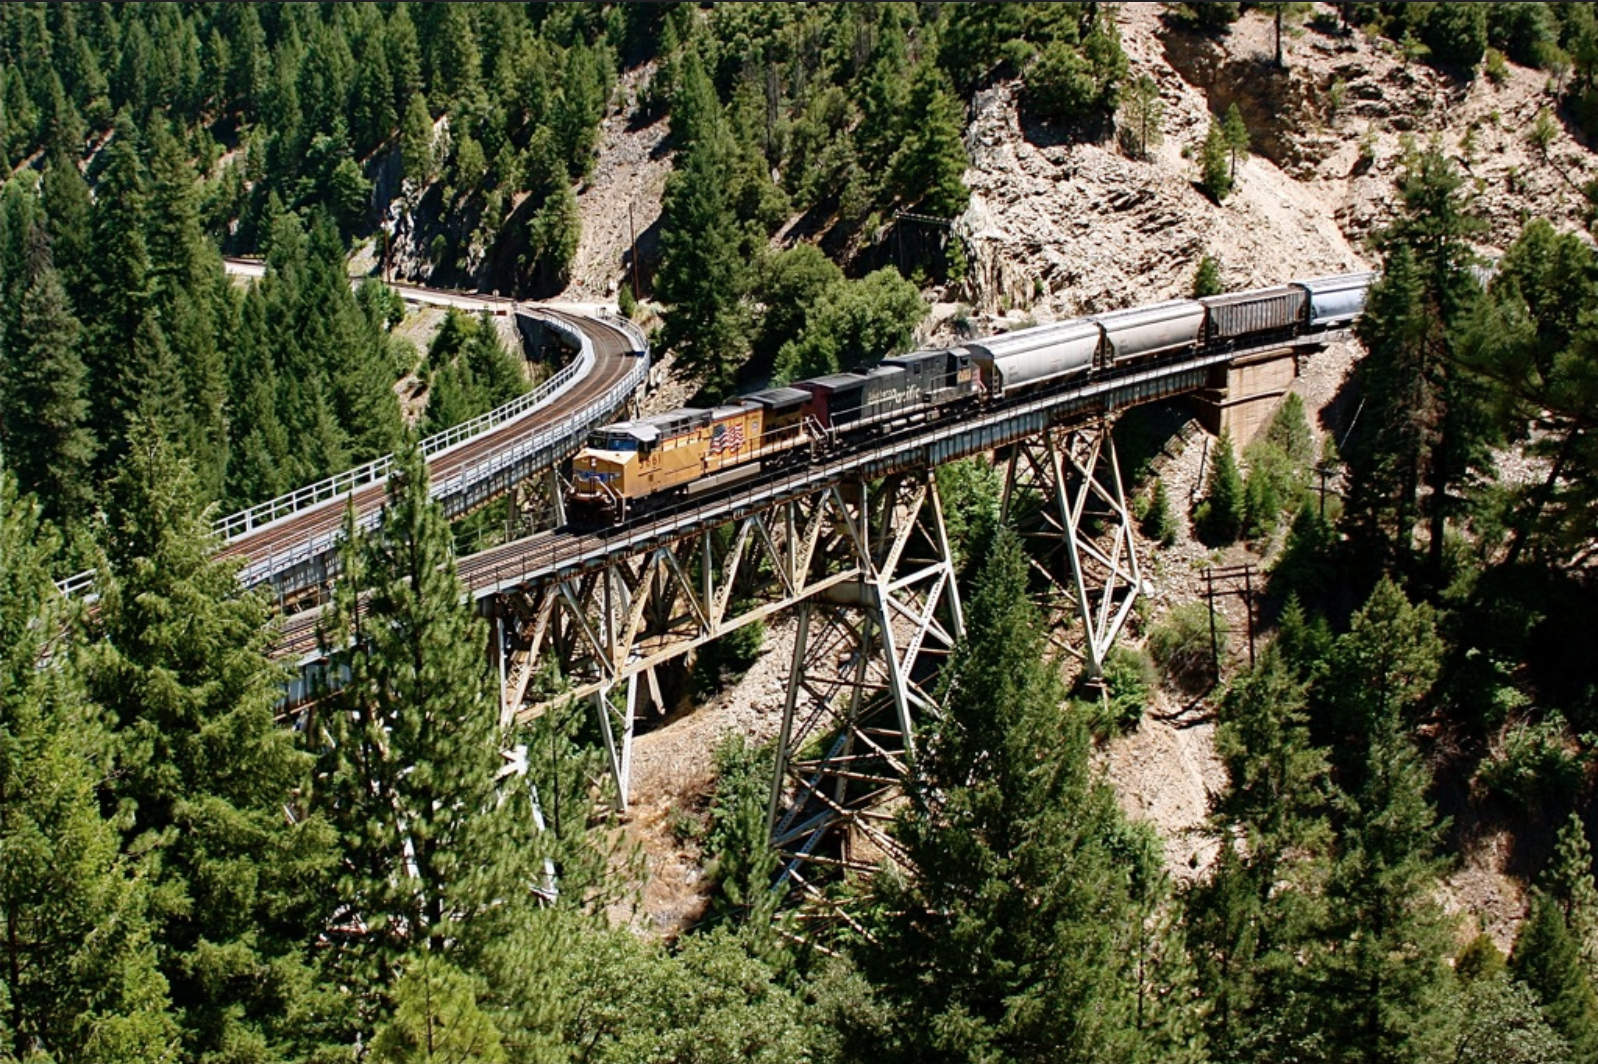
An eastbound BNSF baretable train crosses the Rock Creek Trestle in the Feather River Canyon.
This image is special to me for a couple of reasons. First off, it shows just how spectacular the Feather River Canyon is. I am so lucky to live 45 minutes away from this epic place. There is nowhere like it. I am also lucky that I can share these places with good friends. On this day, I had a good friend come along with me and experience what “the canyon” is like. I couldn’t have asked for a better day.
Searchlight Signals: A Fading Piece of History
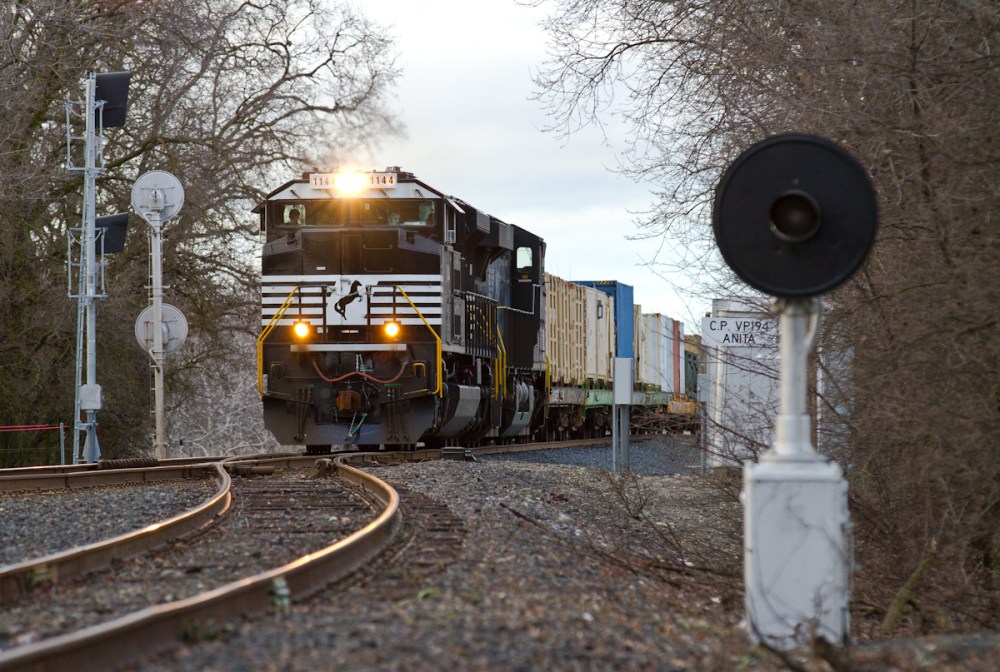
A pair of Norfolk Southern units lead a Union Pacific military train passed the north switch of the Anita Siding (north of Chico). A rare dwarf searchlight has since been removed.
Recently, I have been focused on capturing searchlight signals. Back in my childhood (which wasn’t too long ago), these signals were everywhere. Due to Positive Train Control (PTC) legislation, these signals are being replaced system wide. It is only a matter of time before there are no more searchlights left. I was able to capture this image at the north end of the Anita siding (north of Chico, California) a week before the searchlights were removed. Included in this photo is a rare “dwarf” searchlight.
Western Pacific Lives!
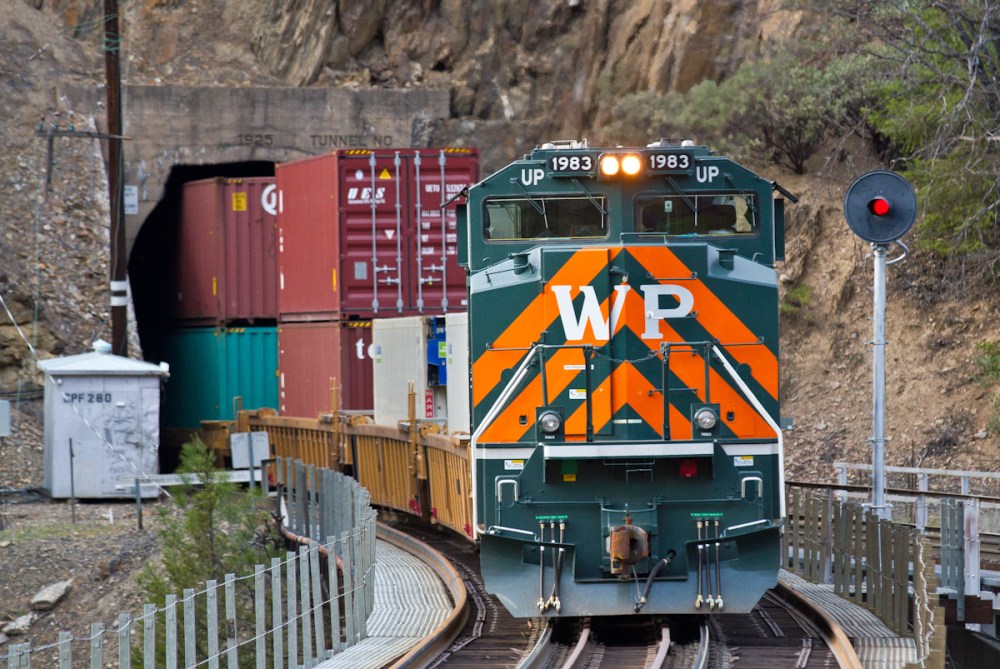
Union Pacific 1983 rolls passed the Keddie Wye as it serves as a DPU on a westbound stack train.
For those of you who are involved with railroads, you know what makes this photo special. Let me explain it for the people who don’t know. The Western Pacific Railroad (“WP”) originally owned and operated the Feather River Route, until it was purchased by the Union Pacific Railroad in 1983. In 2005, Union Pacific painted a commemorative locomotive to honor the Western Pacific Railroad. This unit is known as UP 1983 and is seen above crossing the Keddie Wye, a well known junction originally operated by Western Pacific. There is nothing quite like seeing “WP” on old WP trackage. To learn more about the Western Pacific Railroad, visit http://www.wplives.org.
I hope you enjoy my new photos. Let me know what you think! Am I missing any awesome locations?
So I was just recently going through some of my older photos on Flickr, and believe me, MY EYES HURT! It really shocked me I even took these photos, and then somehow thought they were good enough to post. What was I thinking?!?
Well we do all start somewhere. Most people cannot pick up a camera for the first time and start capturing compelling content. Becoming a photographer takes work.
So let me show you what I am talking about. Here are some of the images that were still posted on my Flickr as of October 2014. Warning: These could cause pain to the eyes and possible blindness.
Just look at the beautiful colors, composition and photographic ingenuity!
Please take some time to wash out your eyes.
Now, back to business. You might ask “Jake, why did you post these in the first place?” Well that’s a great question and one that will help you understand what I am trying to get at. See, back then I had a much different mindset. The only thing I was focused on was documenting “cool” railroad equipment. I didn’t care how the image looked, what the light was like or how I could edit the photo, all I wanted was the image. This gave me something to look back on and go “wow that was cool!”
Notice a theme with these images? All of them have “unique” or “rare” equipment. The first two have heritage units, which are a huge deal in the foamer community. The next photos depicts a freight train on Cuesta Pass and the final two show vintage equipment. All of these things made me post the photo even though the photo itself was terrible. I thought this equipment was more important than the photo.
The Transition to Railroad Photography
Now you might be saying “well the equipment IS cooler than the photo” and if you are saying that, cool! You obviously have a strong passion for trains and you should keep that. This next bit of advice is for folks looking to make the transition from “equipment documenter” to “railroad photographer”.
Like I said before, we all start somewhere. I guarantee when you first start out, the reception will not be warm. You might here “This photo will never be on RailPictures” or “This, this, and this are wrong with the photo”. It happened to me and many others out there.
And this brings me to my first point: Don’t be defensive.
It is easy to say “this guy doesn’t know what he’s talking about” or “screw him, he’s just a terrible person”, but by doing that, you potentially cut yourself off from quality advice. I’ll tell you a story from when I was just starting out. I remember Steven Welch telling me “you need to learn the railroad” and “your photos are horrible”. For awhile I was defensive and arrogant. I thought, no way are my photos that bad and I certainly know the railroad. Luckily, I eventually came around to listening to him. He ended up teaching me the basics on composition, lighting and the railroad. By listening to him (and others of course) I was able to vastly improve my photography. So don’t get mad, start listening!
Next you need to: Want to learn.
Photography is like anything else. If you want to succeed, you have to want to learn. This will require time, energy and resources ($$), but can be worth it in the long run if you truly want to improve your photography.
What To Do Right Now
1. Go watch videos about photography. Go to youtube and watch a ton of free videos or buy a program done by a professional (I recommend CreativeLive).
2. Find photographers you like and view their work on a regular basis. Constantly view photos you like and that style can slowly come to your work.
3. View photos that are not of trains. To be great at railroad photography, it helps to know the basics of other kinds of photography (landscape, environmental portraits, photojournalistic approach).
4. Then ask yourself “what elements of this photo do I like or dislike”. Do your own critique. Figure out what you like, then go find a way to capture it. To this this day, I still view at least 100 photos a day.
Now there is a lot more that goes in to becoming a good photographer and I’m sure I’ll touch on those in future tech tips. But the last point I wanted to make was about keeping a quality portfolio.
Like I showed you above, there are a lot of images on my Flickr that should be in the trash. This is a good reminder that you need to occasionally go back through your portfolio and delete the “trash”. Deleting photos can sometimes improve your portfolio as much as adding photos. So if you’ve been shooting for awhile, go back through and take a look. Don’t end up like me!
What do you think? Do you edit your portfolio often? If you find some laughable throwbacks share them with me. I’d love to see them!
Comments, questions, concerns? Leave a comment or hit “Contact Jake“! I love to hear from you guys.
One of the hardest things to understand as a young photographer is the concept of “good light”. Other photographers will often throw phrases at you like “High Sun!” or “Backlit!”. You’re going to want to learn light as quickly as possible as it will make a dramatic change in the quality of photographs you are able to capture. Luckily, there is an app for that!
SunCalcis app that can help you accurately measure the sun’s angle right on the internet. Once you get comfortable with how to use it, you will know exactly how and when you can take incredible photographs, with awesome light. Check out these examples where SunCalc helped me capture that perfect light.
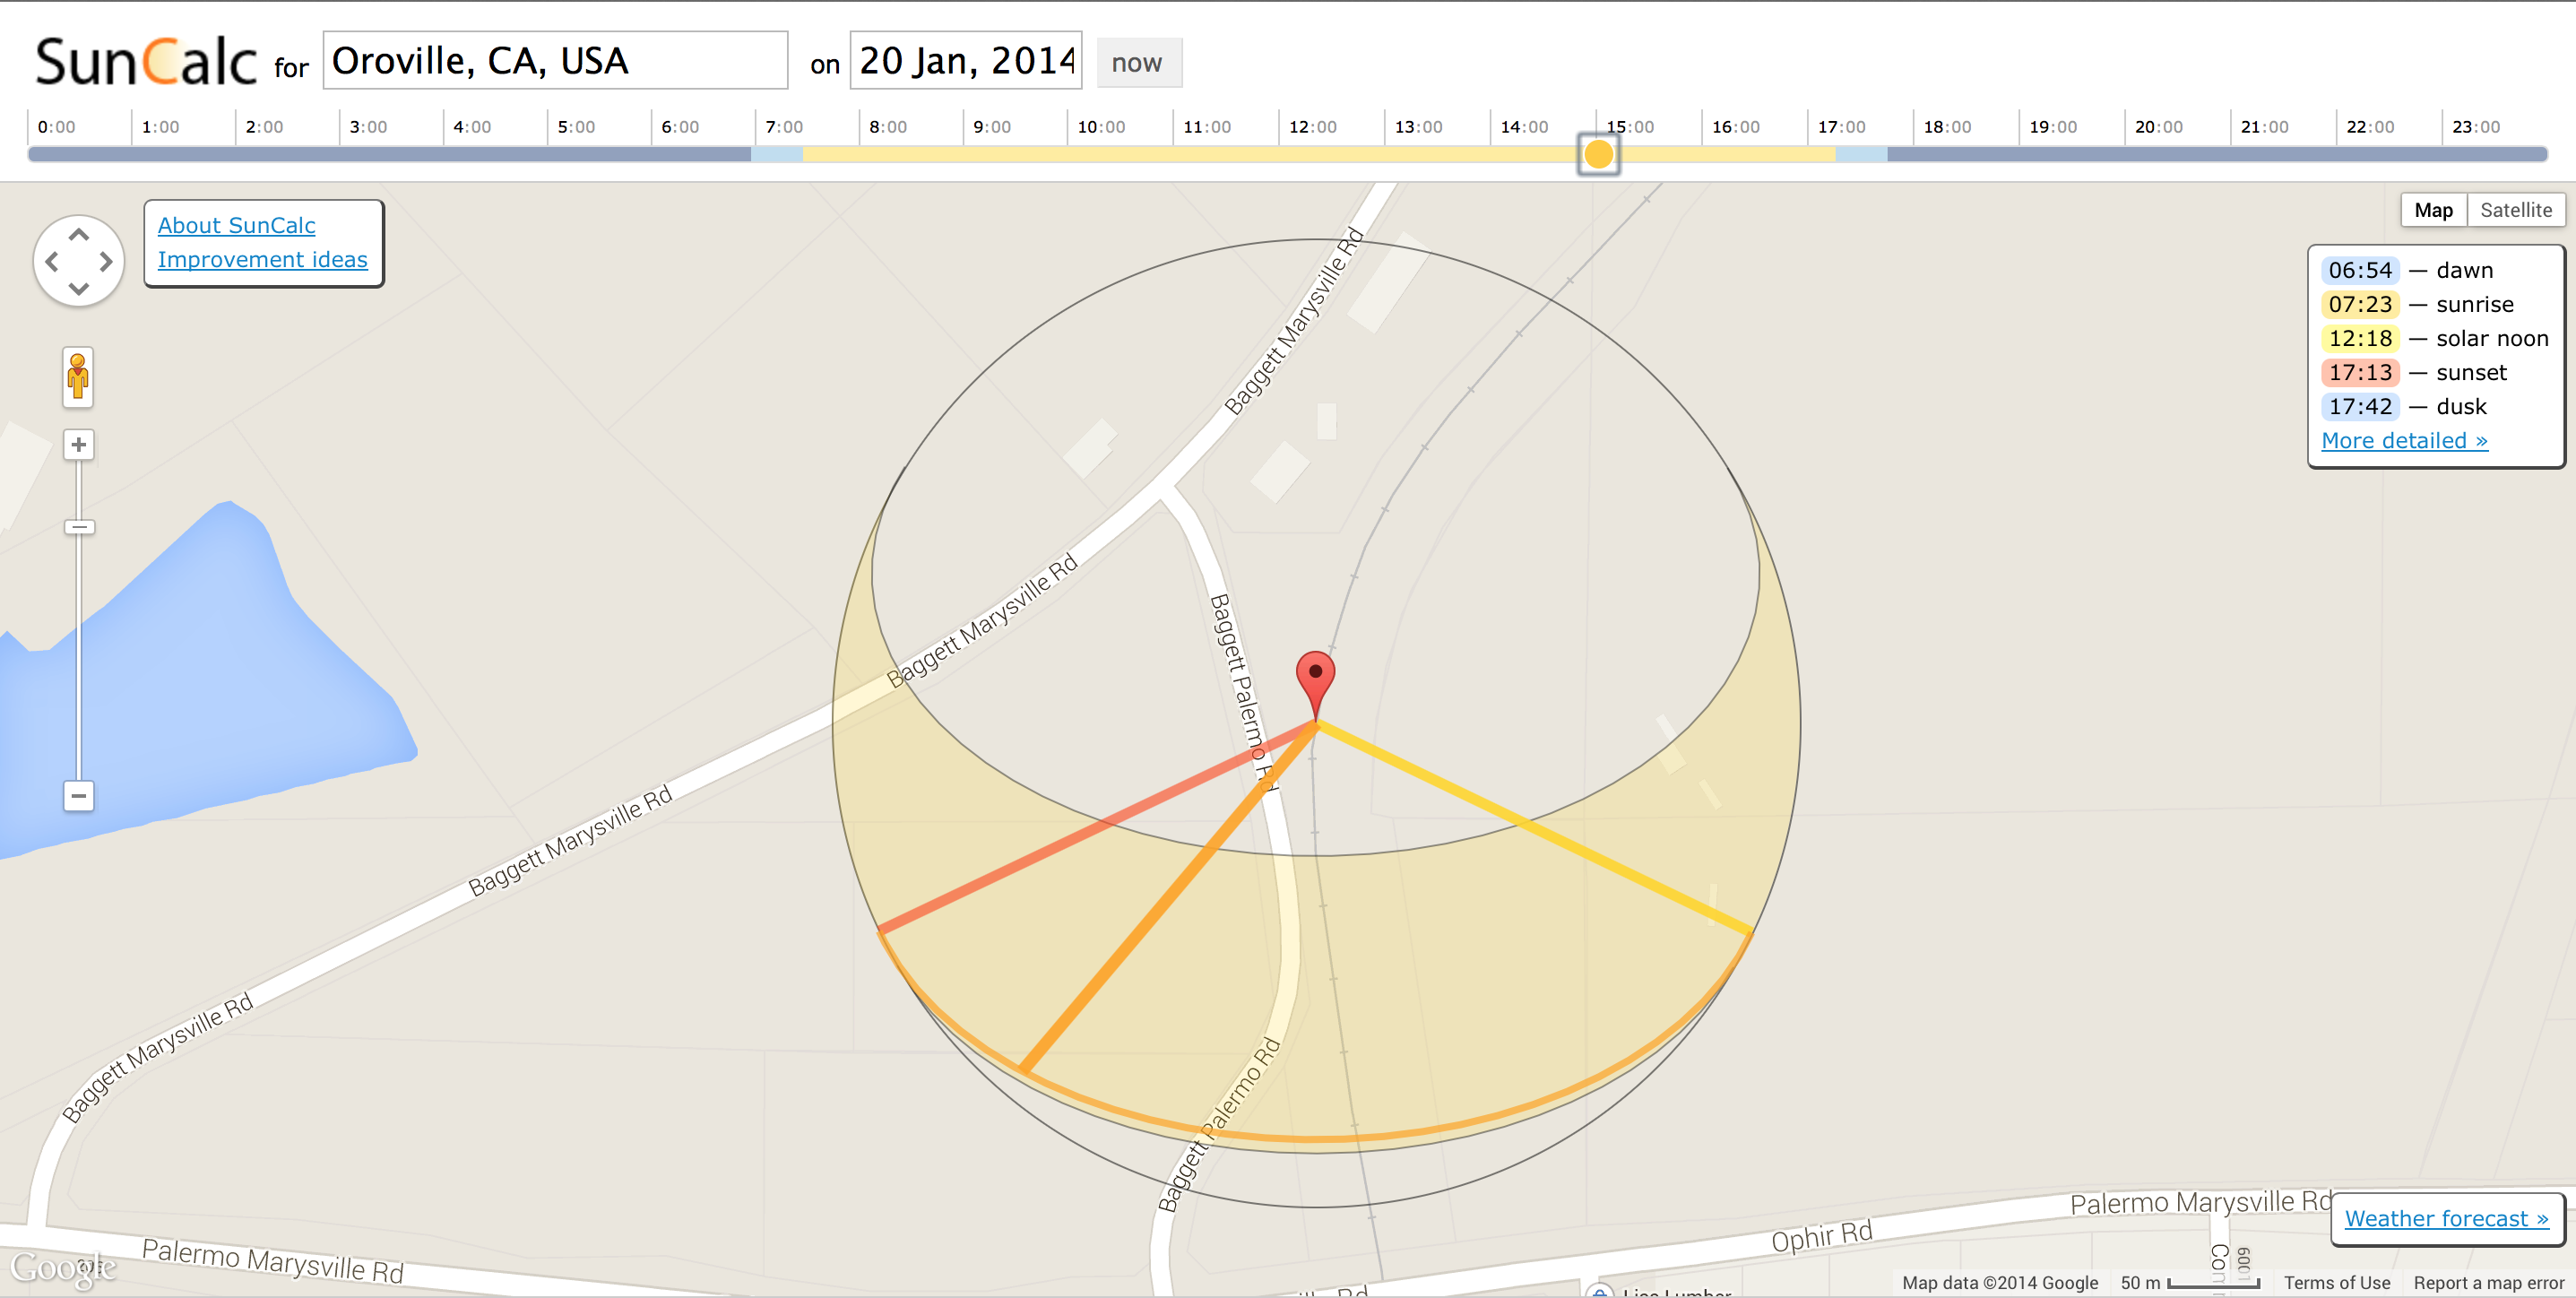
So I wanted to capture a train coming around this cool curve at Oroville. I wanted light on both the front and side of the locomotive, so I knew I needed a good light angle. I went on to SunCalc.com to see when the light angle would be the best. I selected the date I was shooting, which happened to be January 20th, 2014. Then, using the sun slider at the top of the page, I moved the sun angle. After playing with the slider for a few minutes, I found the perfect angle. I marked down the “perfect” time along with the bookends of “good” time. You’ll learn quickly that a train won’t always show up right at the “perfect” time.
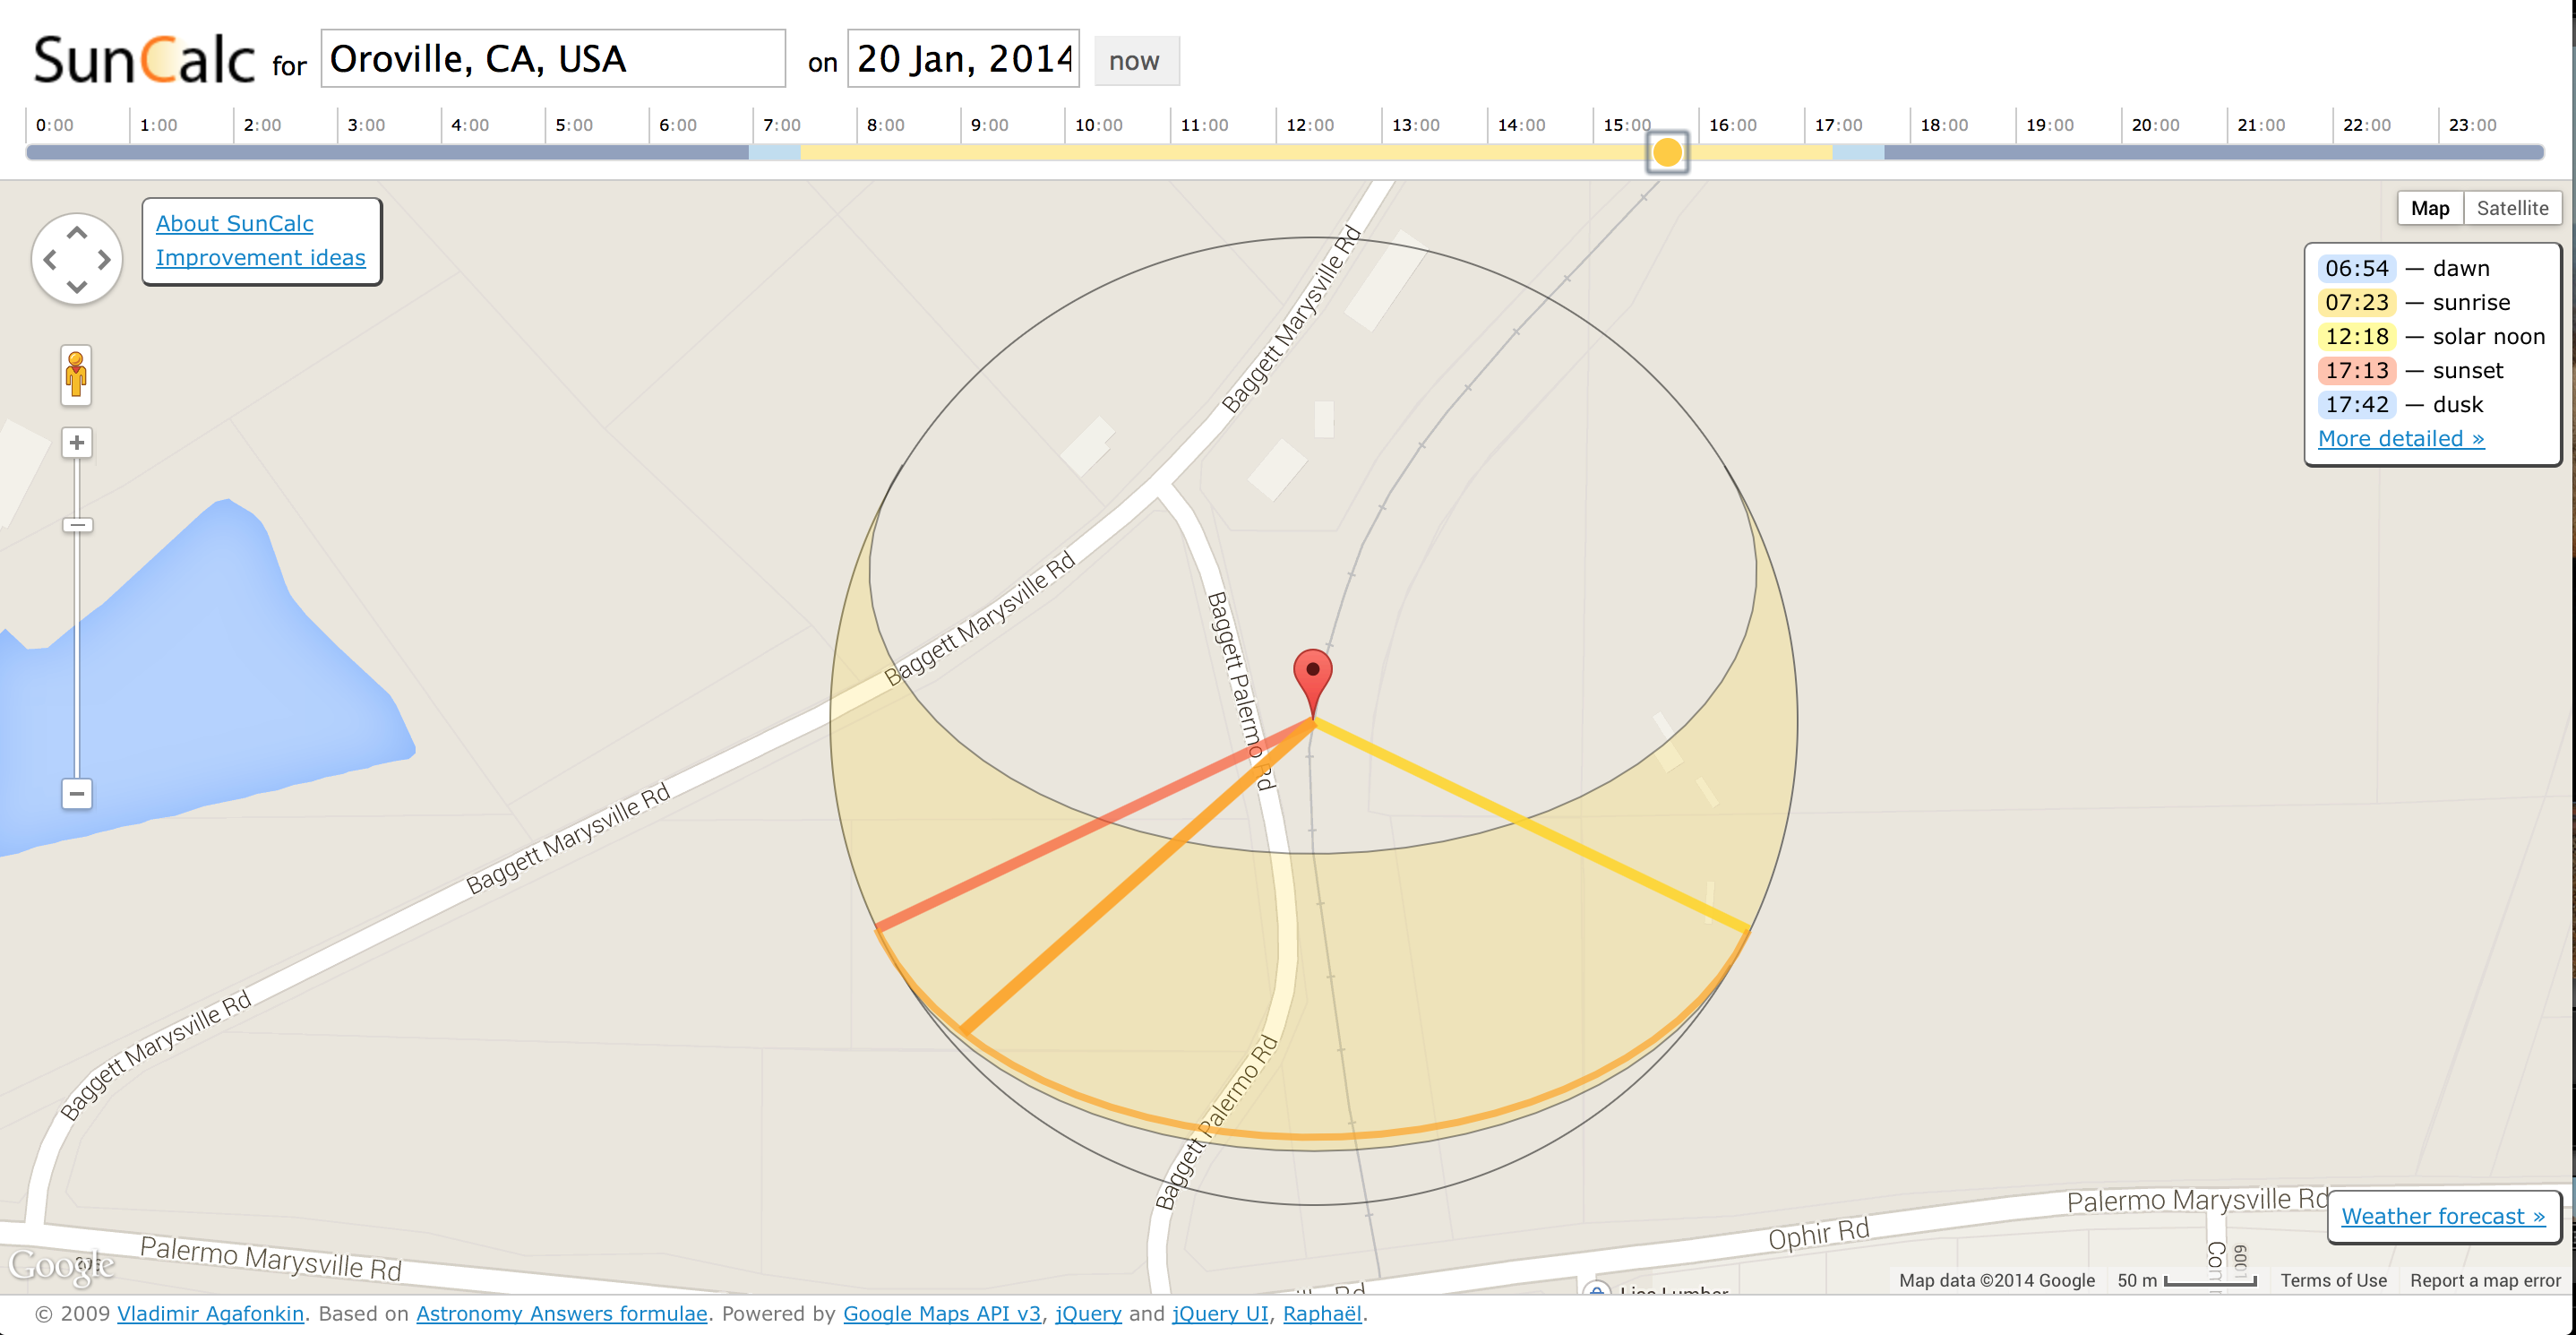
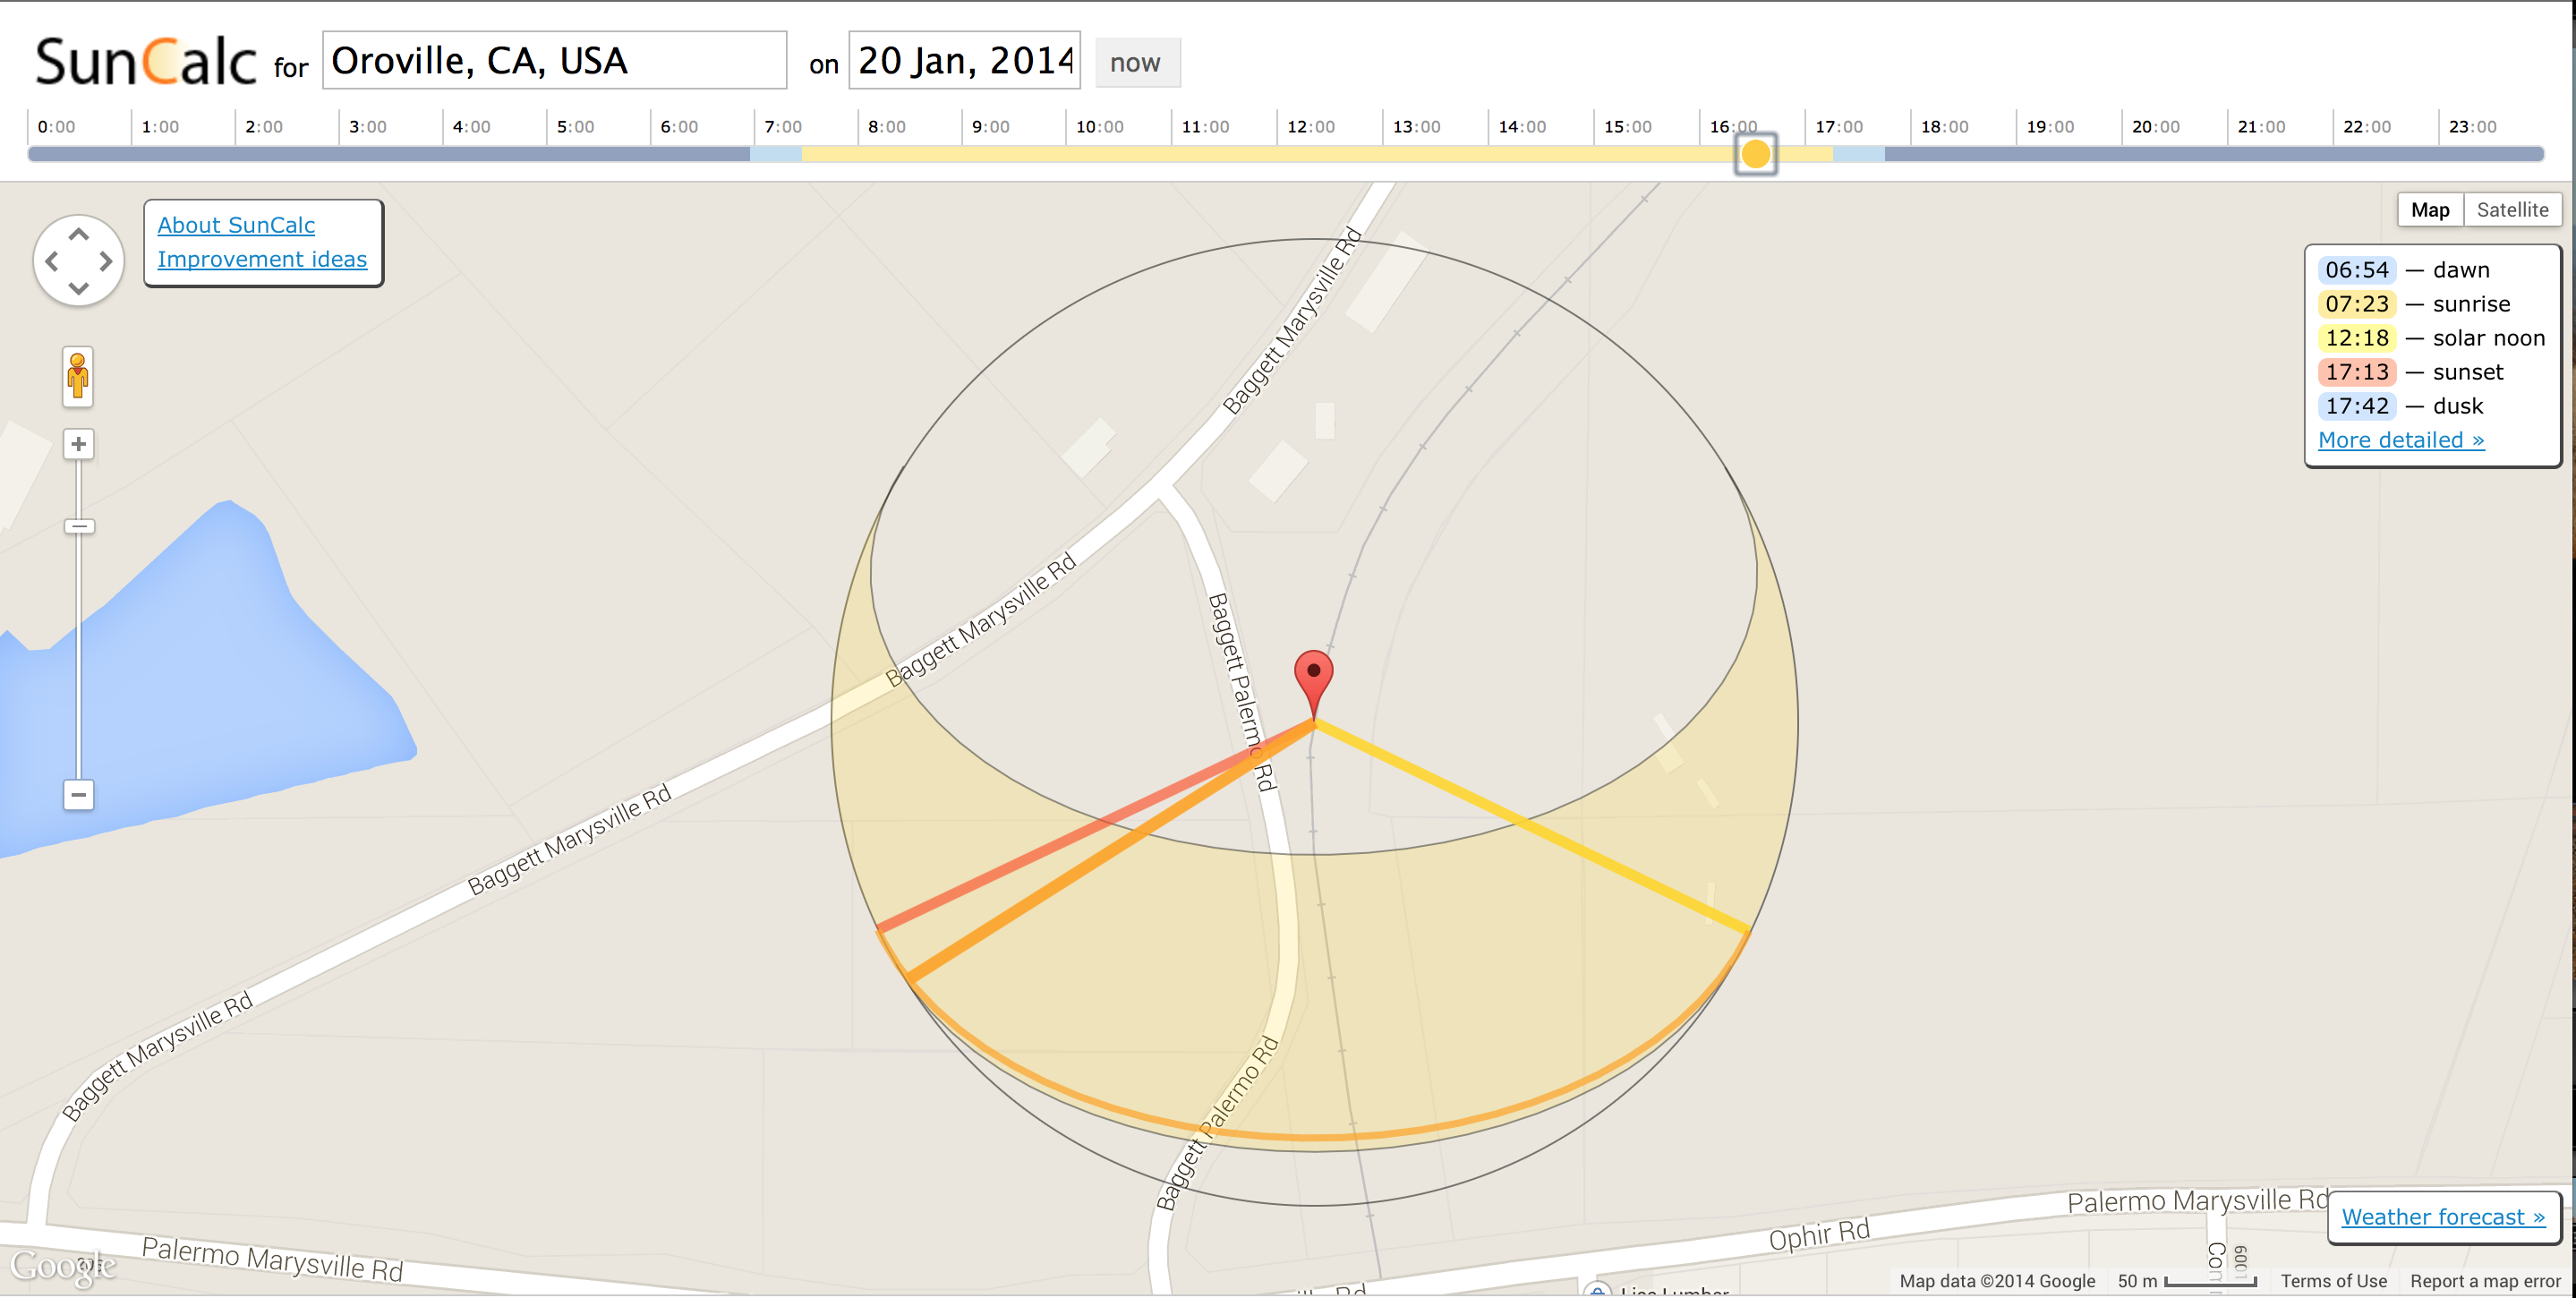
My “perfect” time ended up being right about 15:45 (3:45pm) but I knew I would get a pretty nice shot anywhere between 15:00 (3pm) and 16:30 (4:40pm).
Early bookend (15:00)
Perfect Timing (15:45)
Late bookend (16:30)
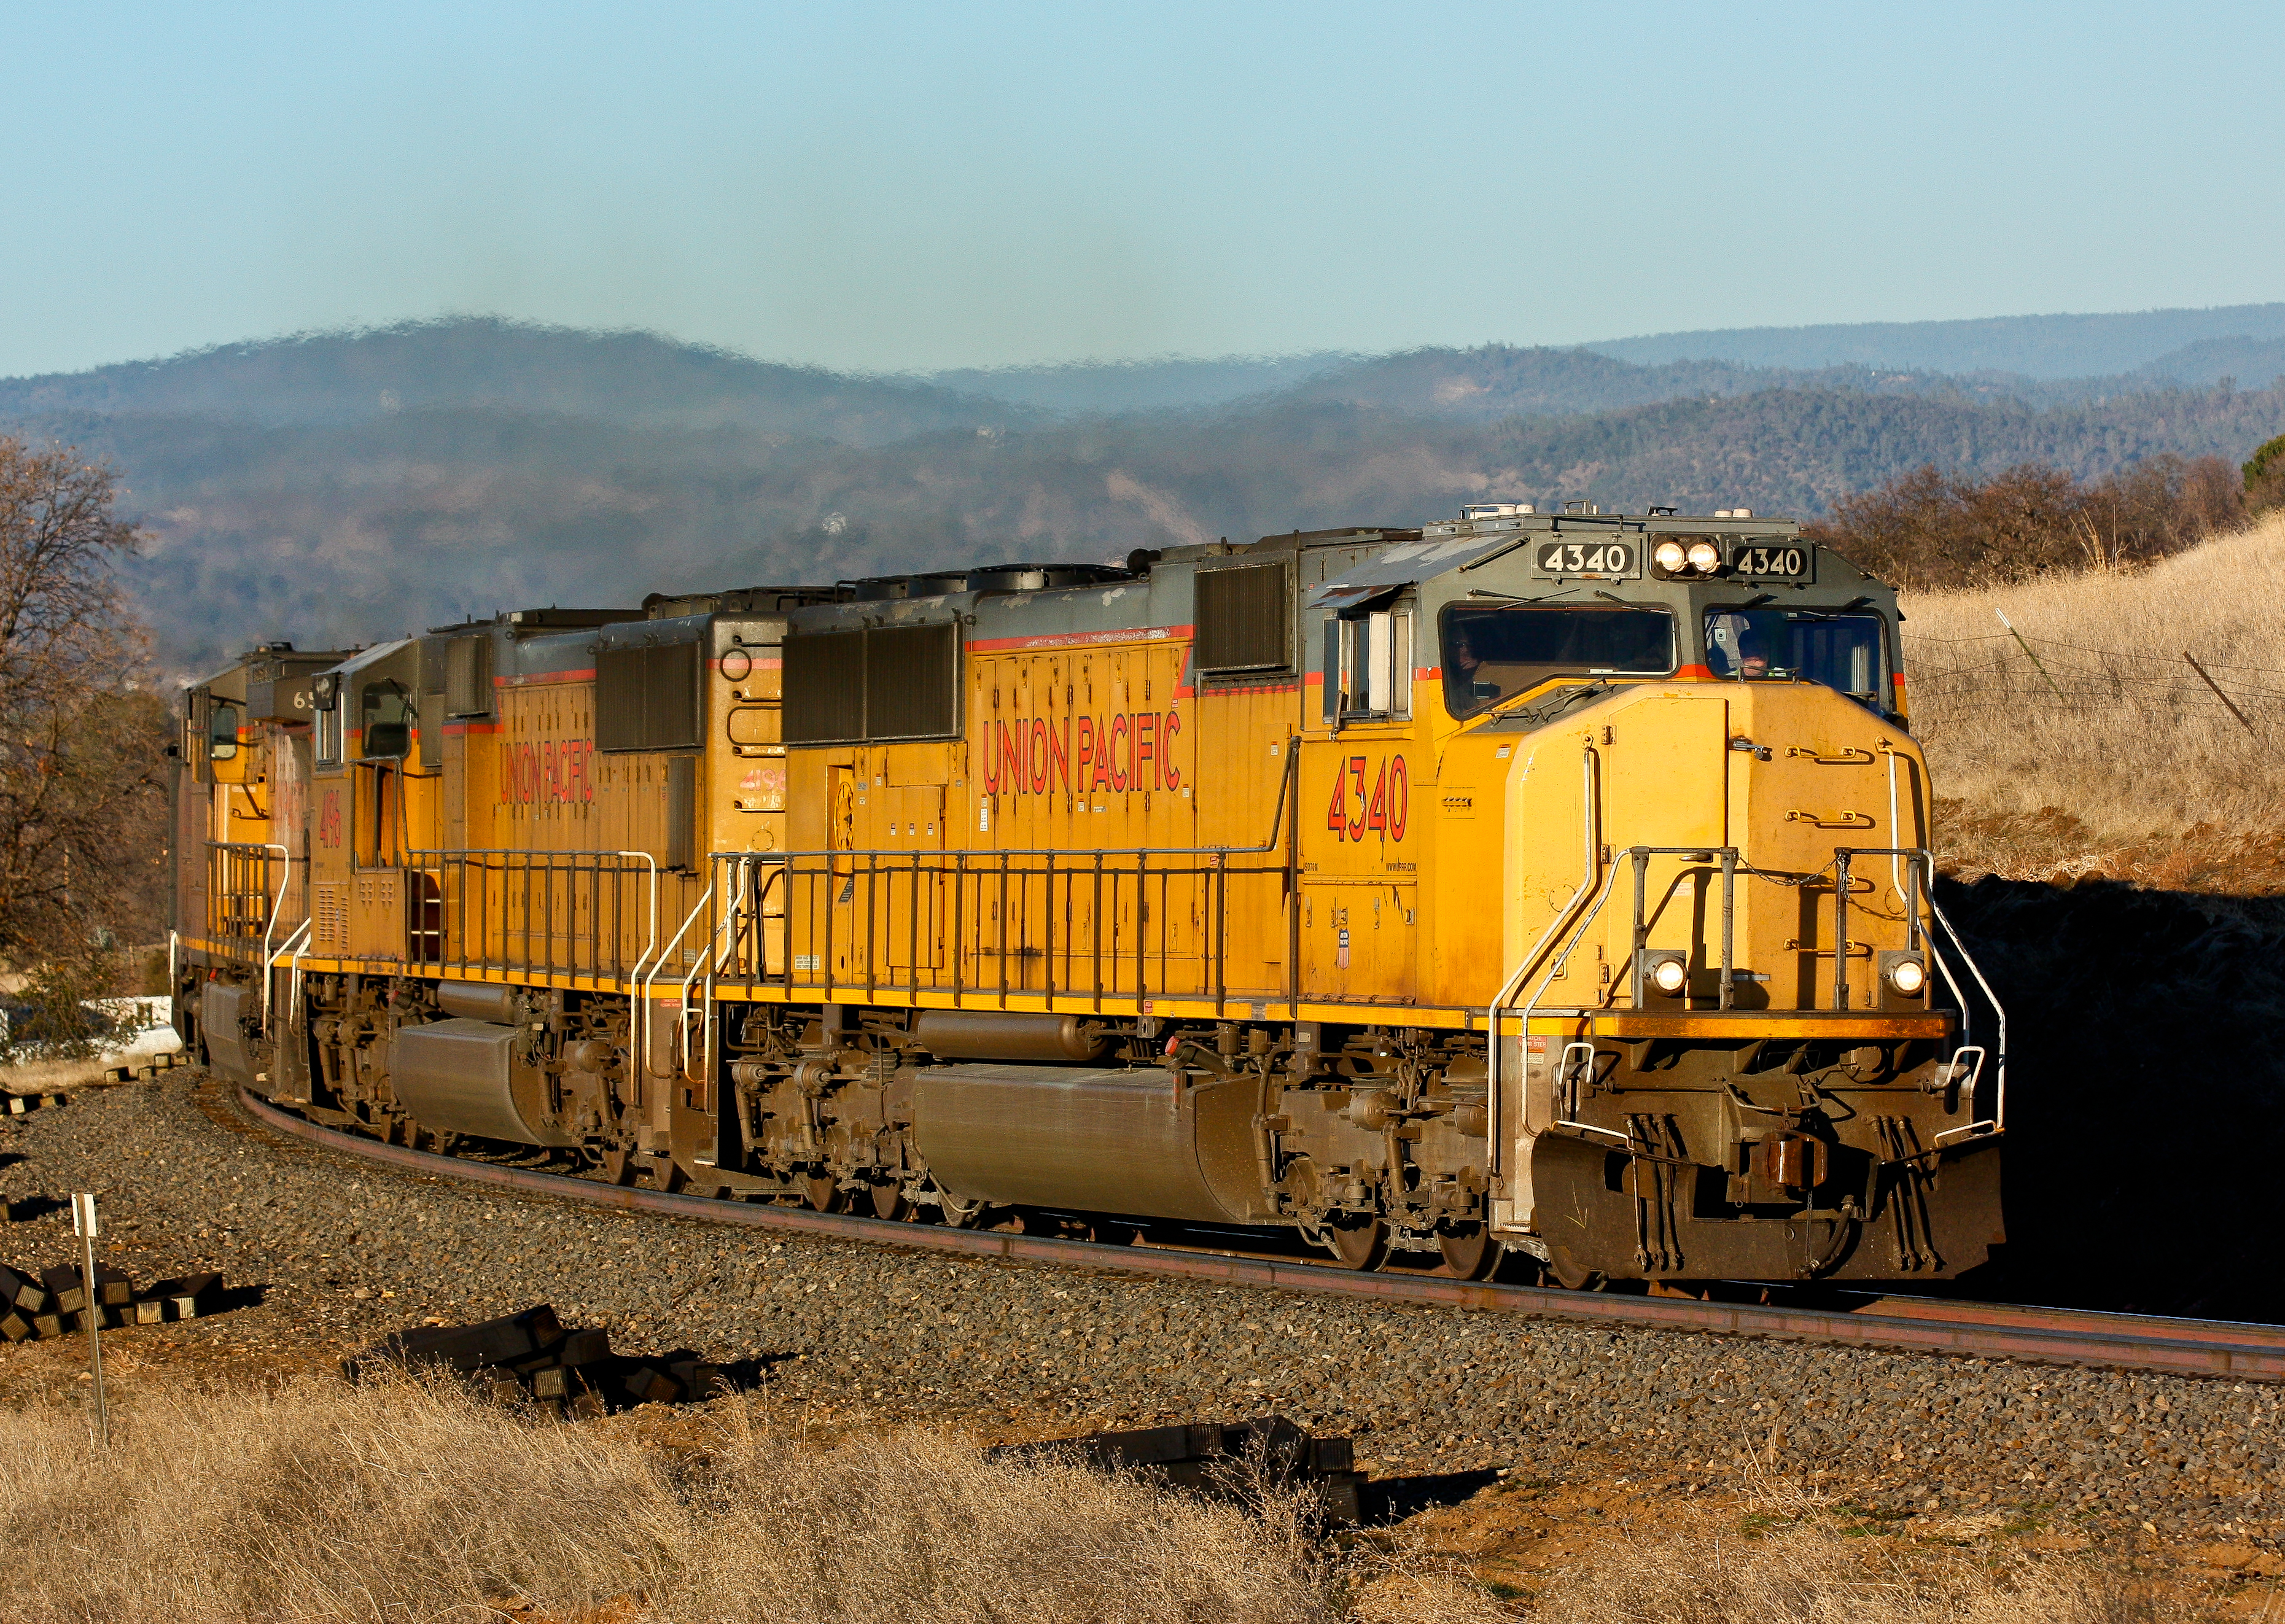
So I packed up my gear and headed trackside for the afternoon. I ended up getting very lucky as a MOW (Maintainance of Way) work window was just clearing up, meaning a backlog of trains were headed my direction. The first train came at 16:11 (4:11pm), right in my window of “good light”. I think the light this shot turned out very nice. What do you think? (Let me know in the comments below.)
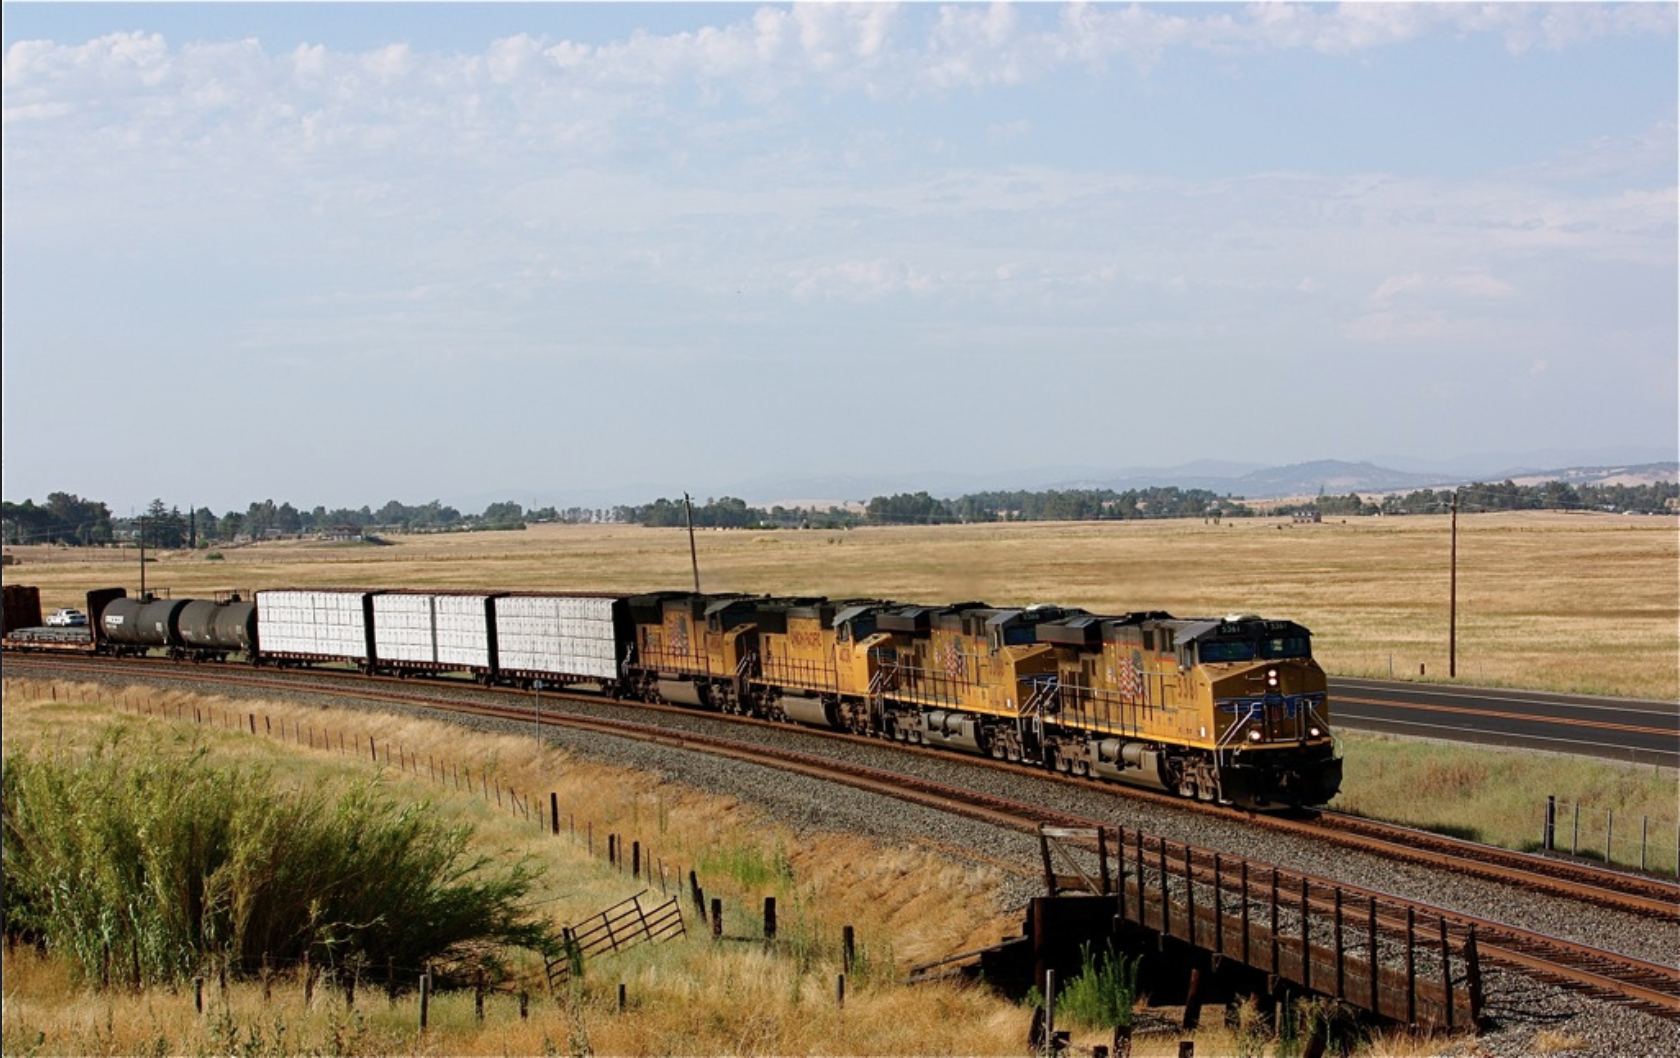
An ethanol train from the midwest rumbles through Oroville, California with the Sierra Nevada Mountains providing the backdrop.
We’ve All Shot In Bad Light
I’ve certainly done it. A number of times in fact. Now my reasoning varies from “I’ve never been to this location before so I’ll shoot everything I see” to “This train is just too cool not to photograph”. And at the end of the day, shooting in bad light is fine, if you want to “document” whatever it may be. . But when you want to take your photography to that next level, you’ll need to be shooting in good light.
Here are some shots I’ve taken in bad light. Notice how in the first shot, the nose (front) of the locomotive is completely in shadow. That is not very attractive considering the photograph really does feature the nose. Now check out the second shot. The side of the locomotive is dark because of shadows. Again, not very attractive to the eye!
To avoid taking shots like these, use the SunCalc like I did in that first shot. Once you become more comfortable out in the field, you will learn how to quickly “read” light, and SunCalc won’t be needed as often. But until then, use SunCalc and capture that train in perfect light!
What About High Sun?
Now you might be wondering, how can SunCalc help me with “High Sun”. Well first you’ll have to understand what exactly “High Sun” is. If someone says, “that shot has high sun”, they are saying the sun was at an extreme angle, causing bad shadows across your train along with overall unattractive light. High sun is usually only a problem during the summer months when the sun passes overhead around 1pm. This graphic might help you understand sun angle.
Here is an example of a shot taken during a high sun time vs a shot taken during late afternoon light. Look at the difference light makes!
High Sun
Late Afternoon Light
“Well how can SunCalc help me with high sun?” I have a general rule which seems to work well when trying to figure out if I’ll be shooting in high sun or not. If the angle line (in SunCalc) is less than half of what the sunrise/sunset line is, then you will be shooting in high sun. Let me show you what I mean using the following example.
Notice how the orange line is about half the length of the yellow line? That means high sun will be starting right about 11:00am this time of year. Generally, anything shot before 11:00am will not be affected by high sun, while anything shot after 11:00am will probably be affected by high sun. Now of course, there is a big difference between shooting at 11:01 and at 1pm (when the sun is at its highest angle this time of year), but it gives you a general time frame to work with. If I were to go shoot around Chico on August 9th, 2014, I would want to spend my time shooting trains between sunrise and 11:00 and then from 3pm to sunset. This would allow me to rest during the period of bad light and focus all my energy when there is good light.
Can you see the unattractive light in the following shot? Notice how the sun angle has created very unattractive shadows on the side of this train. Also notice how the rail is completely covered in shadow. These two clues, along with the overall look of the picture tell me this was taken during high sun. Could you imagine how nice it would have looked in good light?
Do Not Be in Denial
It is hard to accept as a young photographer that you have to wake up early and stay up late for good light. In an ideal world, the best light would come during the middle of the day, allowing us to sleep in and then get home for dinner. But getting yourself out during the best light of the day is crucial if you’re wanting to take your photography to the next level. Capturing an awesome scene is only “good”, capture an awesome scene in amazing light is “great”.
So get yourself out there! Get up early, rest during high sun, and then capture more amazing content as the day draws to a close. If you capture something “great”, I would love to see!
How about you? What are tricks for calculating “great light”? Which photo of yours do you think has the best light? Let me know in the comment below.